
What and why? (TL;DR)
There are four reasons that differentiate this post from others that seem to be similar.
- The idea behind it.
- Learning strategies.
- Visual examples associated with functionality explanation and keyboard shortcuts for macOS, Windows and Linux.
- It’s quite comprehensive, so it may be the only guide you need to read.
Throughout this article, I will present ways to improve work in the Android Studio IDE (AS). You will see in action a lot of hidden features and associated keyboard shortcuts, with their advantages. I will show you how, and encourage you to use Android Studio almost exclusively with your keyboard to become faster and more productive during everyday work. Finally, I will give you handy learning techniques to better assimilate this content. Almost any Android Developer should find something useful here, but this post is addressed to people with at least little familiarity with Android Studio or IntelliJ. If you are already fluent with AS, I would suggest to at least go through all the things I listed, and write down those you might don’t know or don’t remember well. I’m sure you will find at least one useful thing.
Use as much keyboard as possible
We’re learning shortcuts, to automate repetitive tasks, which means doing and delivering things faster. As it is the trait of experts, I think this is an important thing that will boost your fluency.
It would be best if you will use the keyboard only. As I heard, IntelliJ (which Android Studio is based on) has been designed so that it can be operated without the mouse. I will show you how to take advantage of that later. Of course, Android Studio means working with UI, emulator, etc. where you need to sometimes use a mouse, but almost every other operation you can achieve easily with keyboard only. Especially writing code and navigating through the IDE.
When accomplished, you will gain :
- more pleasant and fluent work with greater fun
- speed and efficiency — apart from learning keyboard shortcuts, it will be faster to not switch from keyboard to mouse/touchpad back and forth.
- more workspace when we write the code, which means more focused work. It’s simply because when you need to open, close, and resize all tabs with a mouse, you’re doing it rarely and thus work in a cluttered environment.
Learn features first
You should learn possibilities, and then shortcuts if needed. Especially if you have hard times with remembering them all. For example with FIND ACTION (macOS: cmd + shift + A Windows/Linux: control + shift + A) you just need to write what you want to achieve.
Let’s say you want to be able to pick a font which will use specific characters ≠ → for constructs like != ->. Simply type there ligature and you will be directed to a specific preference panel to do it. I don’t think you need a shortcut for that.
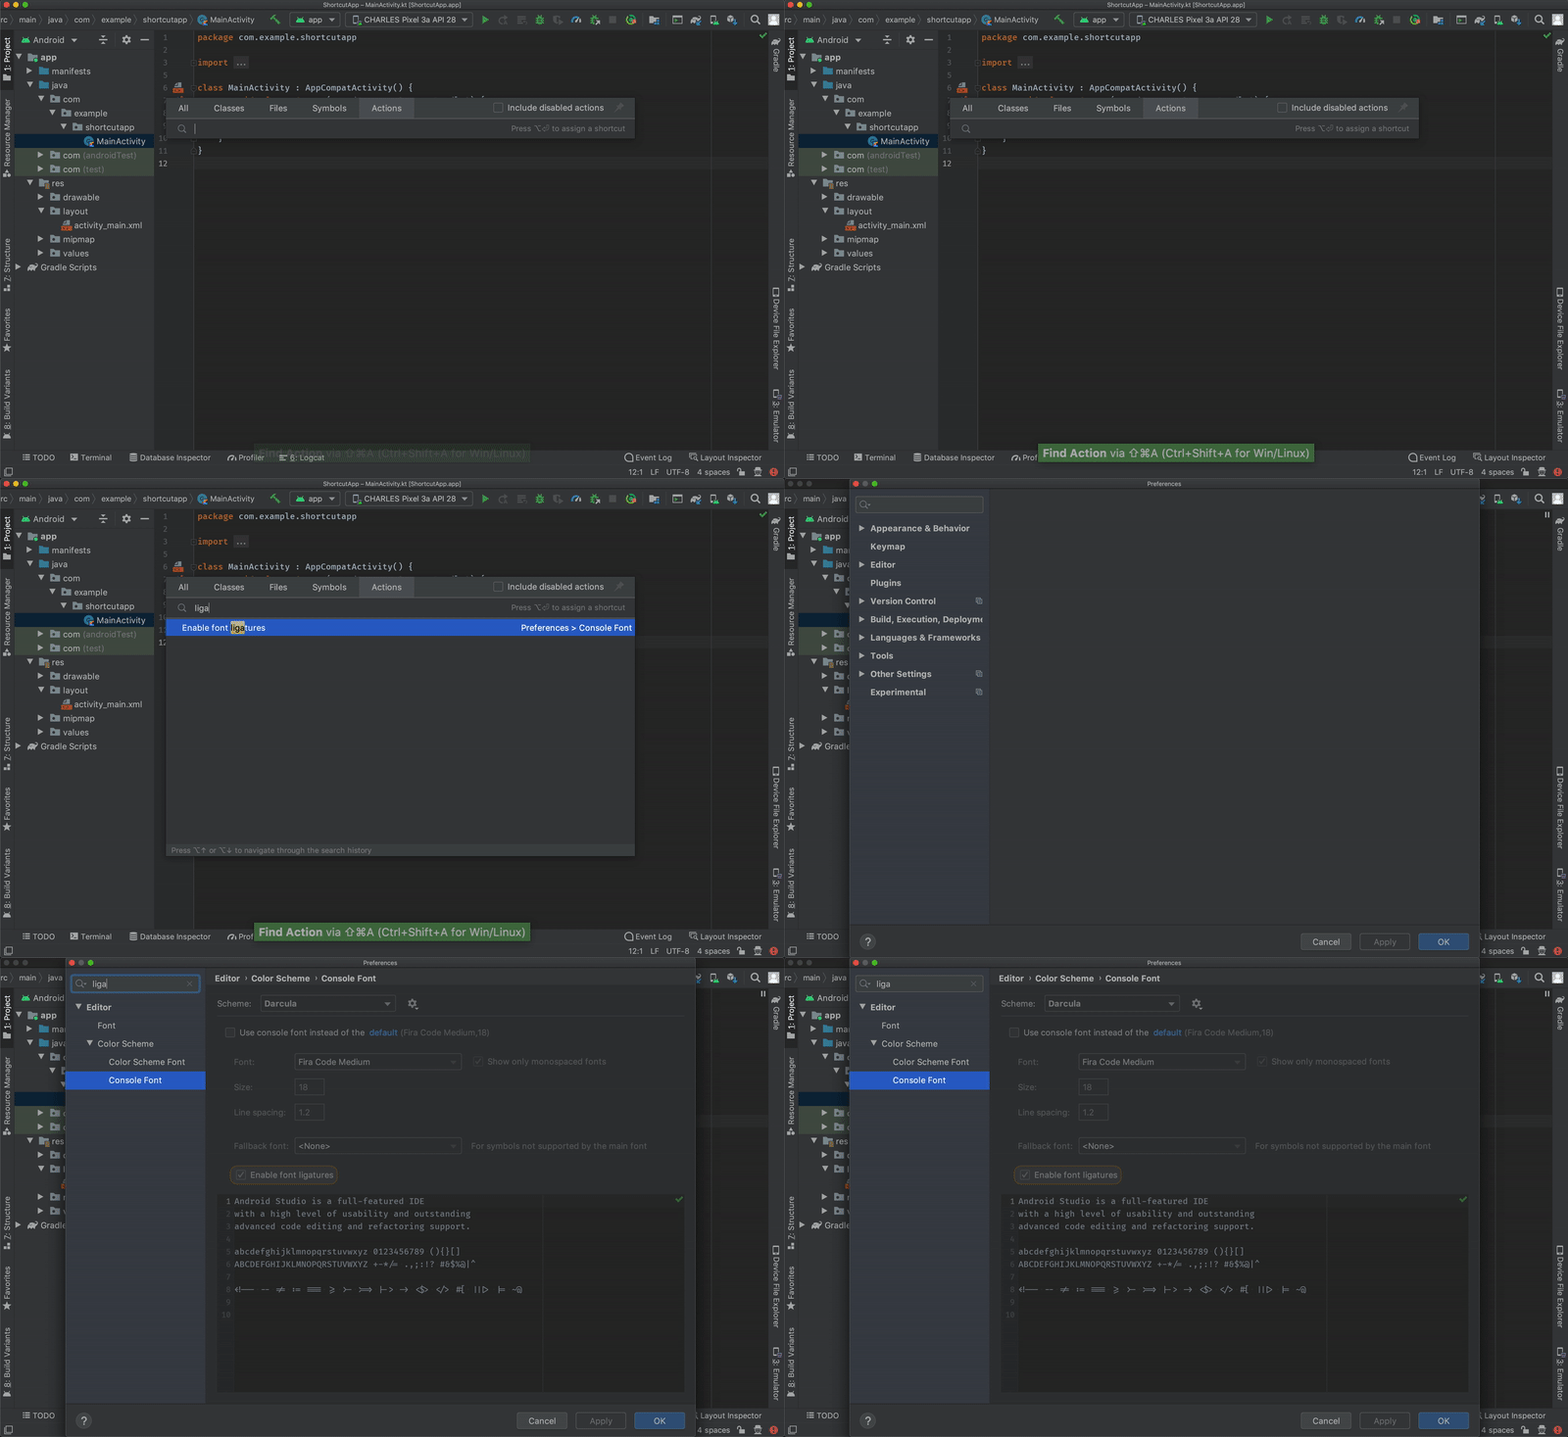
This is also handy if you forget some shortcuts. Let’s say for building a project. Just type find action “build”, and voilà — you can run it. Plus you can refresh your memory with the assigned shortcut.
To sum up, first, you need to know possibilities, then shortcuts for the most frequently used features, to get up on speed.
Learning strategy
In order to learn all these fantastic features that I will present to you in a moment, it’s good to have a plan. I can suggest several steps.
THIS COURSE
I divided the presented functionalities into categories and assigned a day number for each. Simply learn one whole category per day by using listed functions intensively throughout the day, and you should know them all in over the week. Trust me, learning them at once, or one functionality per day will not be fast nor efficient. If you want to really learn them and learn them quickly, you need to focus on one category at a time. Plus make revision. After you will finish the whole course, go to the next step.
PLUGINS
Of course, there is a probability that some shortcuts and features will be harder to remember than others. In order to learn from mistakes after the course, I would suggest installing Presentation Assistant plugin. That will allow you to see shortcuts corresponded to the action you’ve made with the mouse instead of the keyboard. Not all of them will appear, but the majority should work, so you will know the main pain points. Key Promoter is the second choice.
PRODUCTIVITY GUIDE
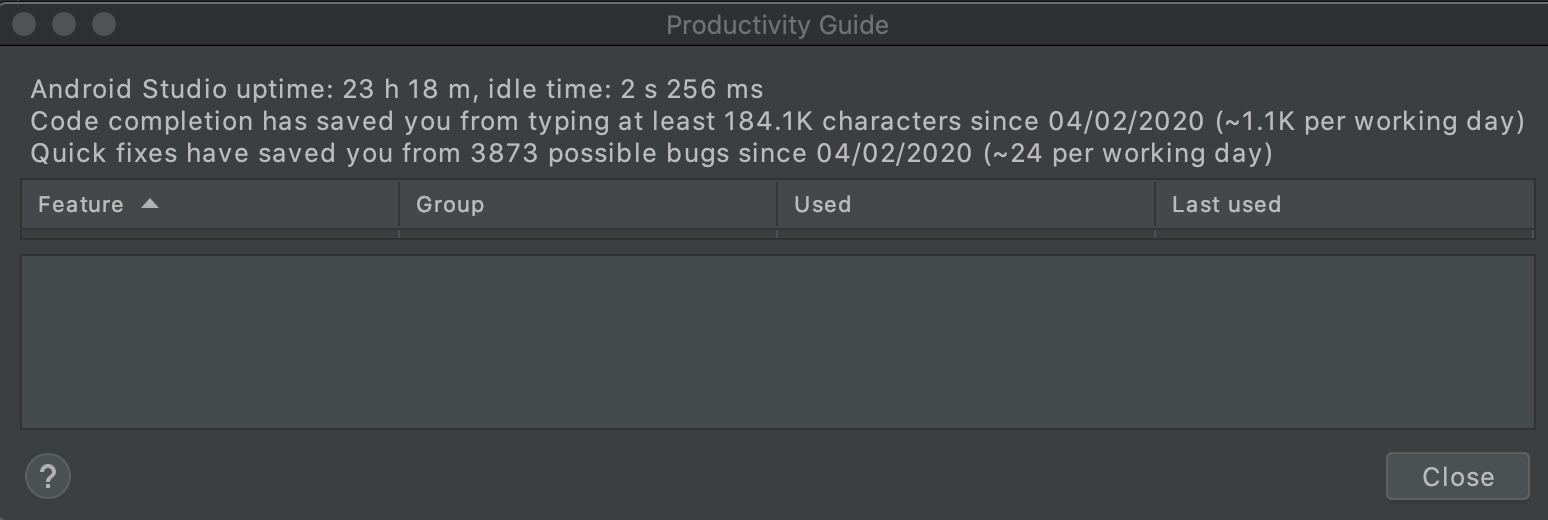
If you’re using AS for a while, next thing is to check the Productivity Guide (Help -> Productivity Guide). You will be prompted with the list of commands that you were using without shortcuts and an associated shortcut for learning it. With that tool, you will know the main actions you can speed up.
TIP-OF-THE-DAY
You can also stop dismissing tip-of-the-day and actually learn/remember something new. As far as I know, it’s connected with the Productivity Guide as it’s using the same content.
REVISE OFFICIAL DOCUMENTATION
Last but not least check Android Studio keyboard shortcuts and IntelliJ documentation to learn every niche function.

Move around IDE with keyboard only — Day 1
REMOVE TABS
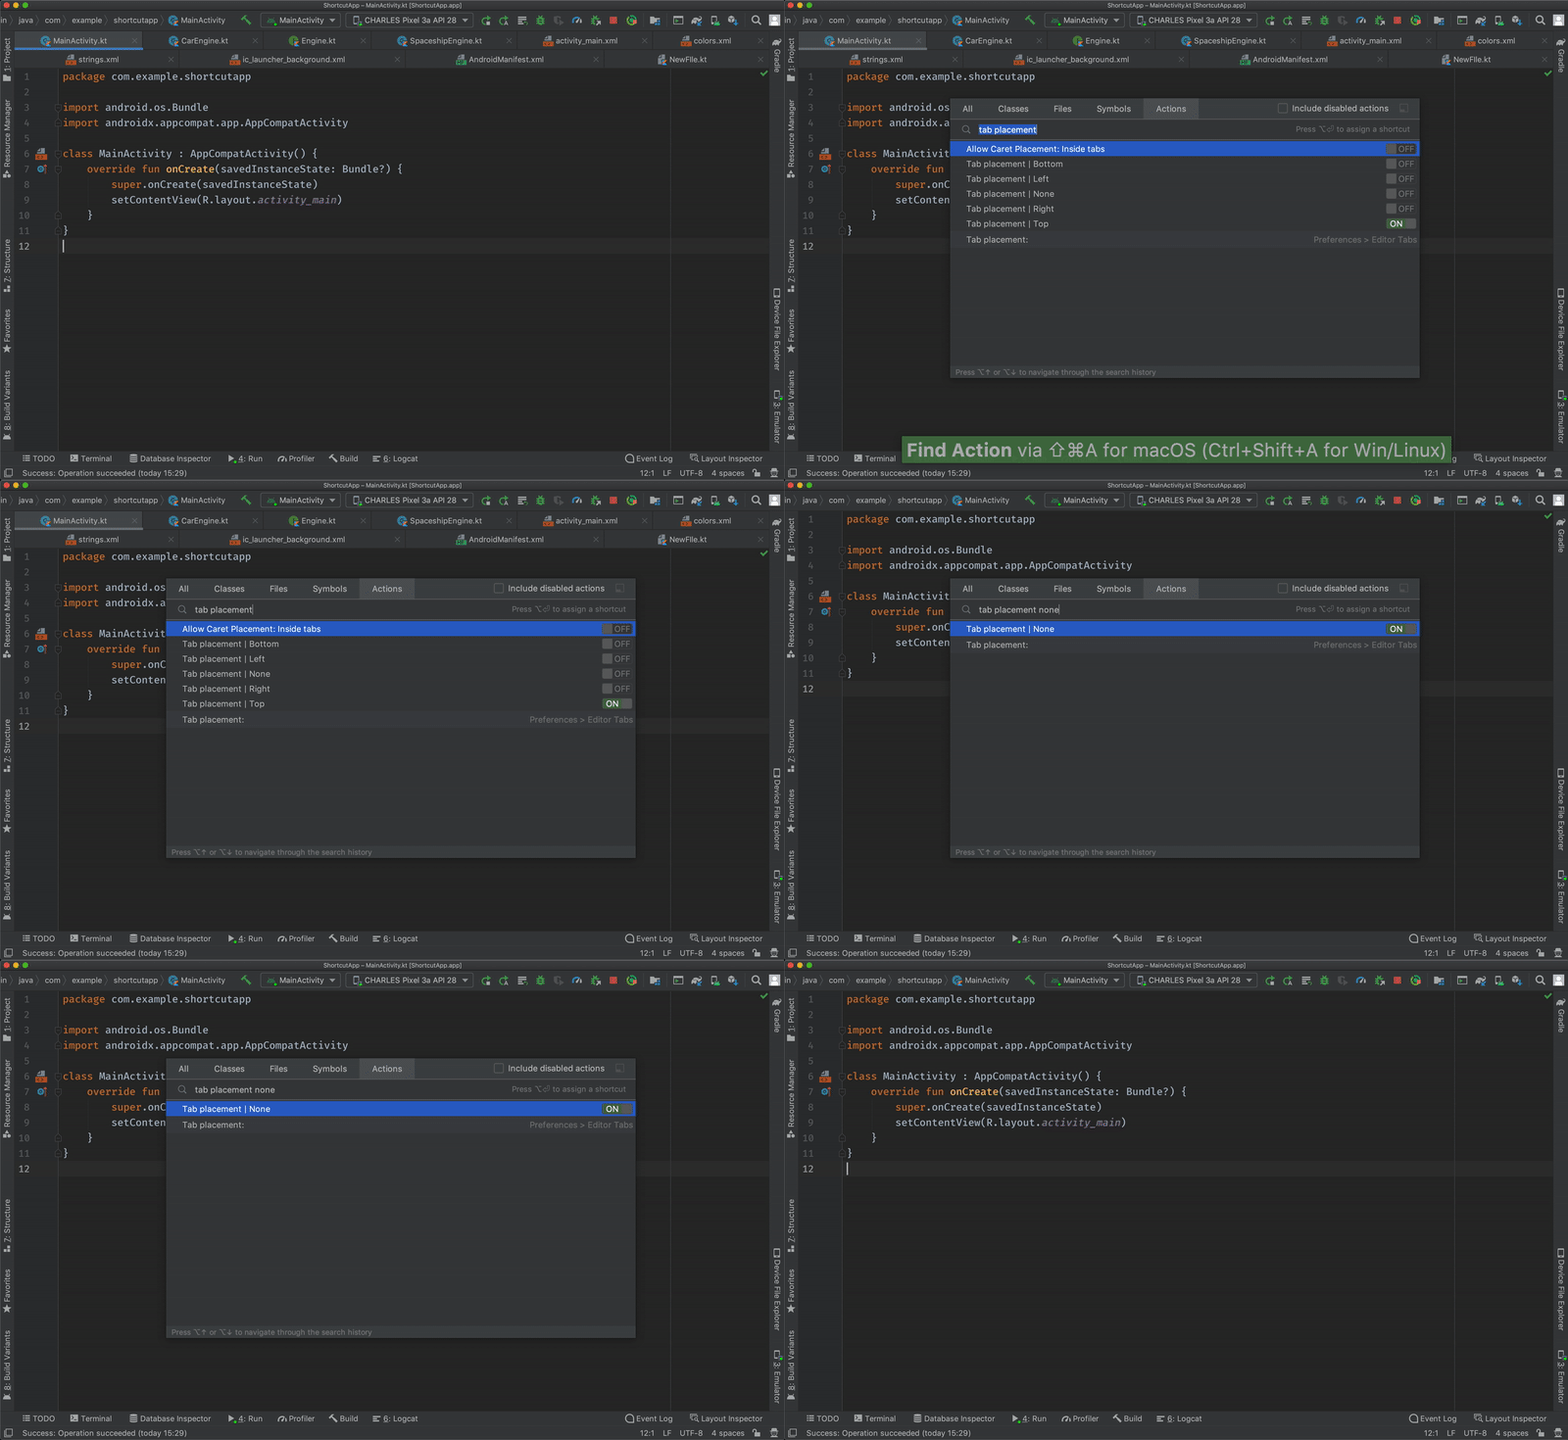
Step one, switch tabs off by (tab placement -> none). If you only had to pick one thing from this article, I would suggest this one. There are far better methods to navigate through files you will learn on Day 2. Plus you will get more free space.
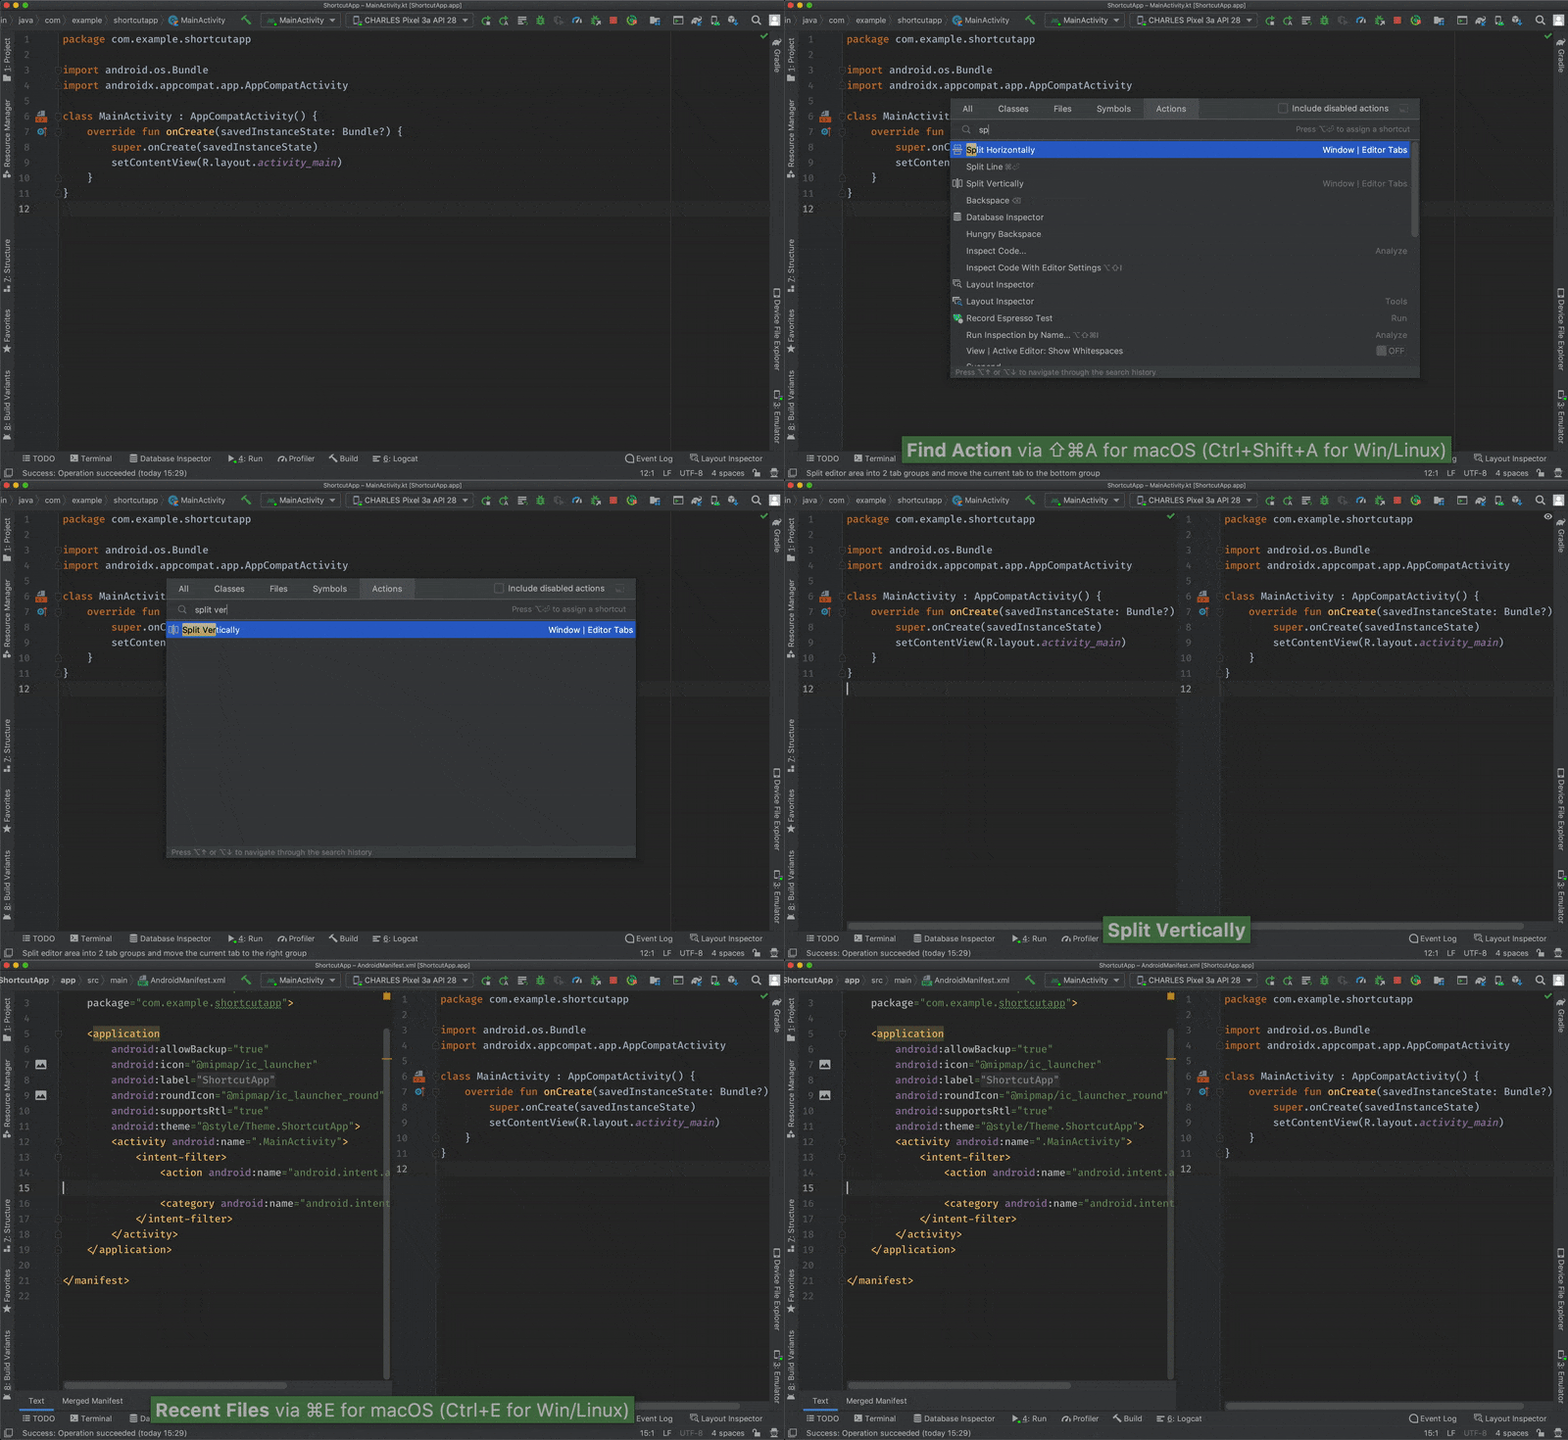
If you need to work with several files opened, just find action: split vertically / split horizontally. Close divided editor with (macOS: cmd + W Windows/Linux: ctrl + F4).
PANELS
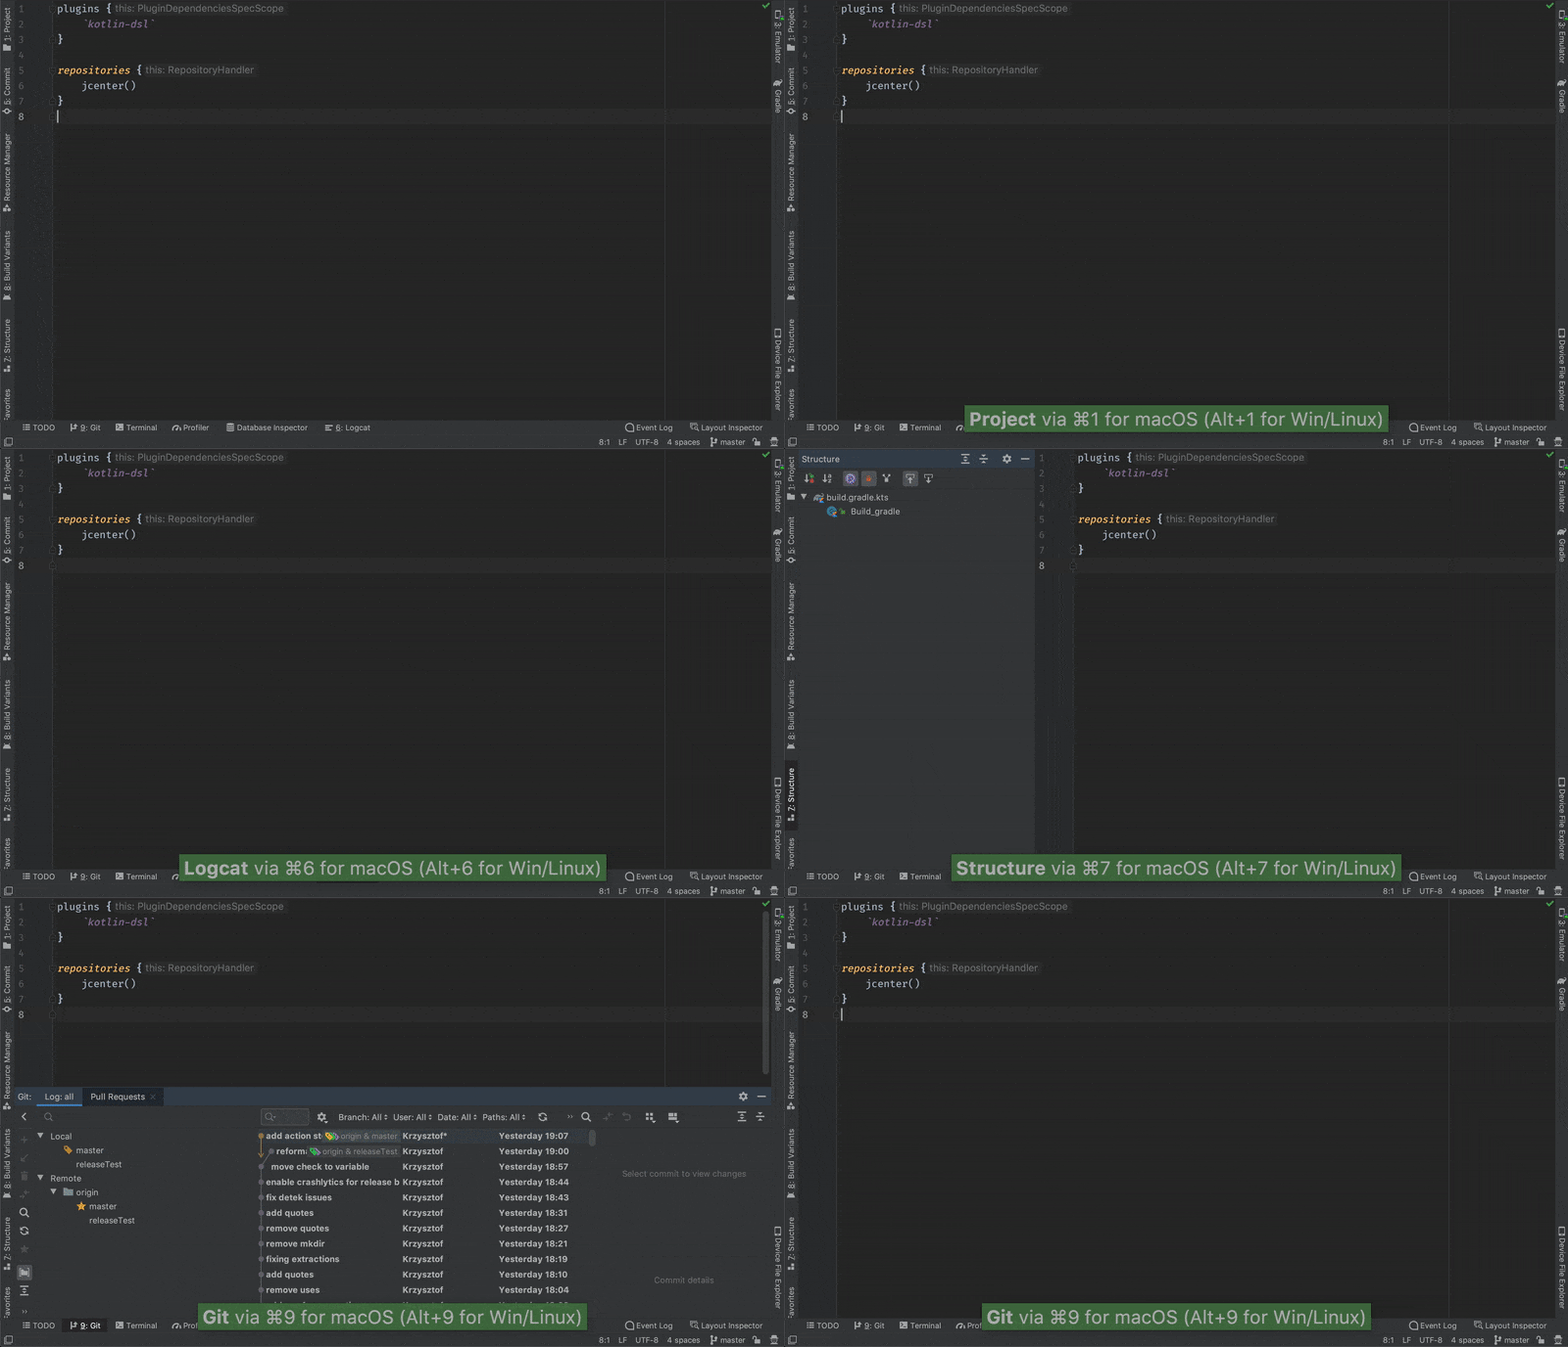
(macOS: cmd + digit Windows/Linux: alt + digit) – digits for most important panels:
1– PROJECT6– LOGCAT7– STRUCTURE of the currently opened file (alsomacOS: cmd + F12 Windows/Linux: ctrl + F12as a pop-up)9– VERSION CONTROL
I’m using a custom assignment for numbers:
2– COMMIT (from AS 4.1 it’s separated from git panel)3– EMULATOR (from AS 4.1 it can be embedded in AS window as panel), so with keyboard shortcut it’s finally easy to show and hide it8– BUILD VARIANT – helpful when working with multiple flavors
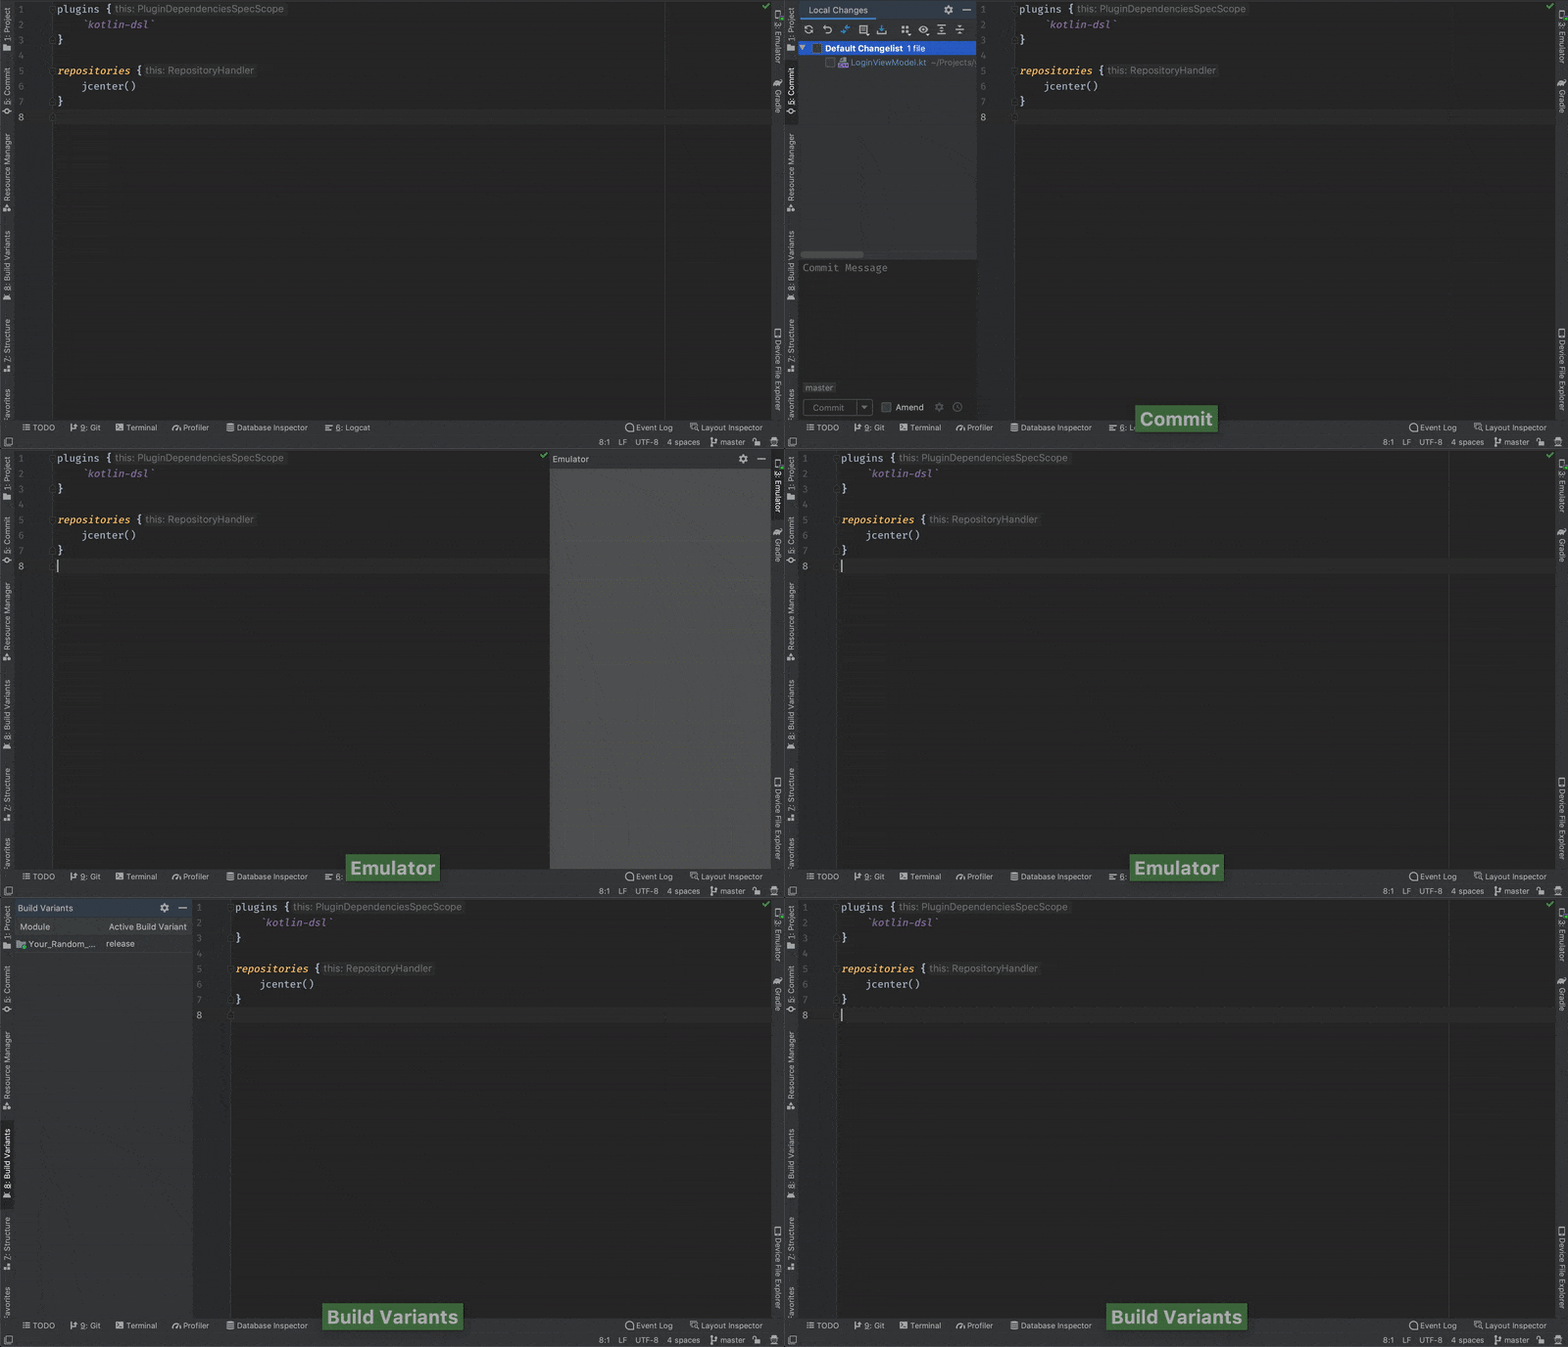
There are also a lot more panels, among others: Terminal, Layout Inspector, Favourites, Profiler, Resource Manager, Gradle, Device File Explorer, Todo list etc.
RESIZING / STRETCHING PANELS
(macOS: cmd + shift + arrow Windows/Linux: ctrl + shift + arrow) – to shrink or expand. Once you’ve open the panel (i.e. project), you will often want to resize it. Making it by hand is painful as you need to aim perfectly at the point between the panels to be able to drag it. The only thing you need for this shortcut is to have a focus on the panel you want to stretch.
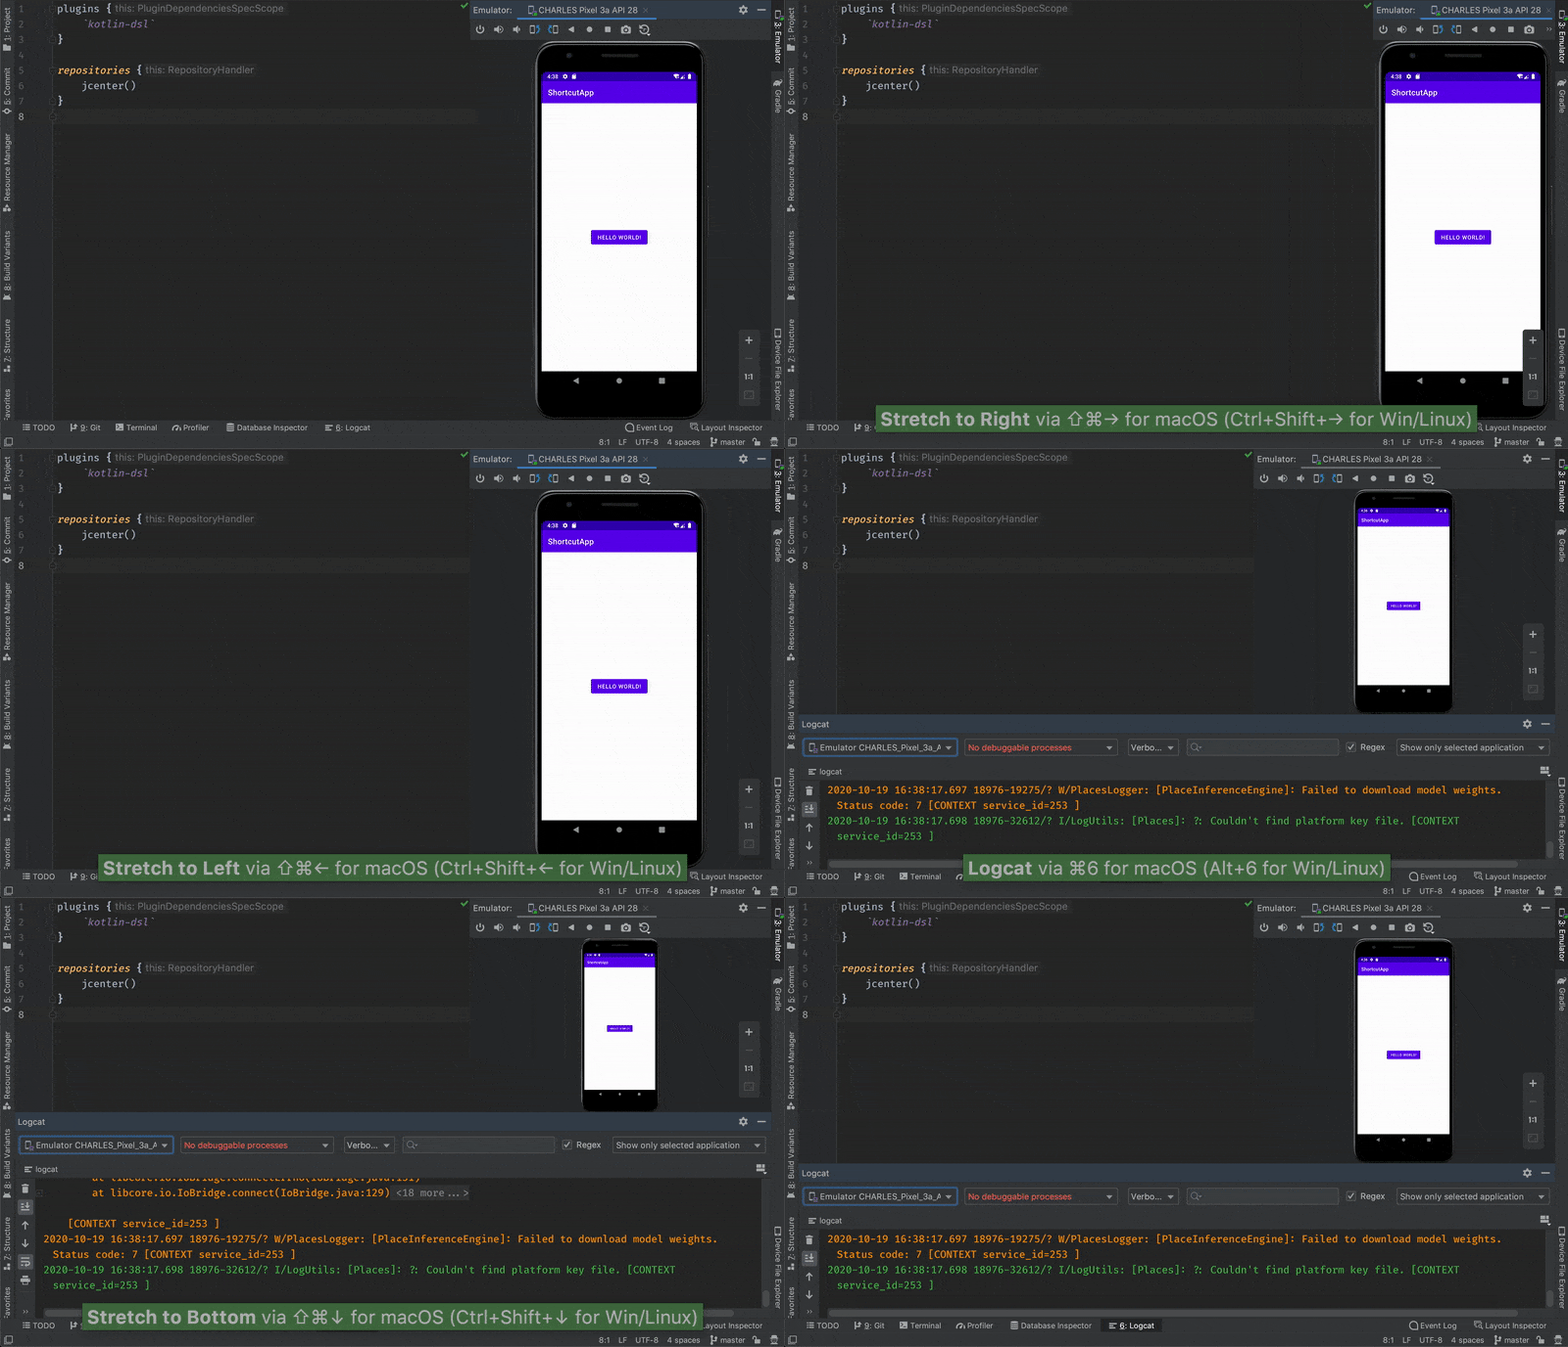
There are two options:
- (
enter) to select the file from the project panel or navigation tab. Sometimes (esc) is also needed to lose focus from the panel and move focus to the editor. You can combine both actions into one with (F4). If you want IDE to automatically open selected files from project panel, turn onOpen Files with Single Click(AS 4.1) so thenenter/ecs/F4won’t be necessary. - to always see the location of the currently opened file in the project panel, use
Auto Select Opened File(AS. 4.1)
PREFERENCES
(macOS: cmd + , Windows/Linux: ctrl + alt + S) – handy shortcut, but only when you don’t know what exactly you’re looking for. If you know, just use the mentioned already FIND ACTION and type name of the desired functionality.
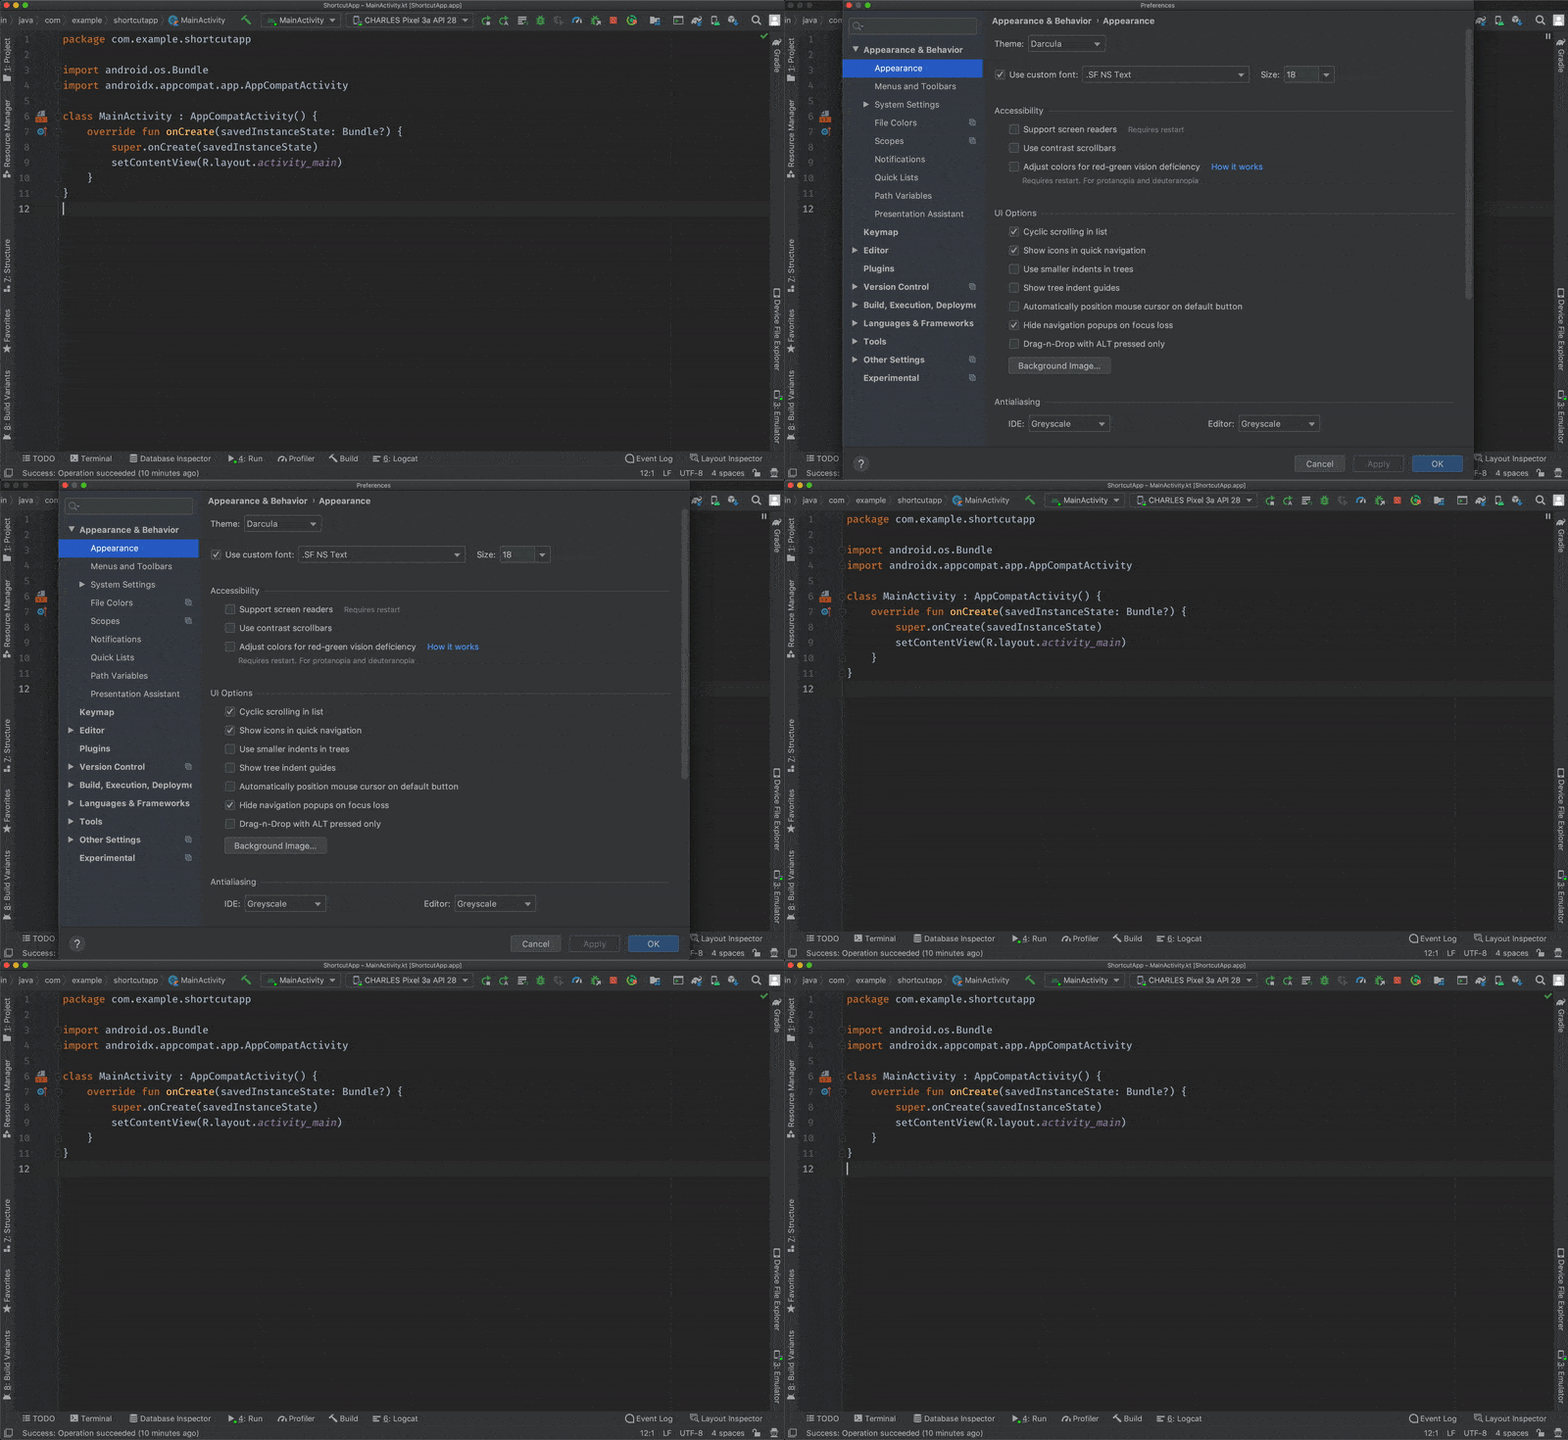
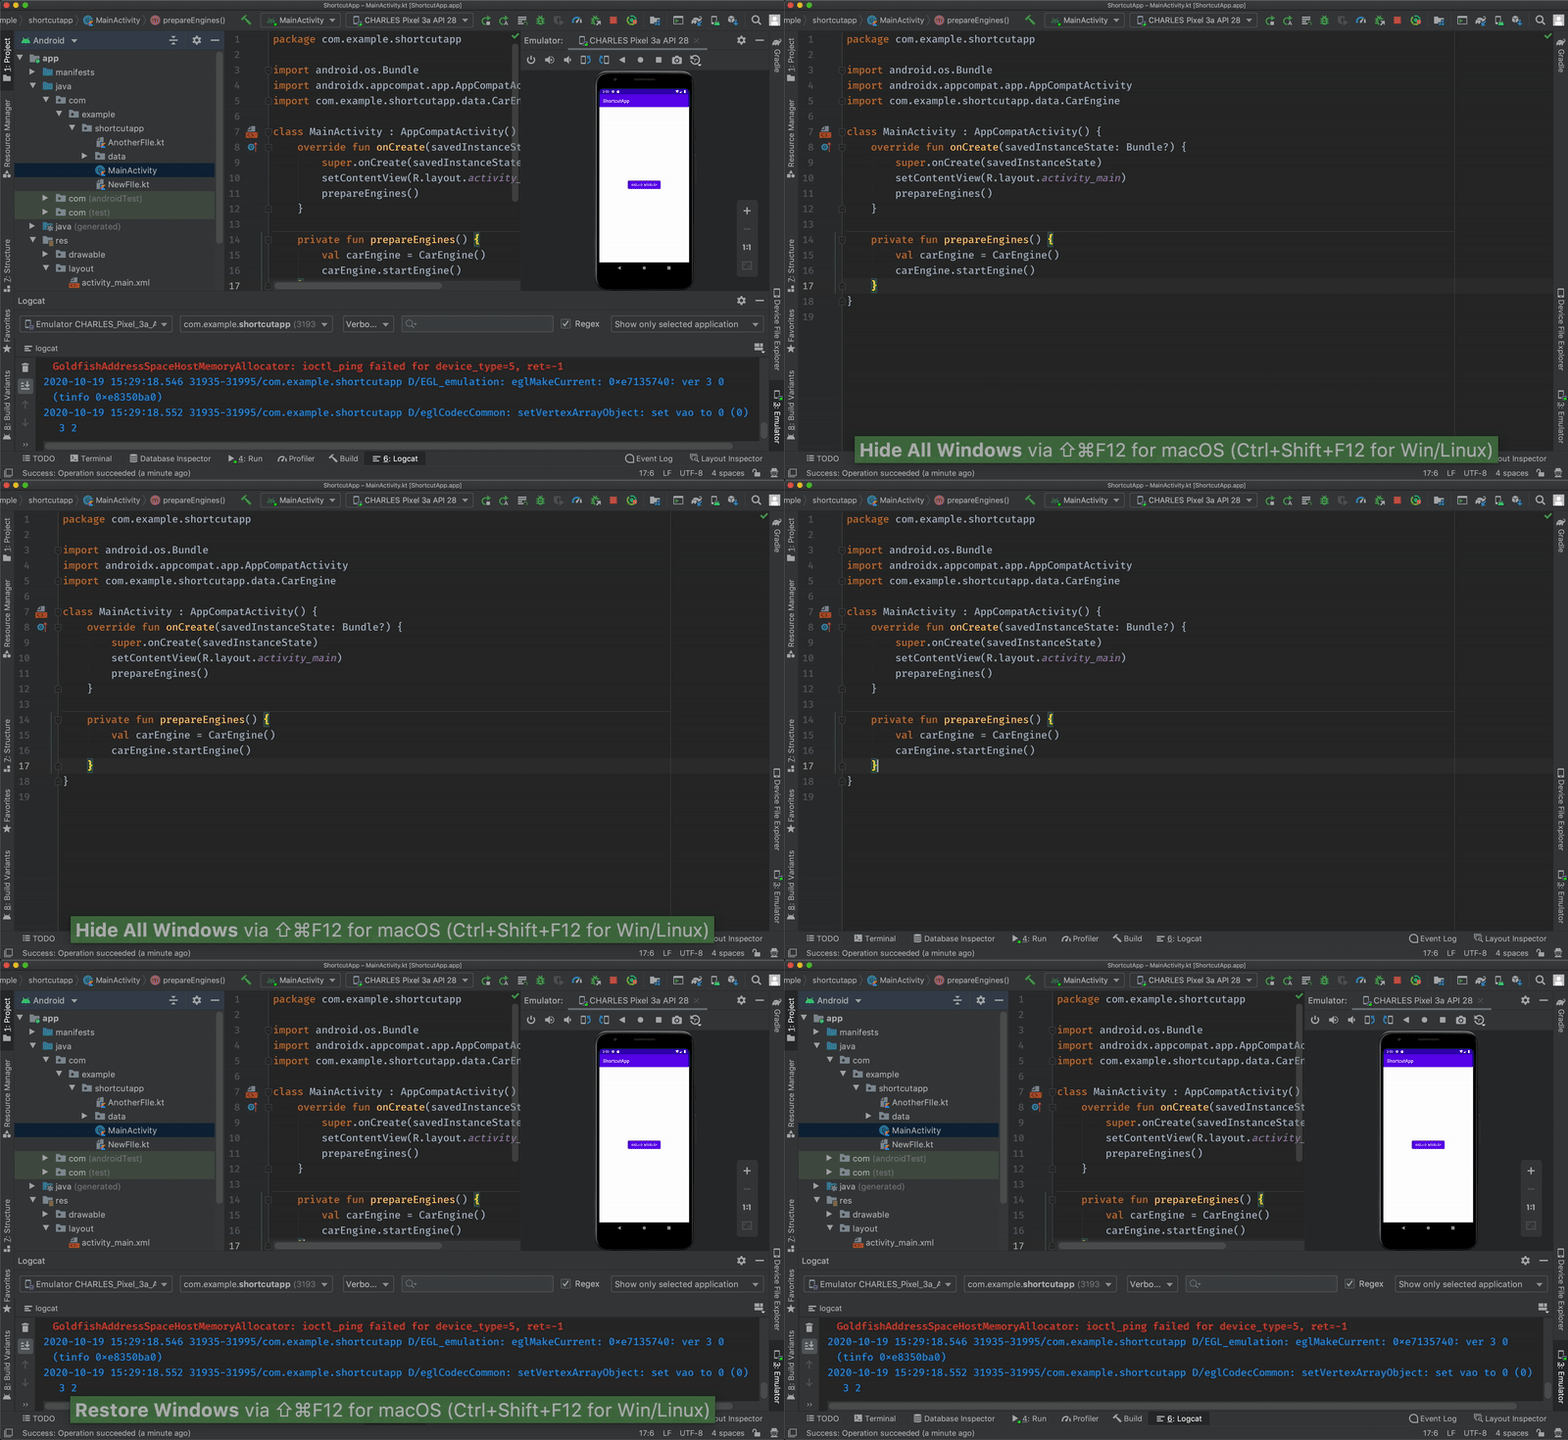
CLUTTERED / UNCLUTTERED WORKSPACE TOGGLE
(macOS: cmd + shift + F12 Windows/Linux: ctrl + shift + F12) – of course, some panels must be opened in the cluttered version first.
ZEN MODE / DISTRACTION MODE
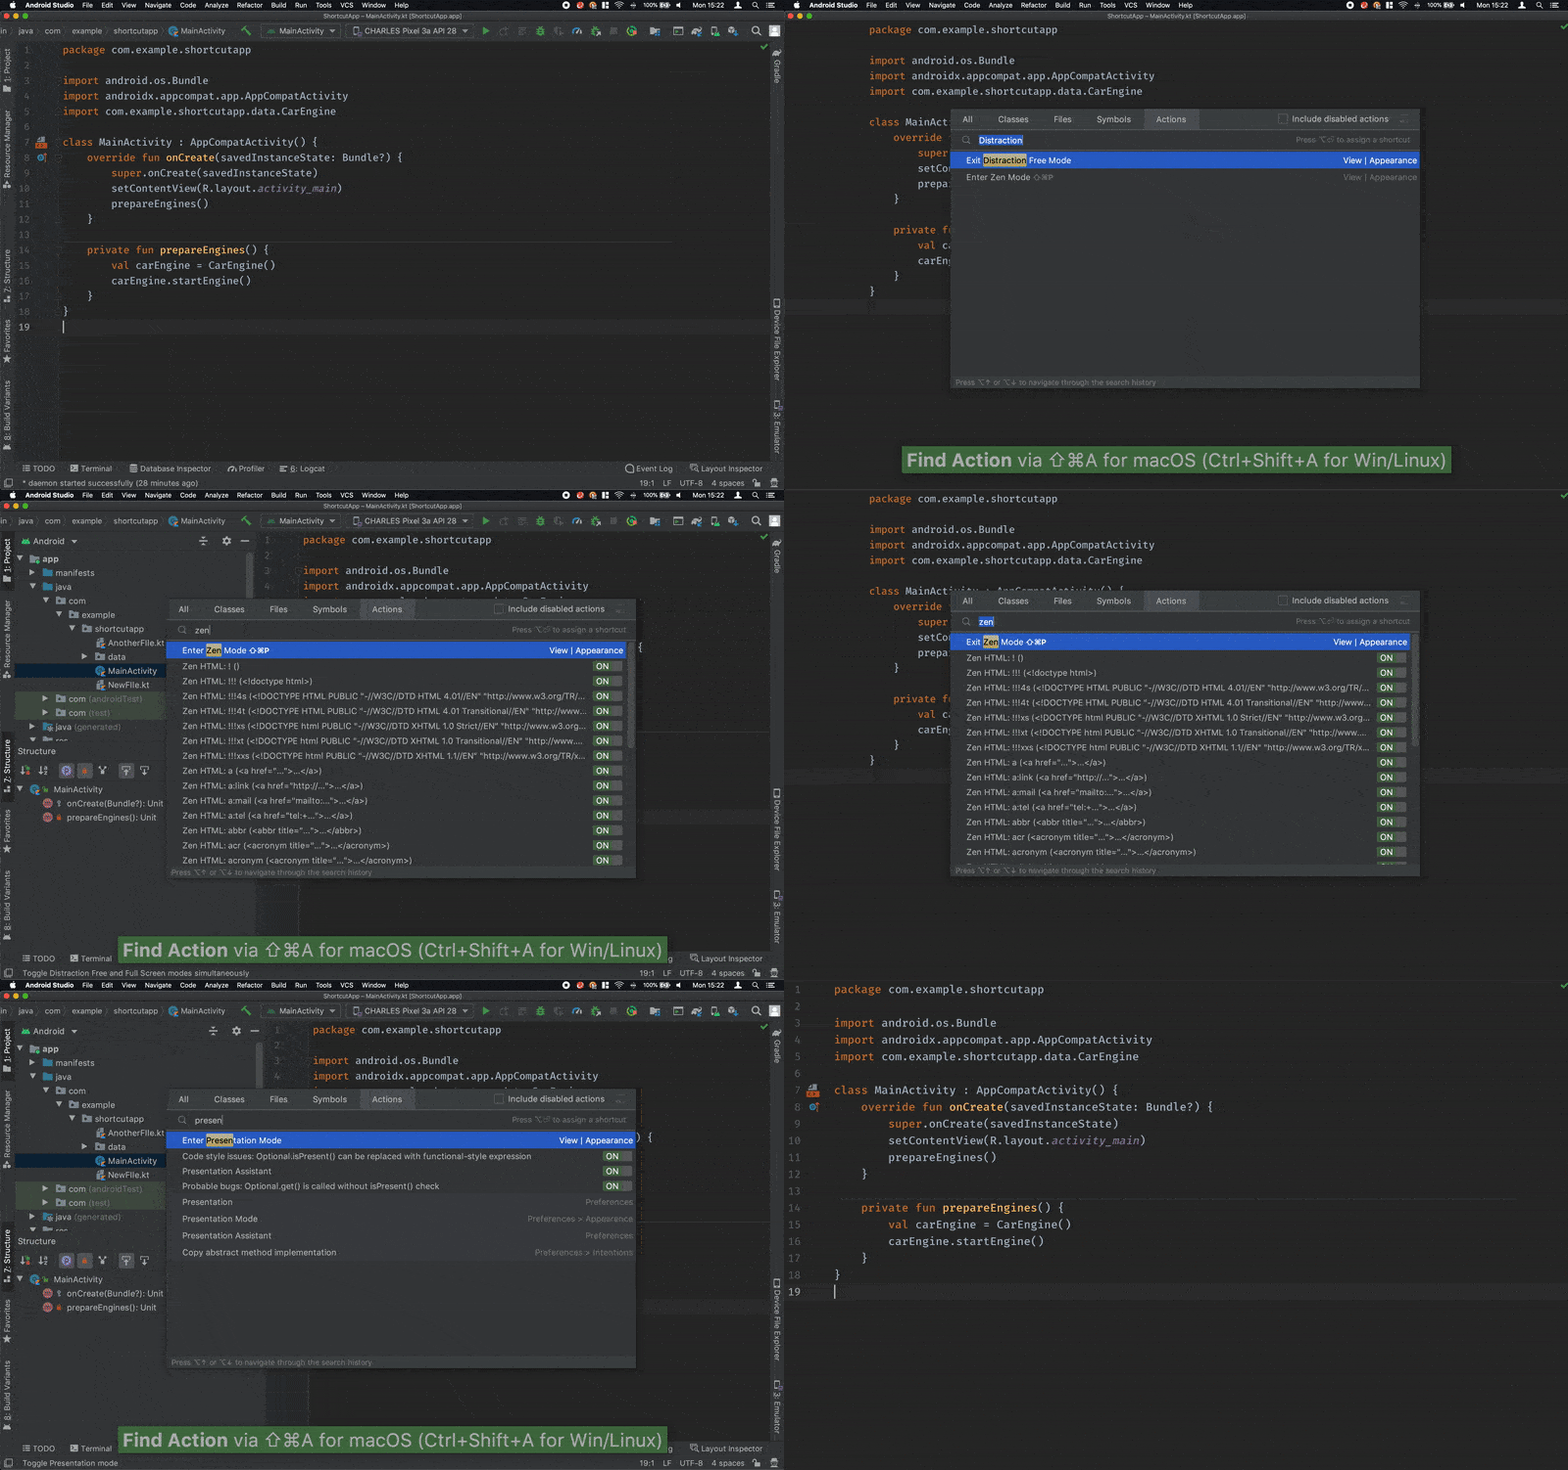
Assign a shortcut that best suits you. I’m using (shift + cmd + P). This should be the mode you’re working most of the time. Distraction-Free Mode maximizes editor to the whole window. Zen Mode is the same but on full screen. There is also a PRESENTATION MODE. By default, it has a huge font size and that’s why it’s best suited for presenting your code rather than working. After you will go back from presentation mode, you may not see previously opened panels. To reopen them you need to use clutter/unclutter toggle. In each of these modes, you can also use panels shortcuts.
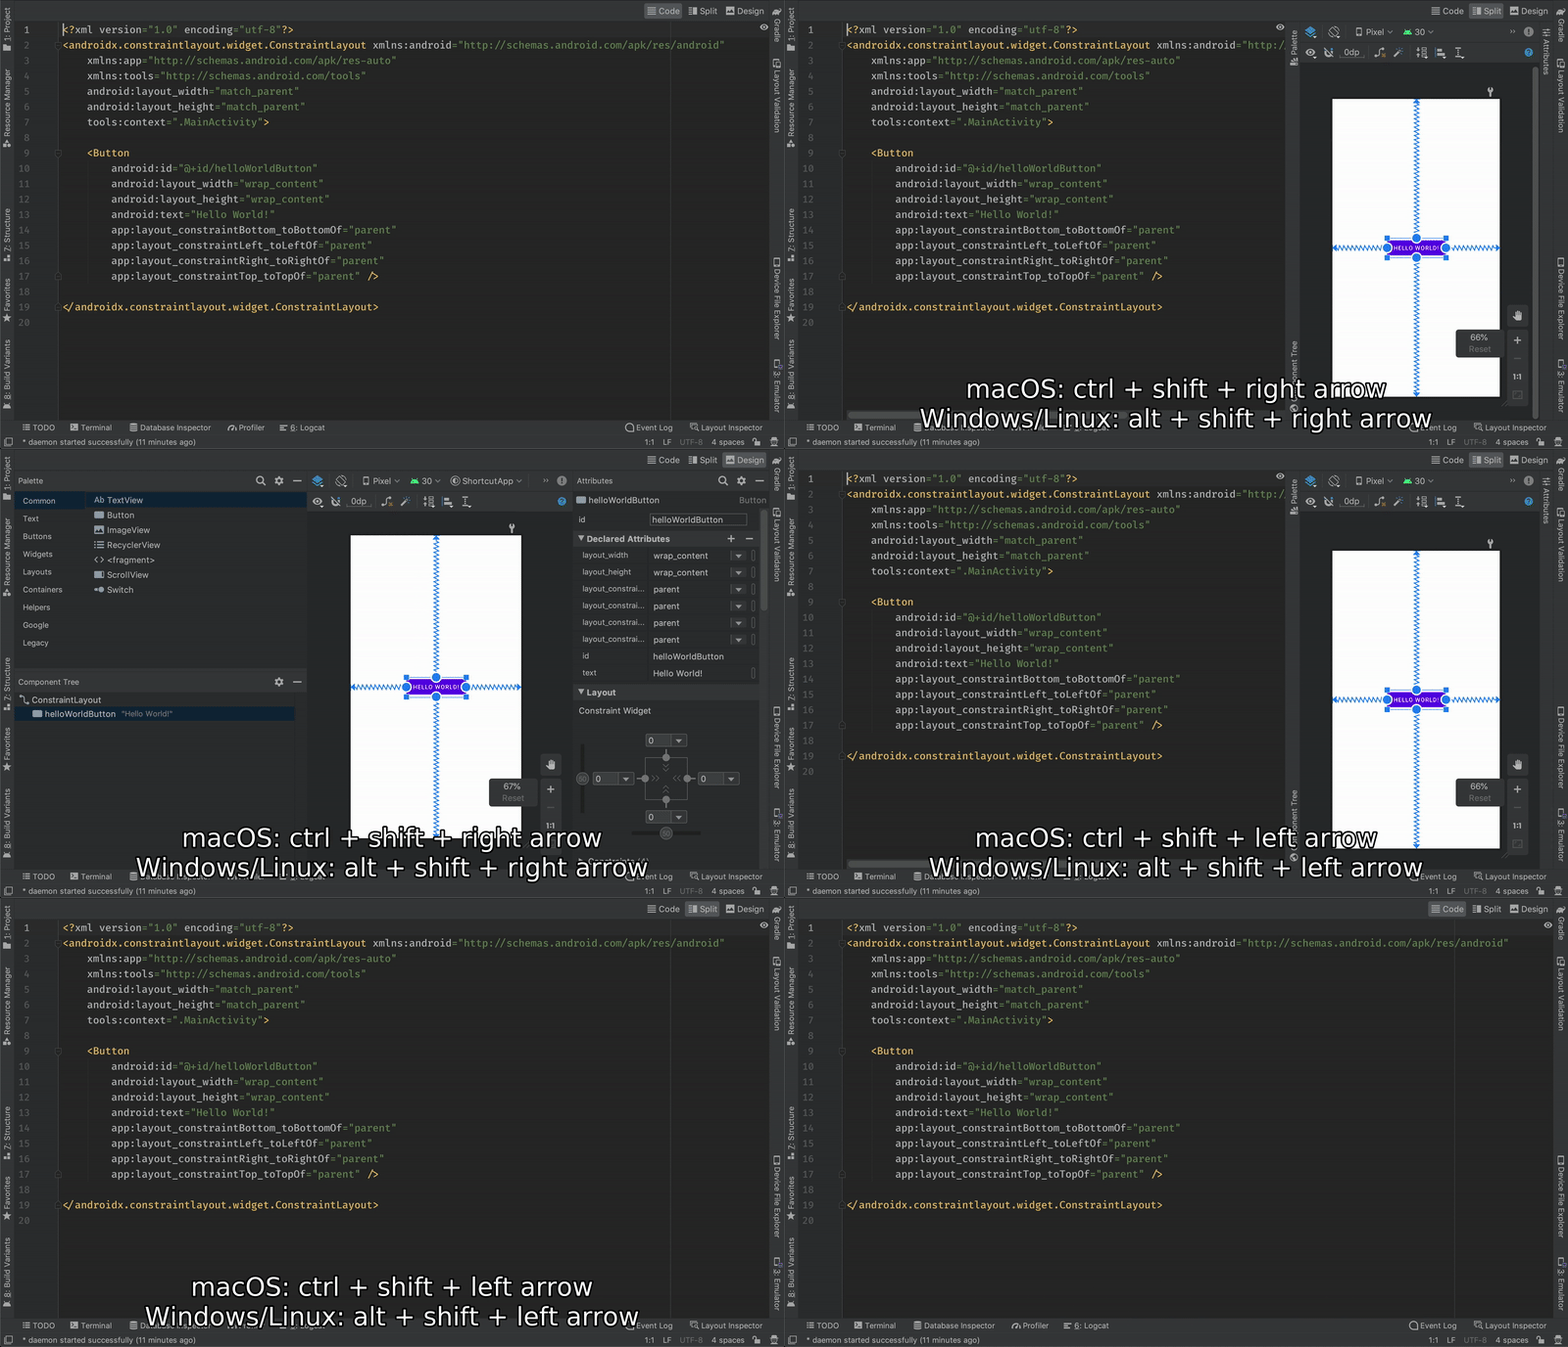
(macOS: ctrl + shift + left arrow or right arrow Windows/Linux: alt + shift + left arrow or right arrow) If it doesn’t work it means that you need to focus on the workspace in order to do this (F4)may help.
Search / Recent — Day 2
As you removed tabs, you’re probably wondering about the way to navigate through files you’re using. There are 3 ways to do it:
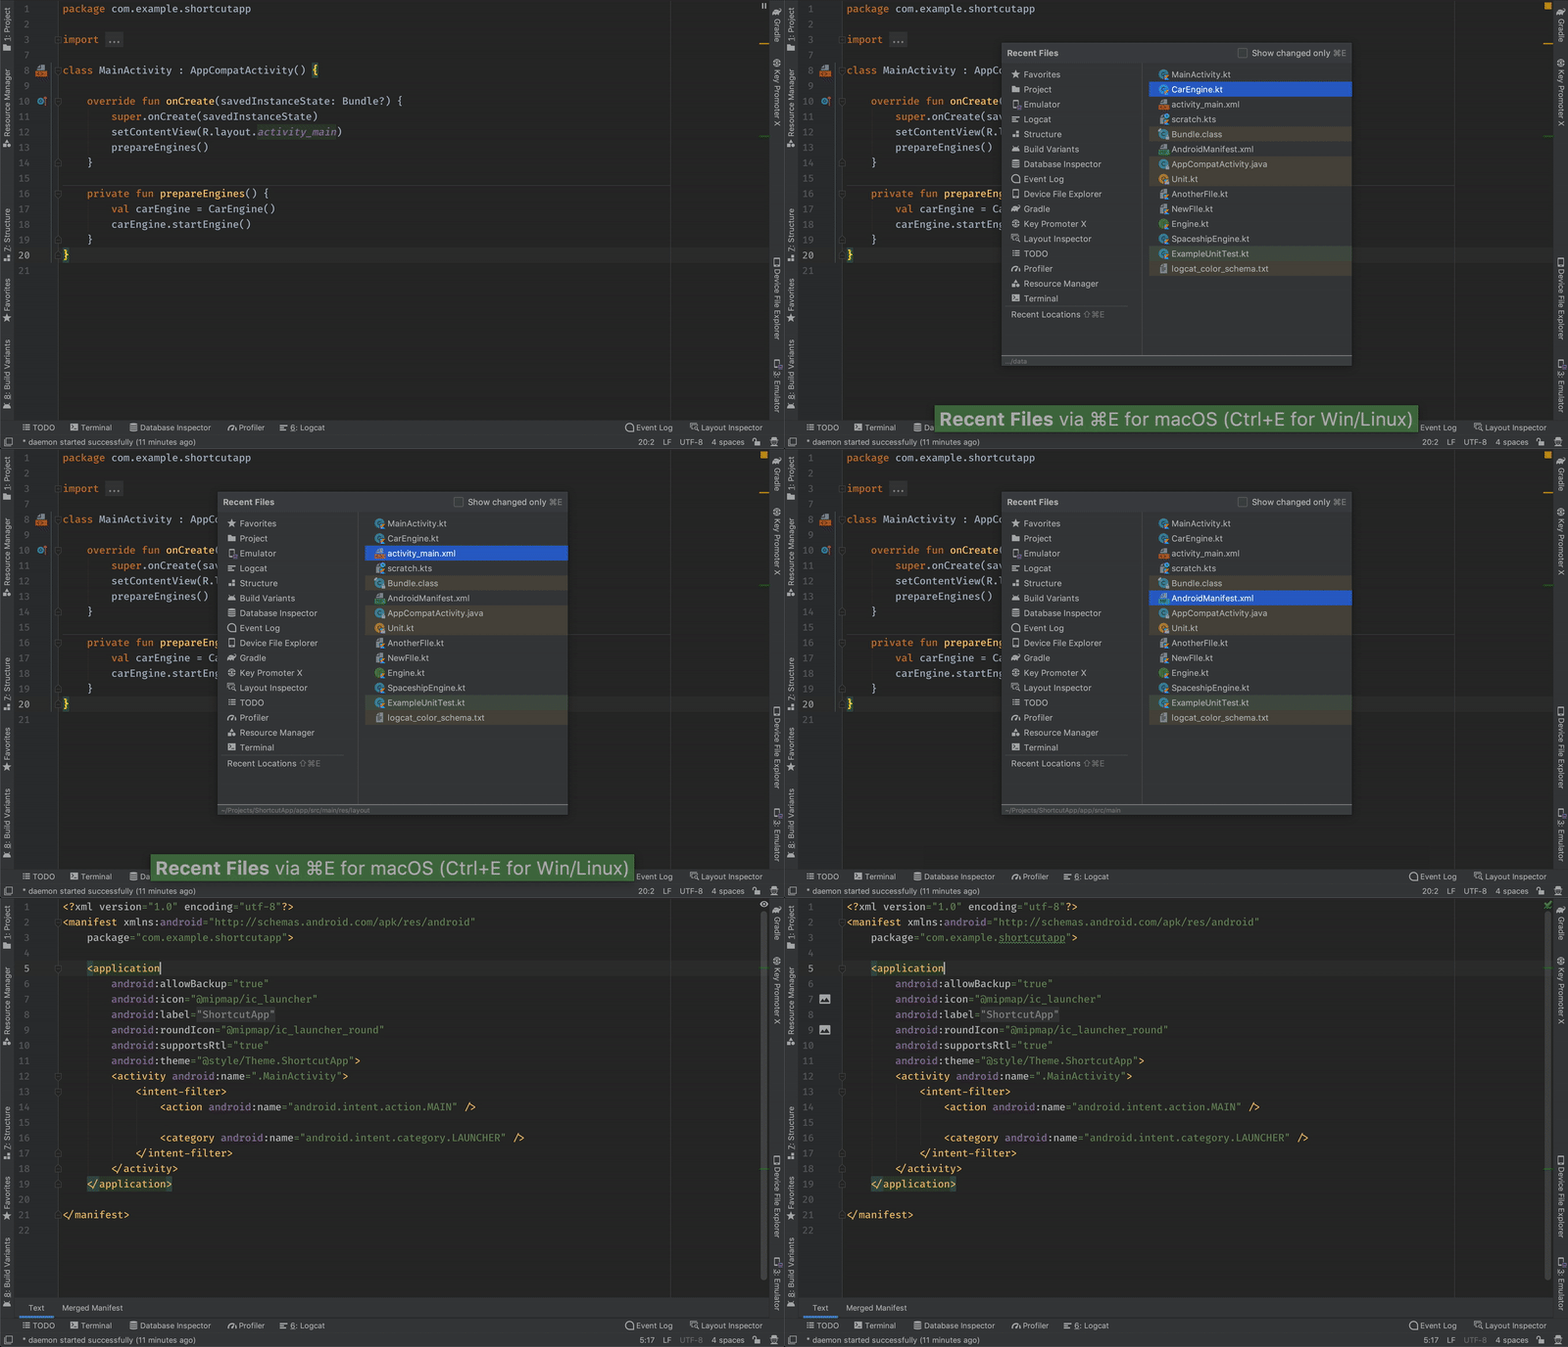
RECENT FILES
(macOS: cmd + E Windows/Linux: ctrl + E)
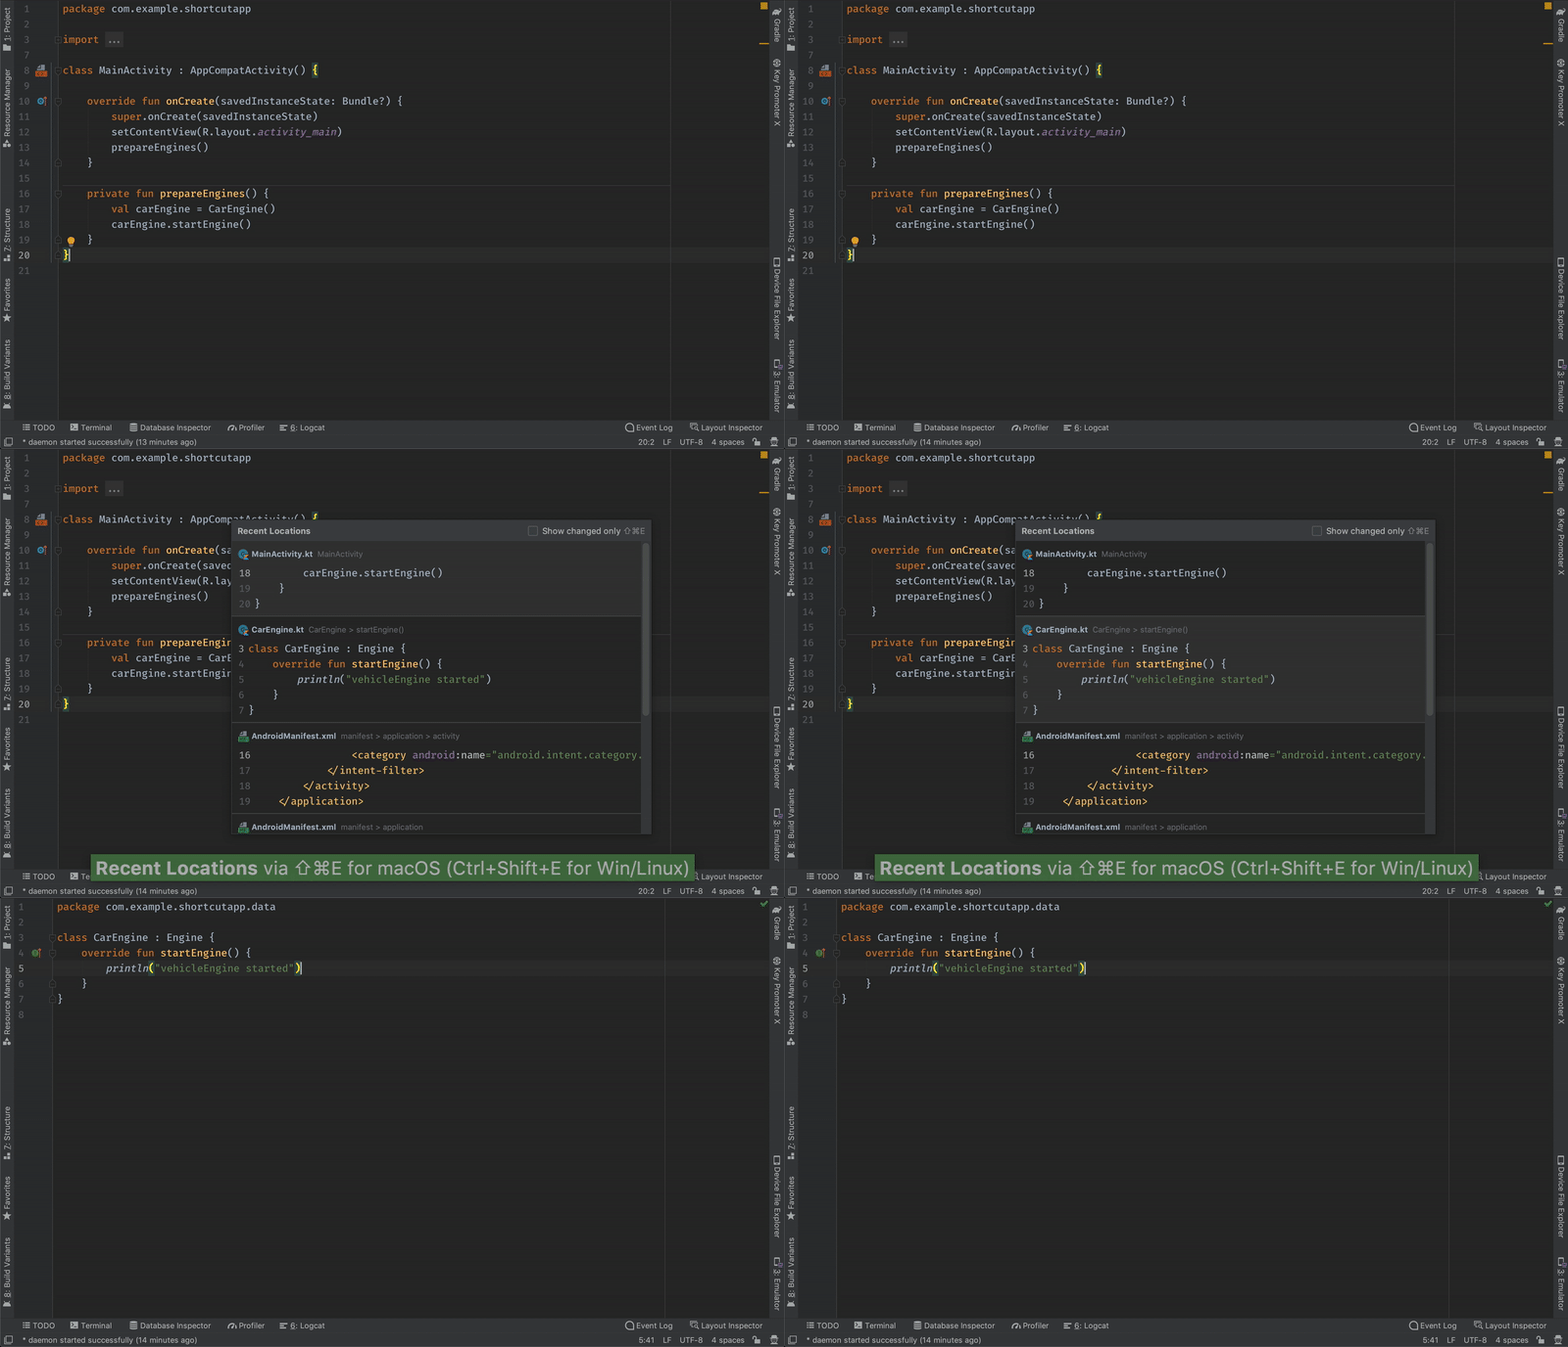
RECENT LOCATIONS
(macOS: cmd + shift + E Windows/Linux: ctrl + shift + E)
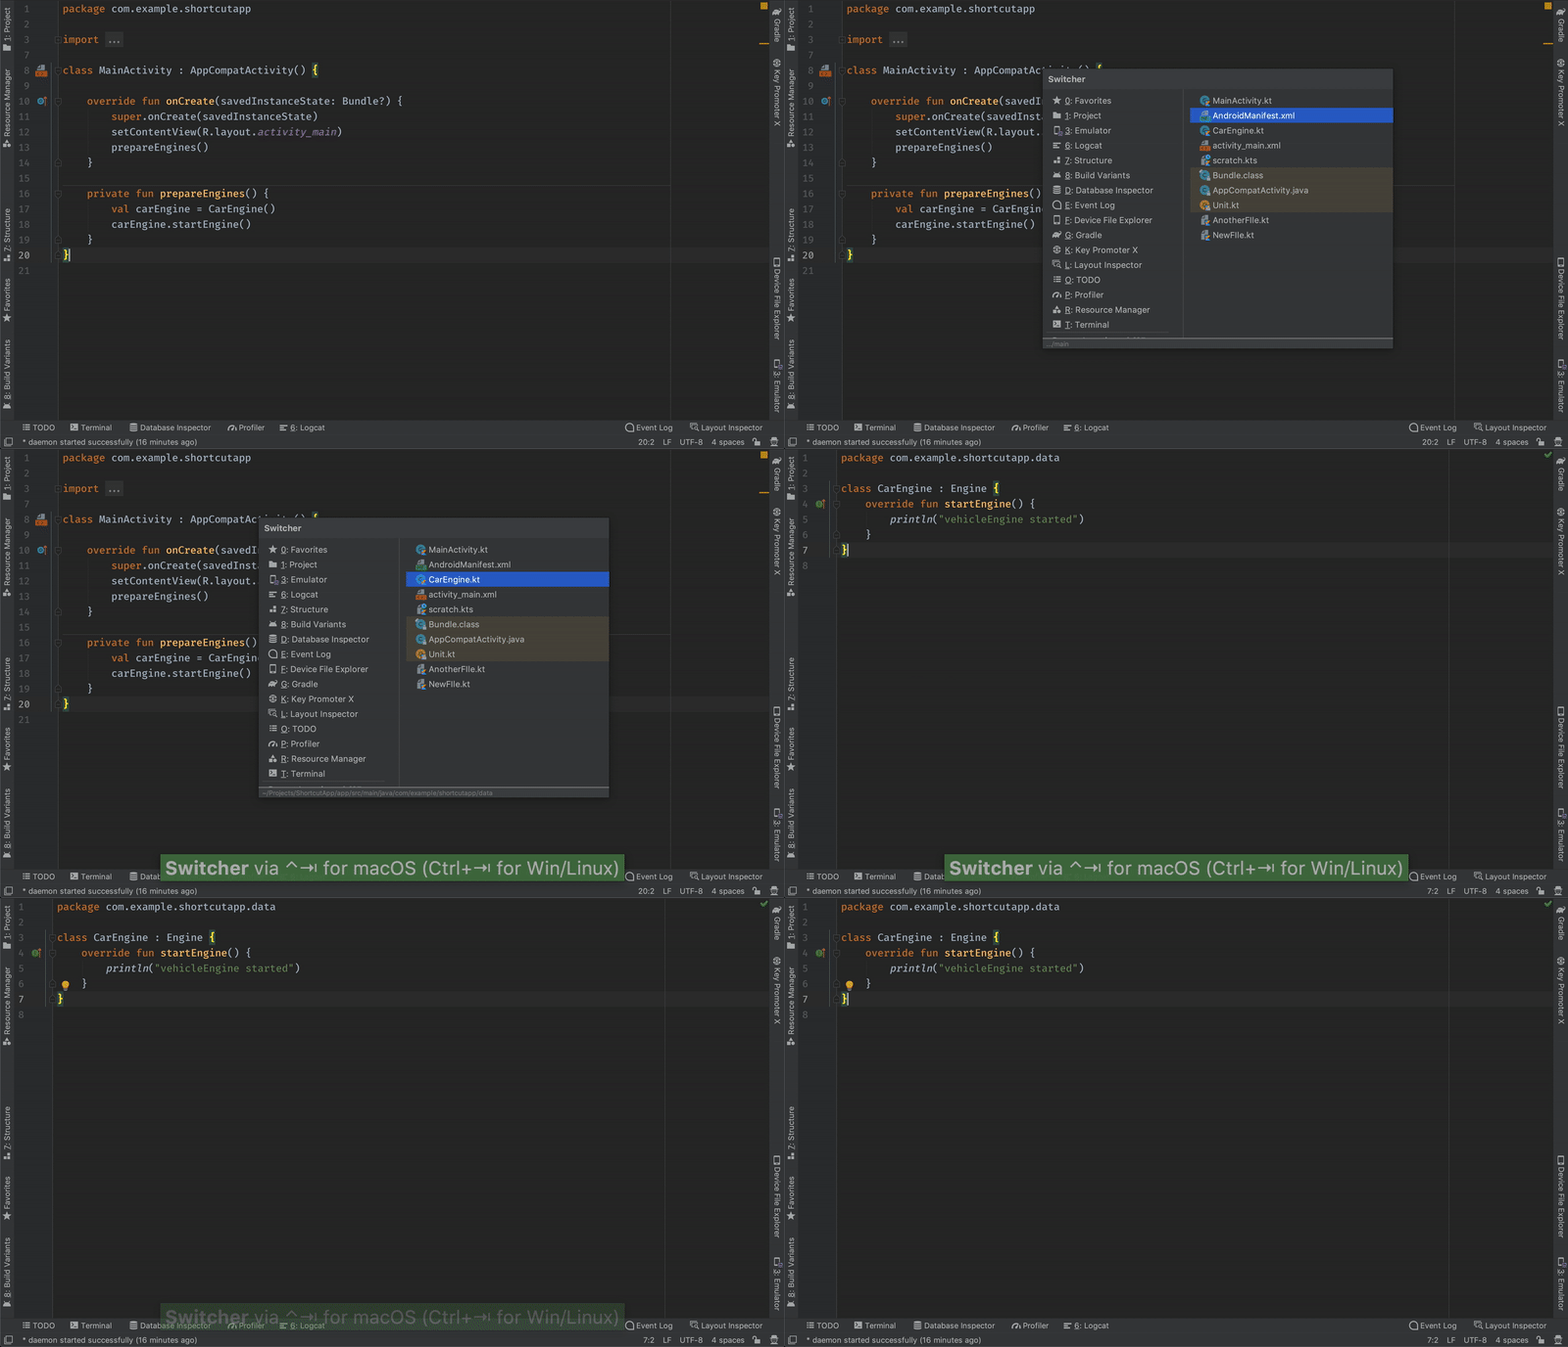
SWITCHER
(macOS/Windows/Linux: ctrl + tab) – both switcher and recent files are useful for picking panels too. While (ctrl) still pressed, you can use (tab) to go to the next position or (shift + tab) to the previous position.
For searching, it’s worth to know all possibilities, but the most universal one is:
SEARCH EVERYWHERE / ALL
(macOS/Windows/Linux: double hit shift) it’s the best because it’s also the simplest. On large projects, it can take a while to search all possible options, so it’s worth knowing detailed options as well. As you can see, the dialog is always the same, but the following shortcuts are selecting a specific tab.
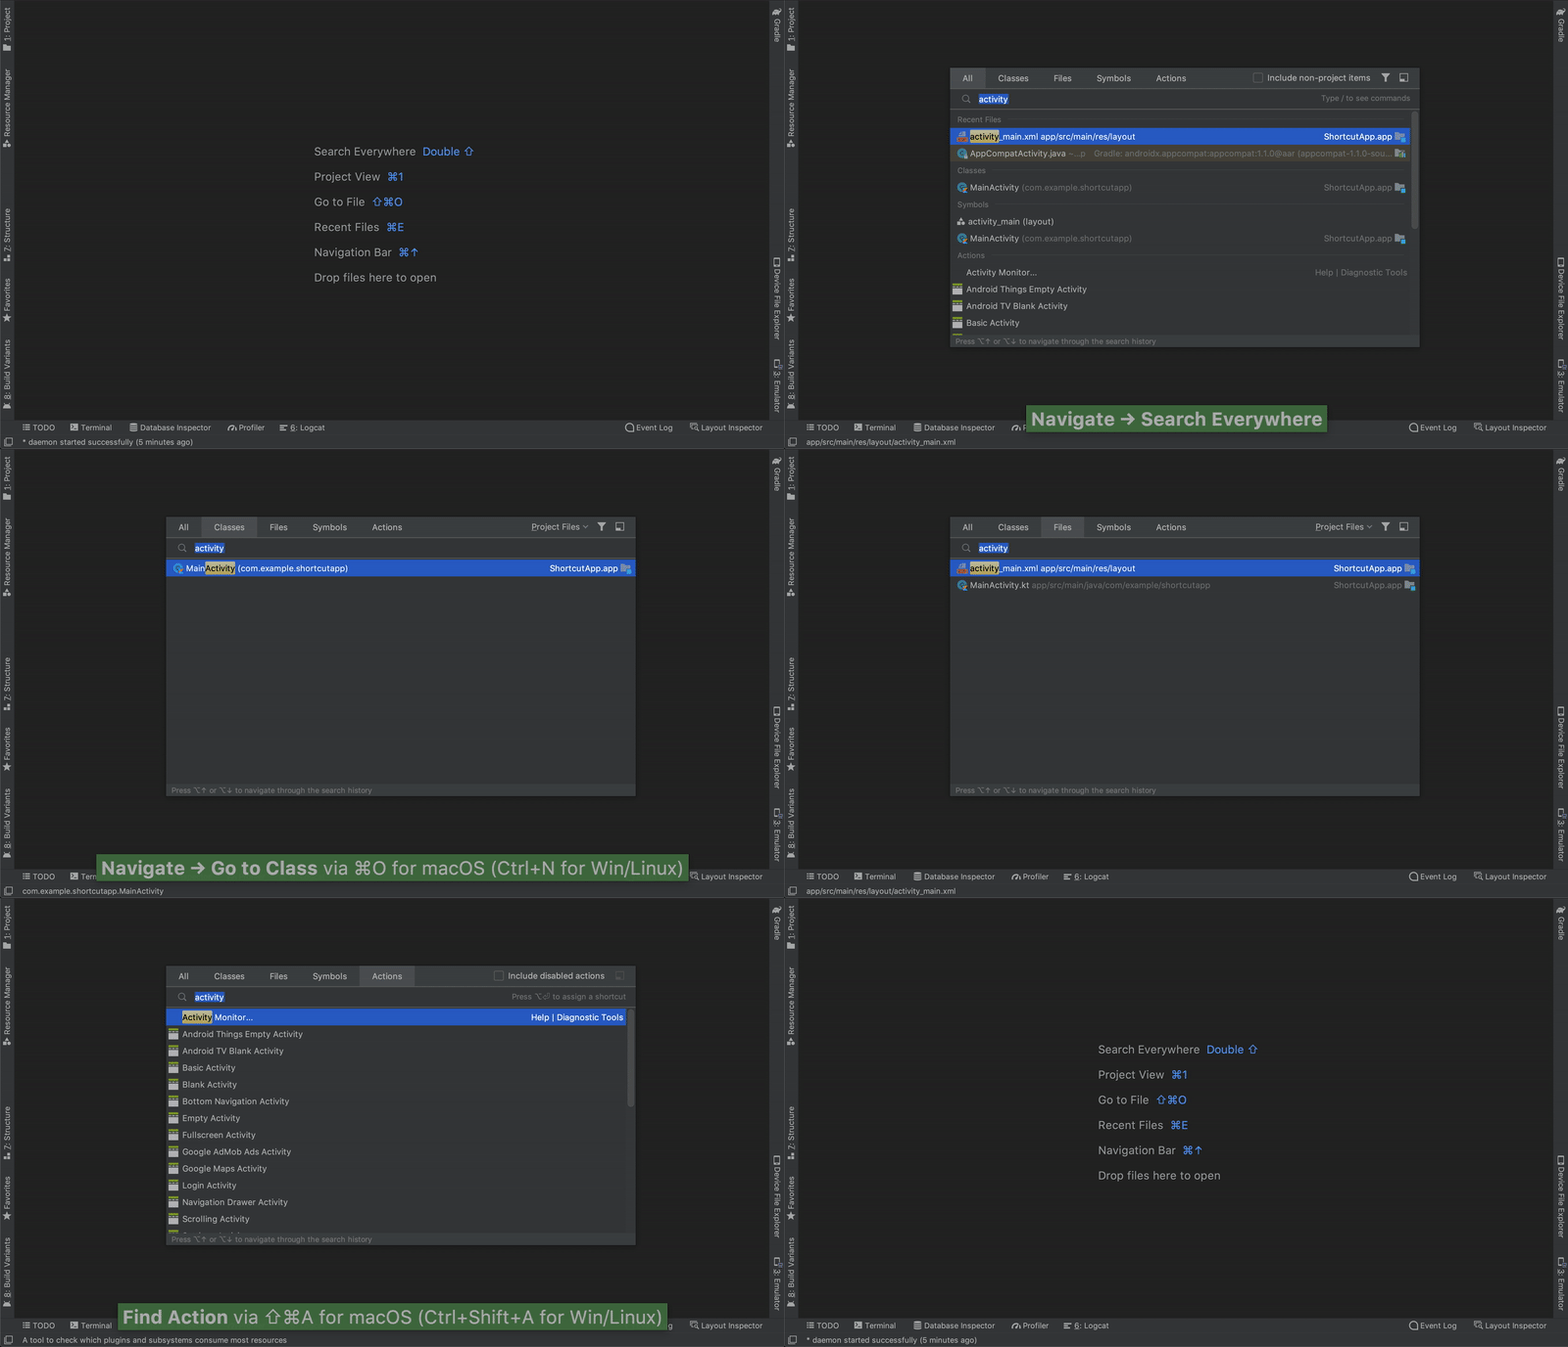
Specific search shortcuts are self-explanatory:
ACTION SEARCH
(macOS: cmd + shift + A Windows/Linux: control + shift + A) – preferences, commands, panels, etc.
CLASS SEARCH
(macOS: cmd + O letter Windows/Linux: ctrl + N) – Kotlin and Java classes, interfaces, enums, etc.
FILE SEARCH
(macOS: cmd + shift + O letter Windows/Linux: ctrl + shift + N) – xml’s, drawables, values, so everything in res folder.
SYMBOL SEARCH
(macOS: cmd + alt + O letter Windows/Linux: ctrl + alt + shift + N)
Search / replace text within files — Day 3
To search through the content of your files you will need:
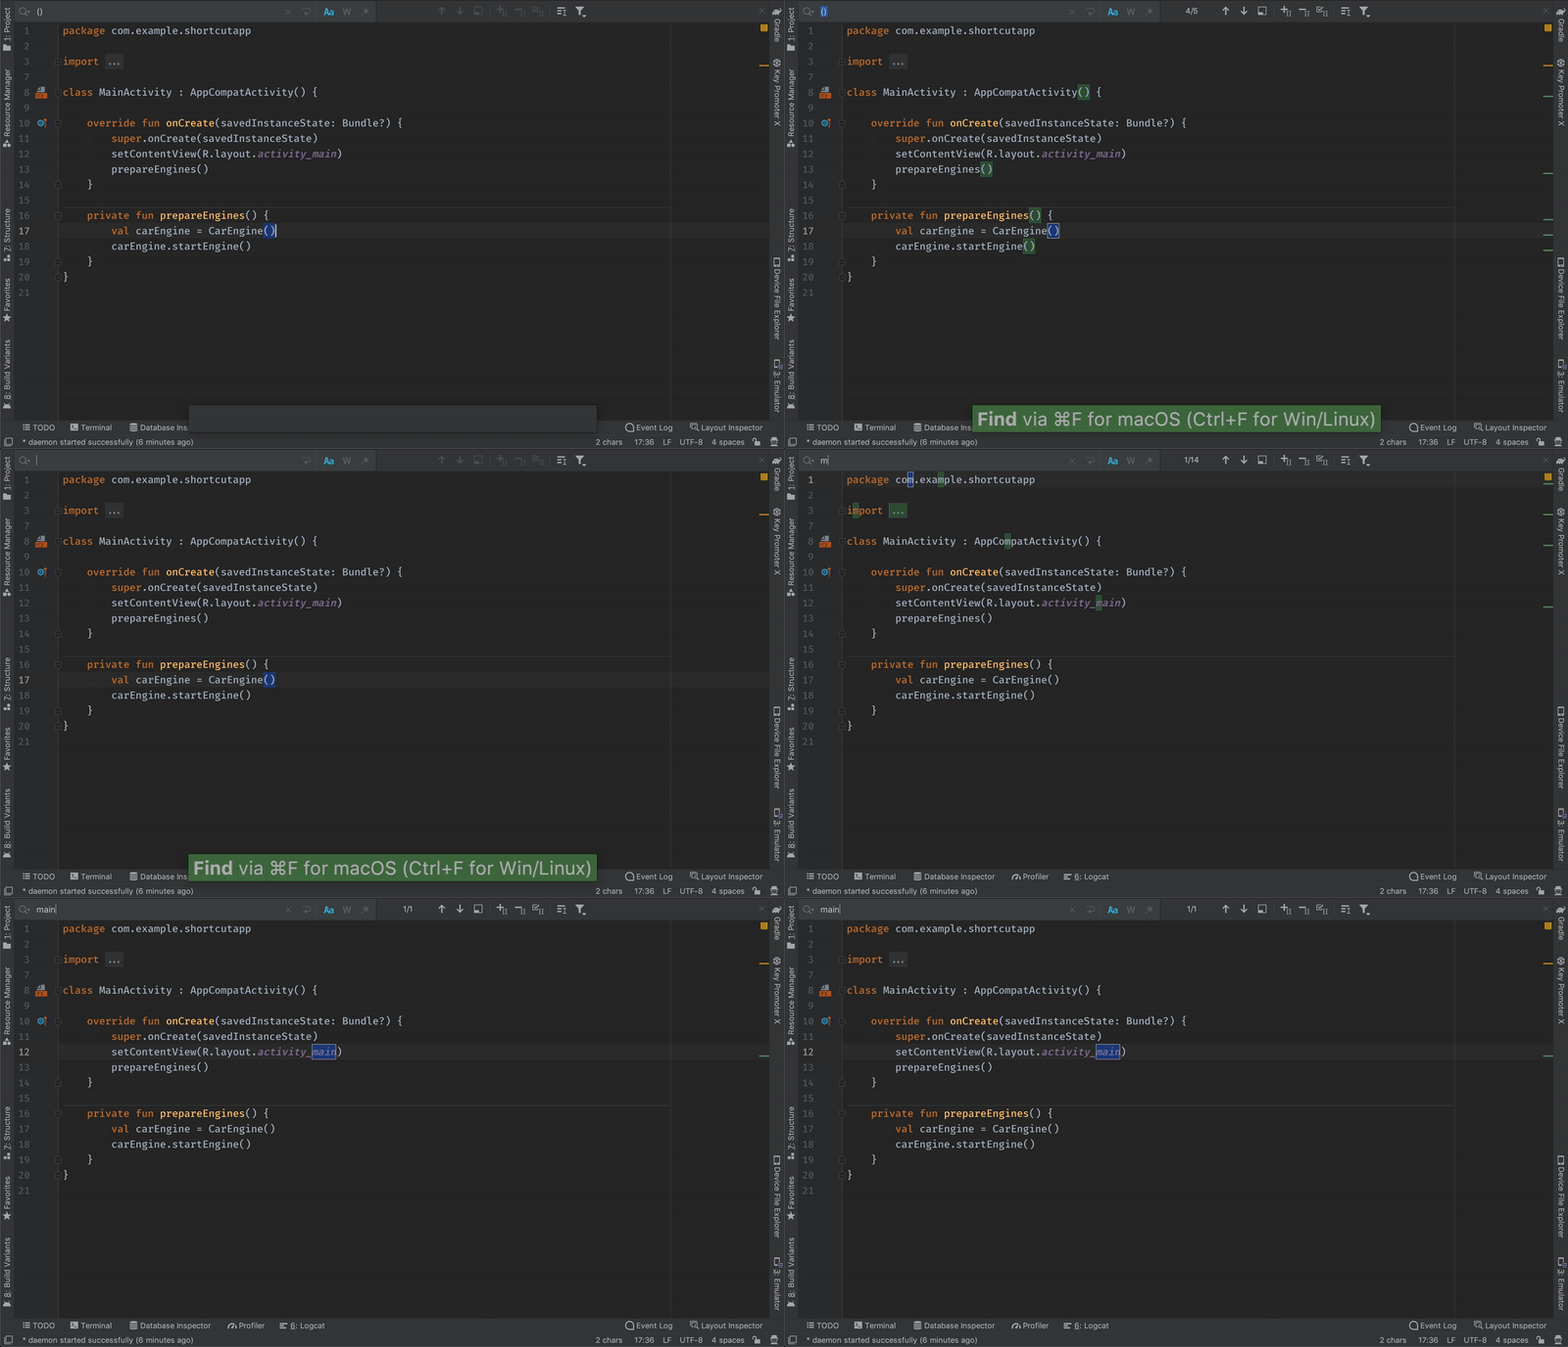
SEARCH IN CURRENT FILE
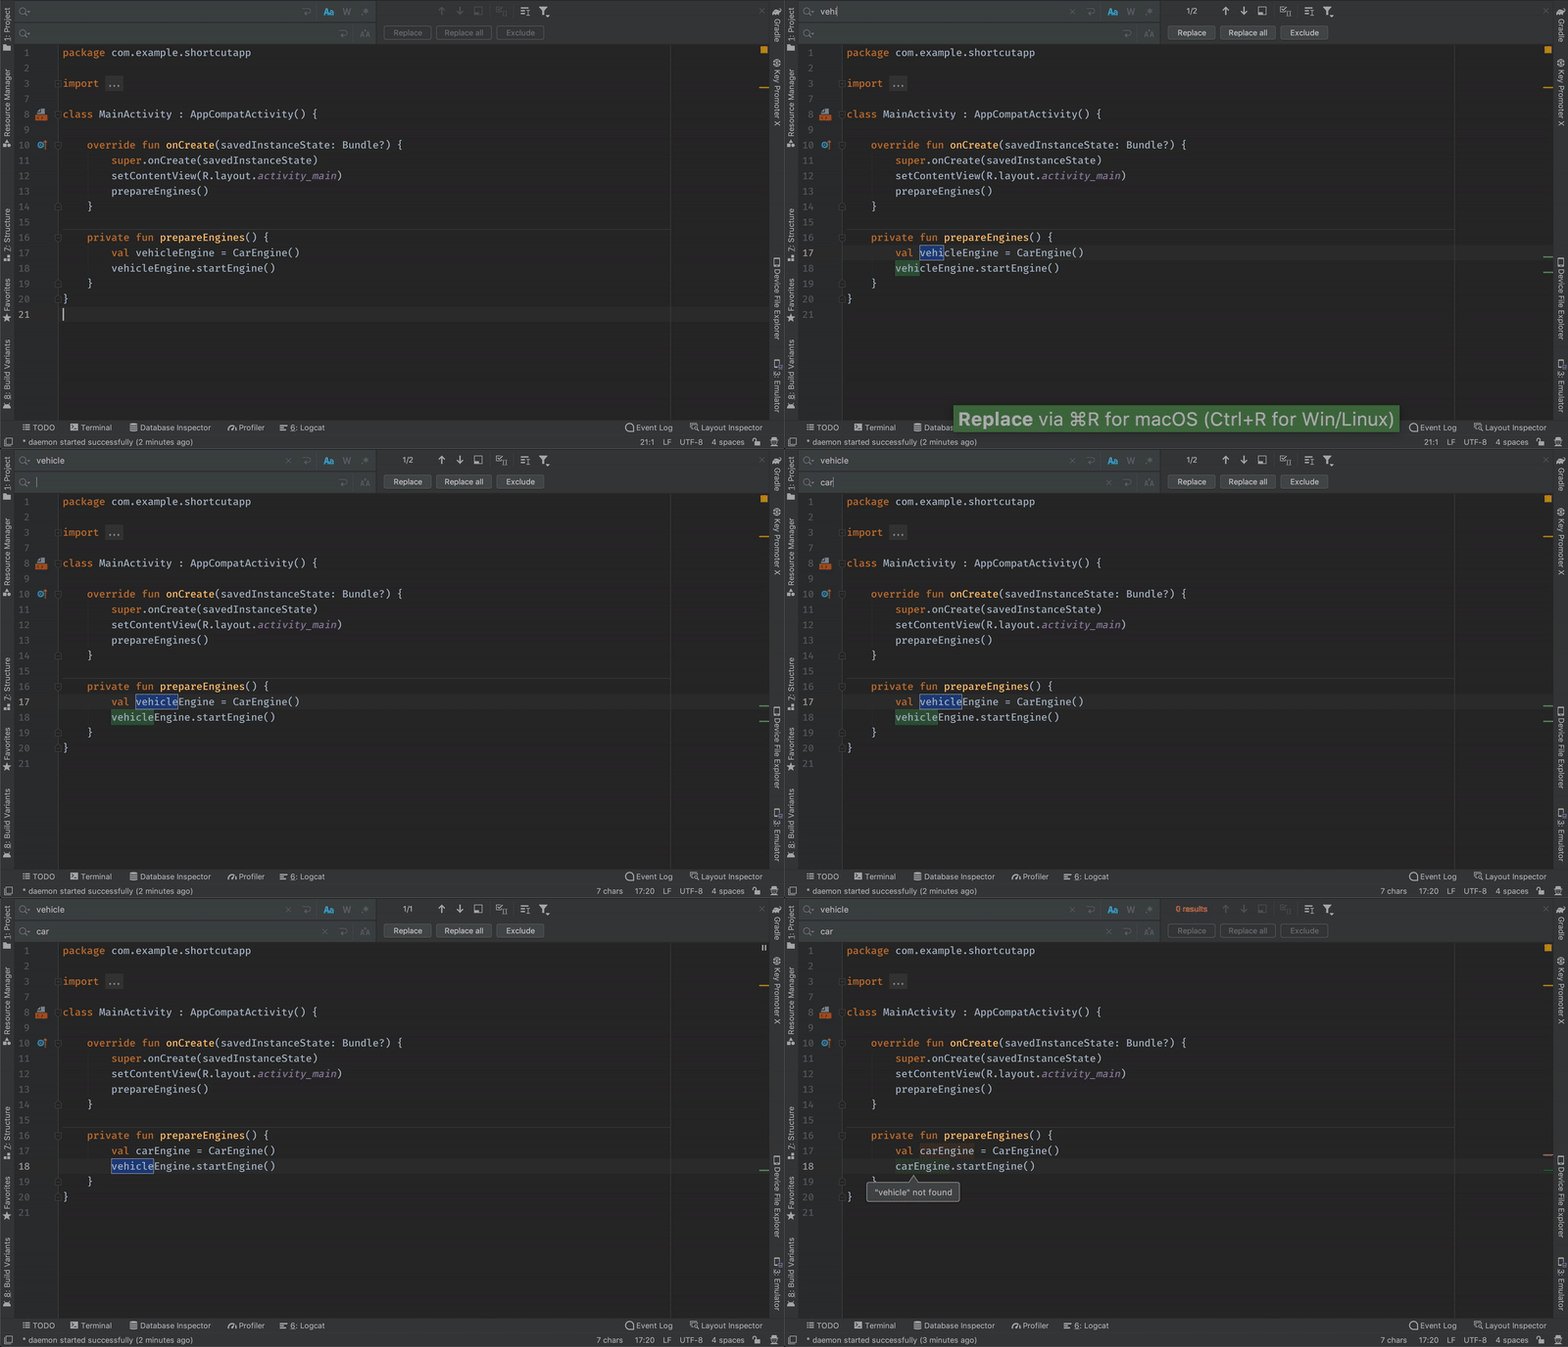
(macOS: cmd + F Windows/Linux: ctrl + F) – will search only within the opened file.
REPLACE IN FILE
(macOS: cmd + R Windows/Linux: ctrl + R) – allow modifying searched phrase type.
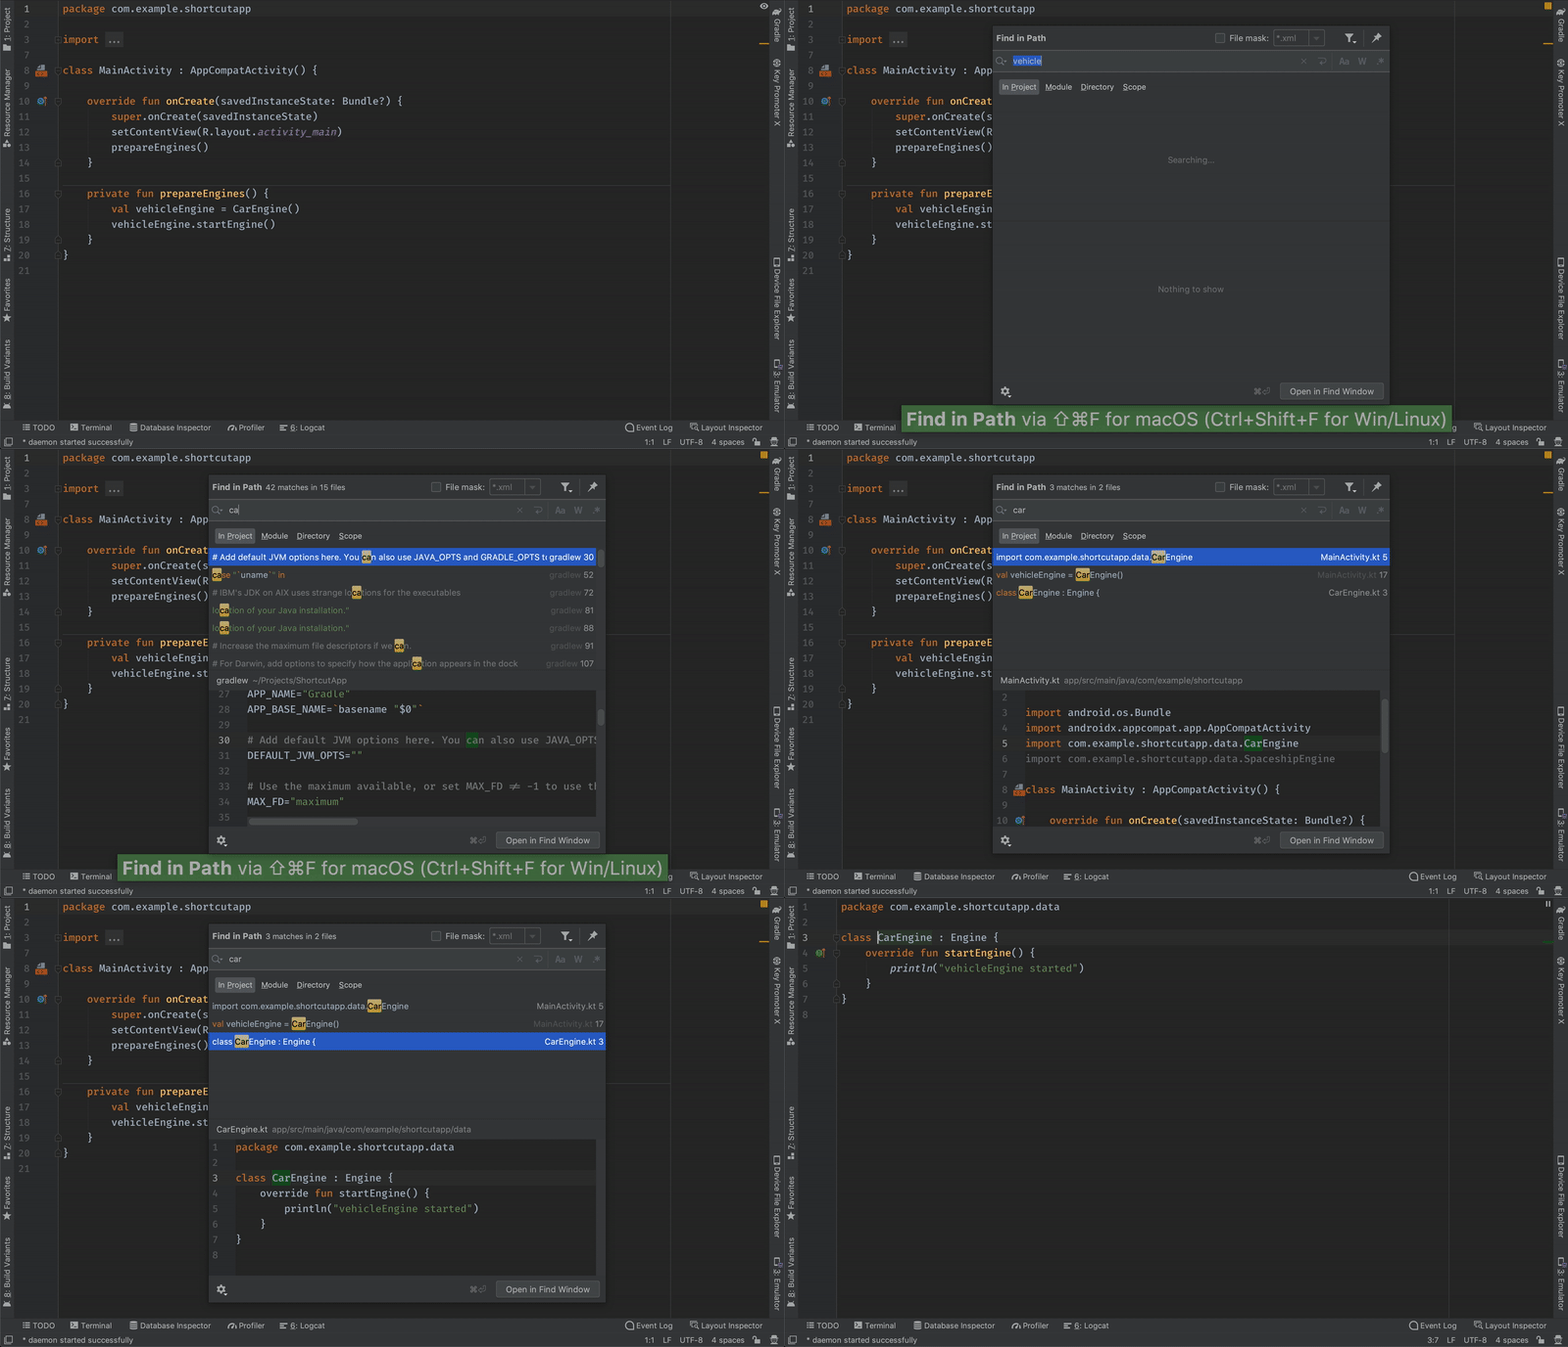
SEARCH IN PATH
(macOS: cmd + shift + F Windows/Linux: ctrl + shift + F) – will go through the content of each file. By default, it’s looking inside the whole project, but you can narrow down your searches to Module, Directory or Scope. If you’re looking for files with that popup, and you’re not seeing results, check if you’ve picked the right scope. The same rules apply to Replace in Path.
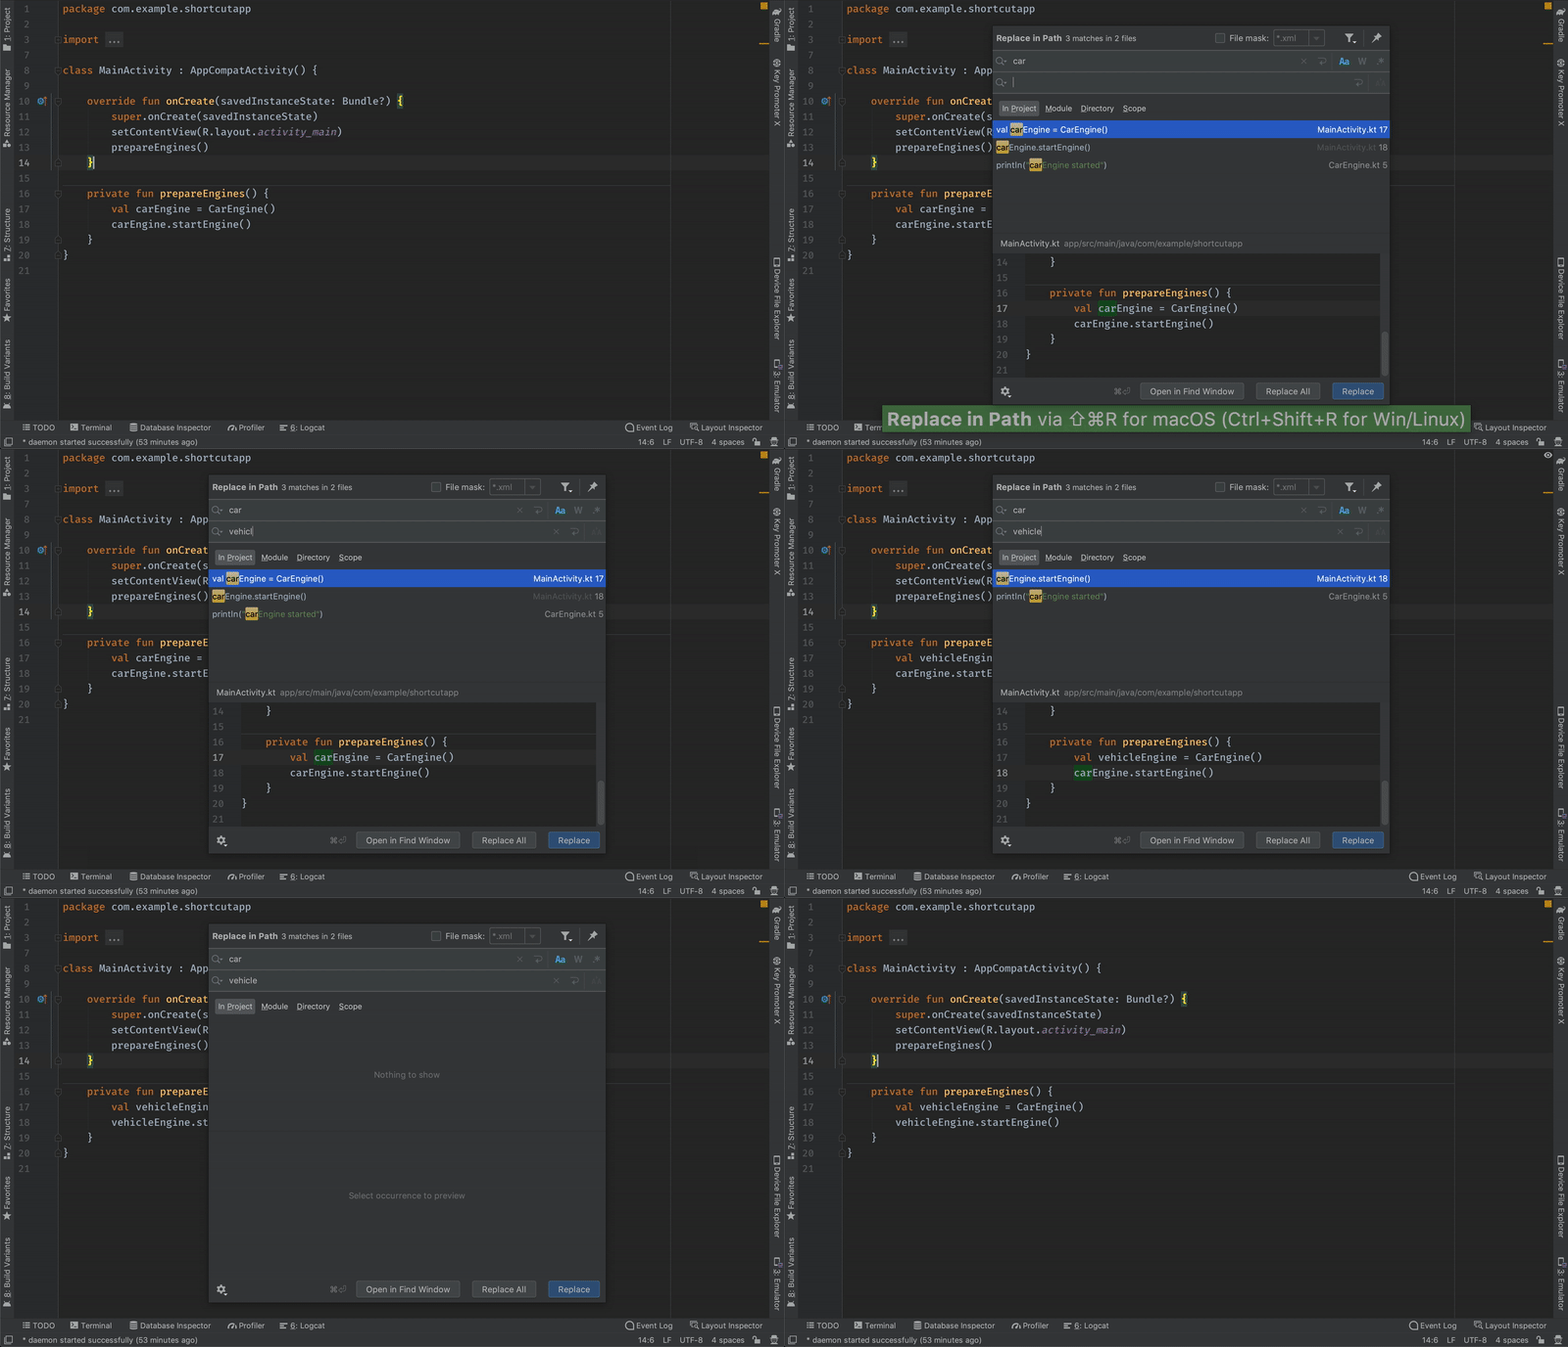
REPLACE IN PATH
(macOS: cmd + shift + R Windows/Linux: ctrl + shift + R) – allow modifying searched instances within the content of files.
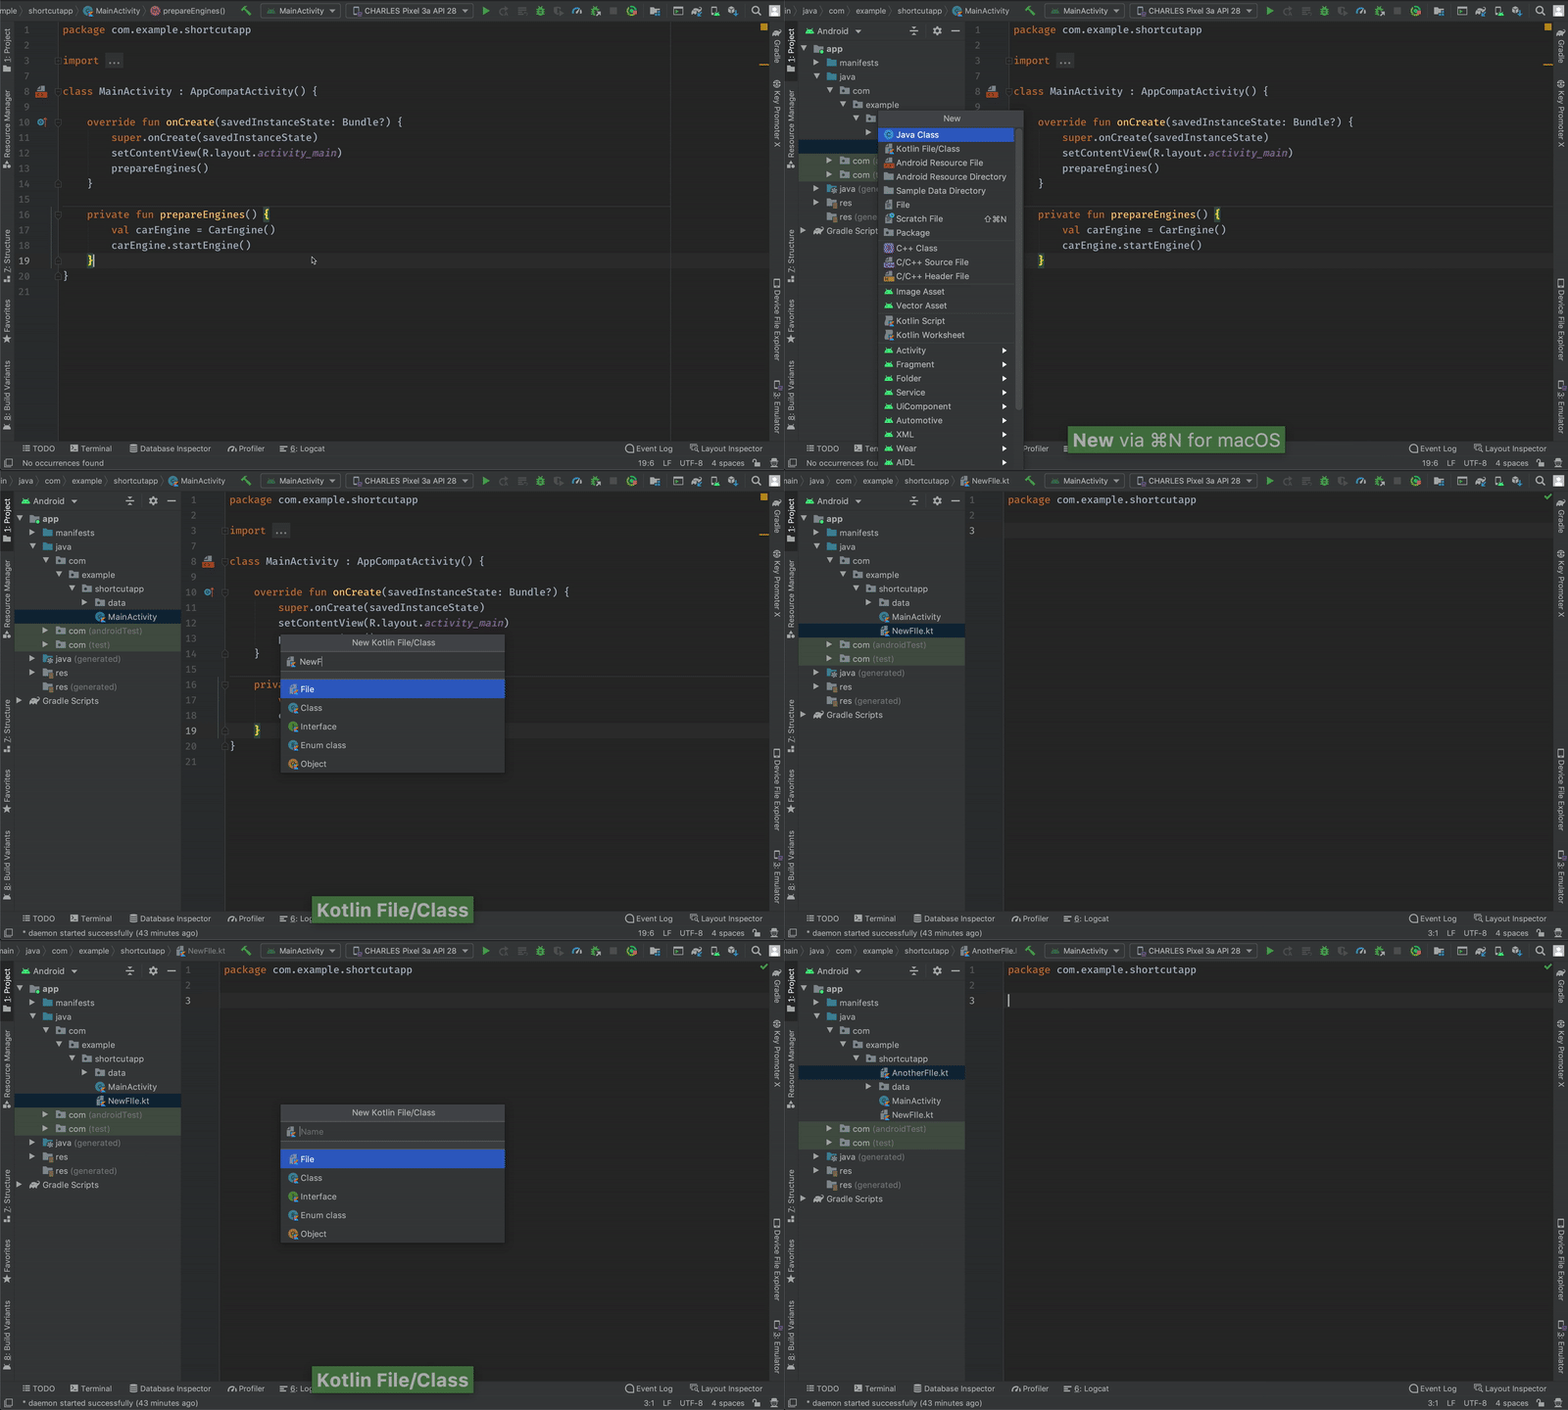
CREATE FILE WITH CONTEXTUAL ELEMENT
(macOS: cmd + N Windows/Linux: alt + insert) – needed focus on the project tab or navigation bar in order to work.
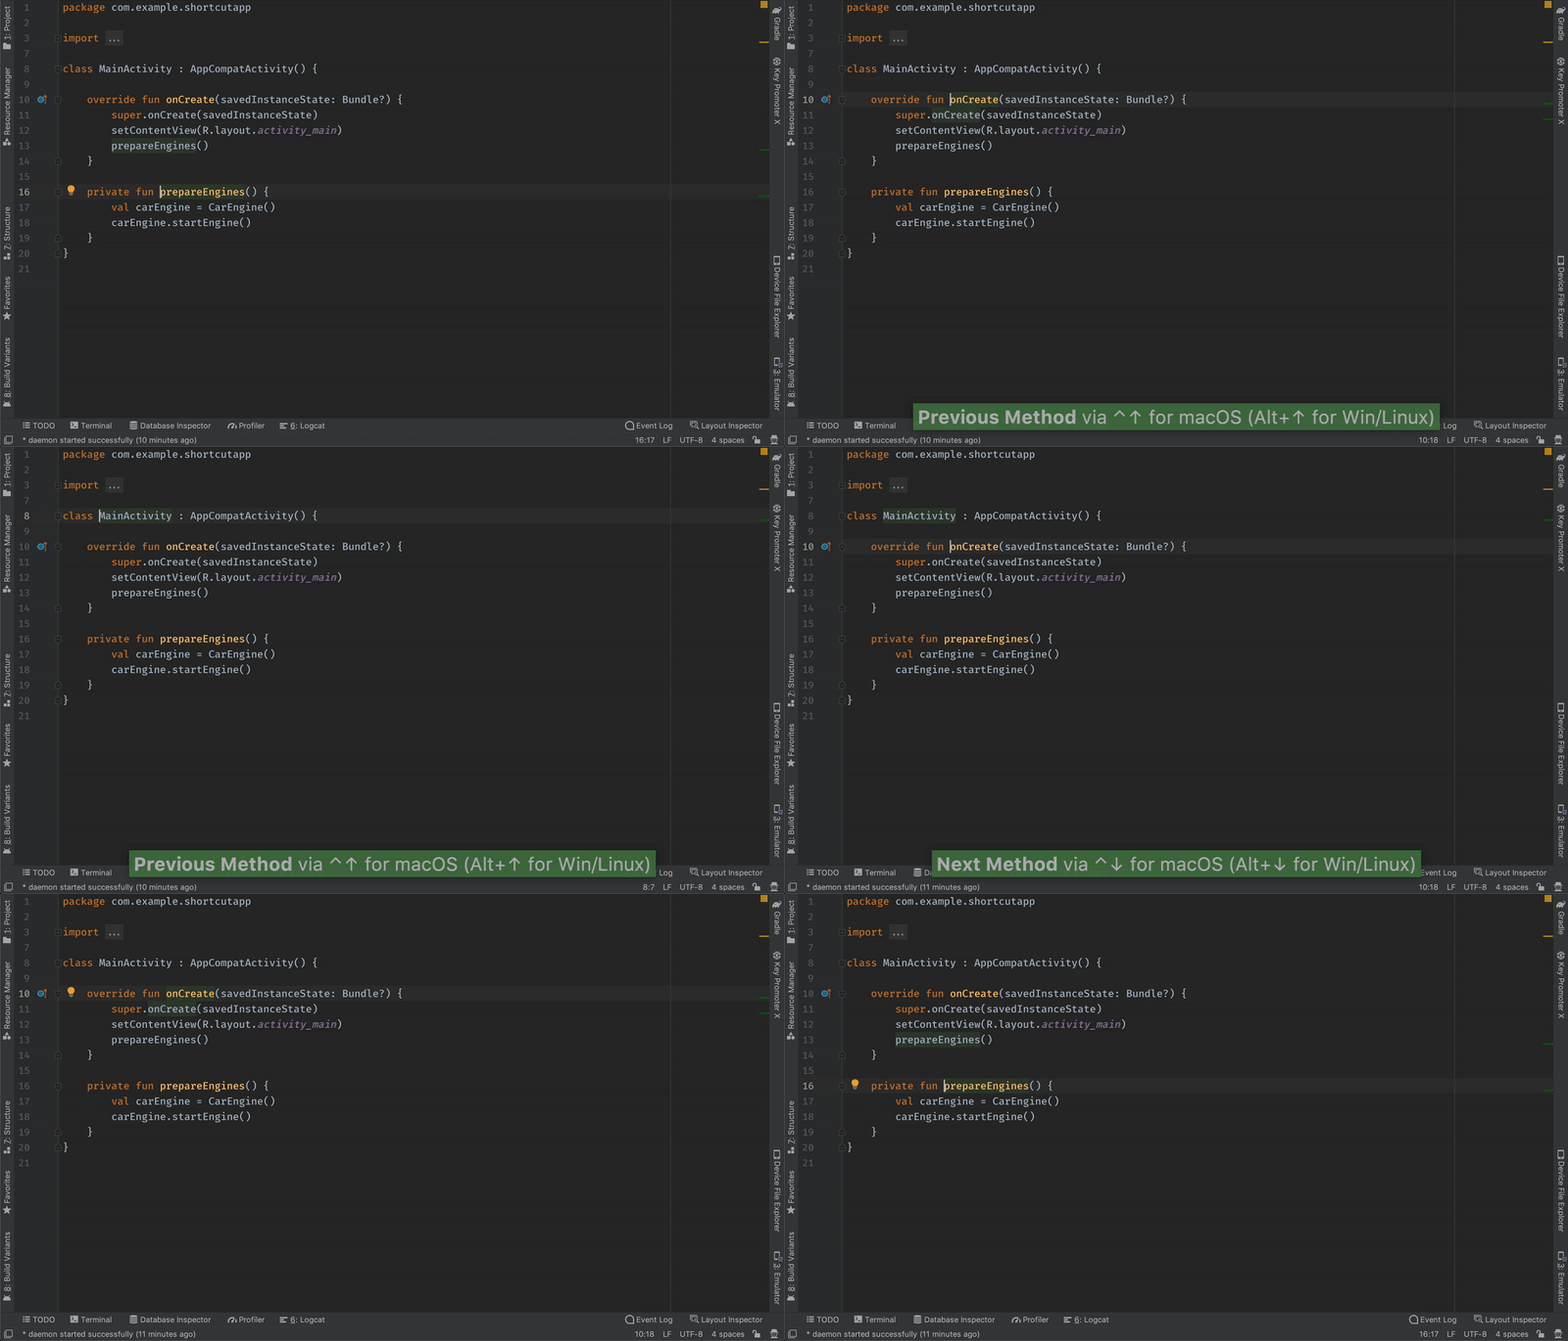
(macOS: ctrl + up arrow or down arrow Windows/Linux: alt + up arrow or down arrow) – may clash with system shortcut on macOS, so you may need to reassign these. I made reassignment on system level for ctrl + opt + cmd + arrows.
MOVE CODE
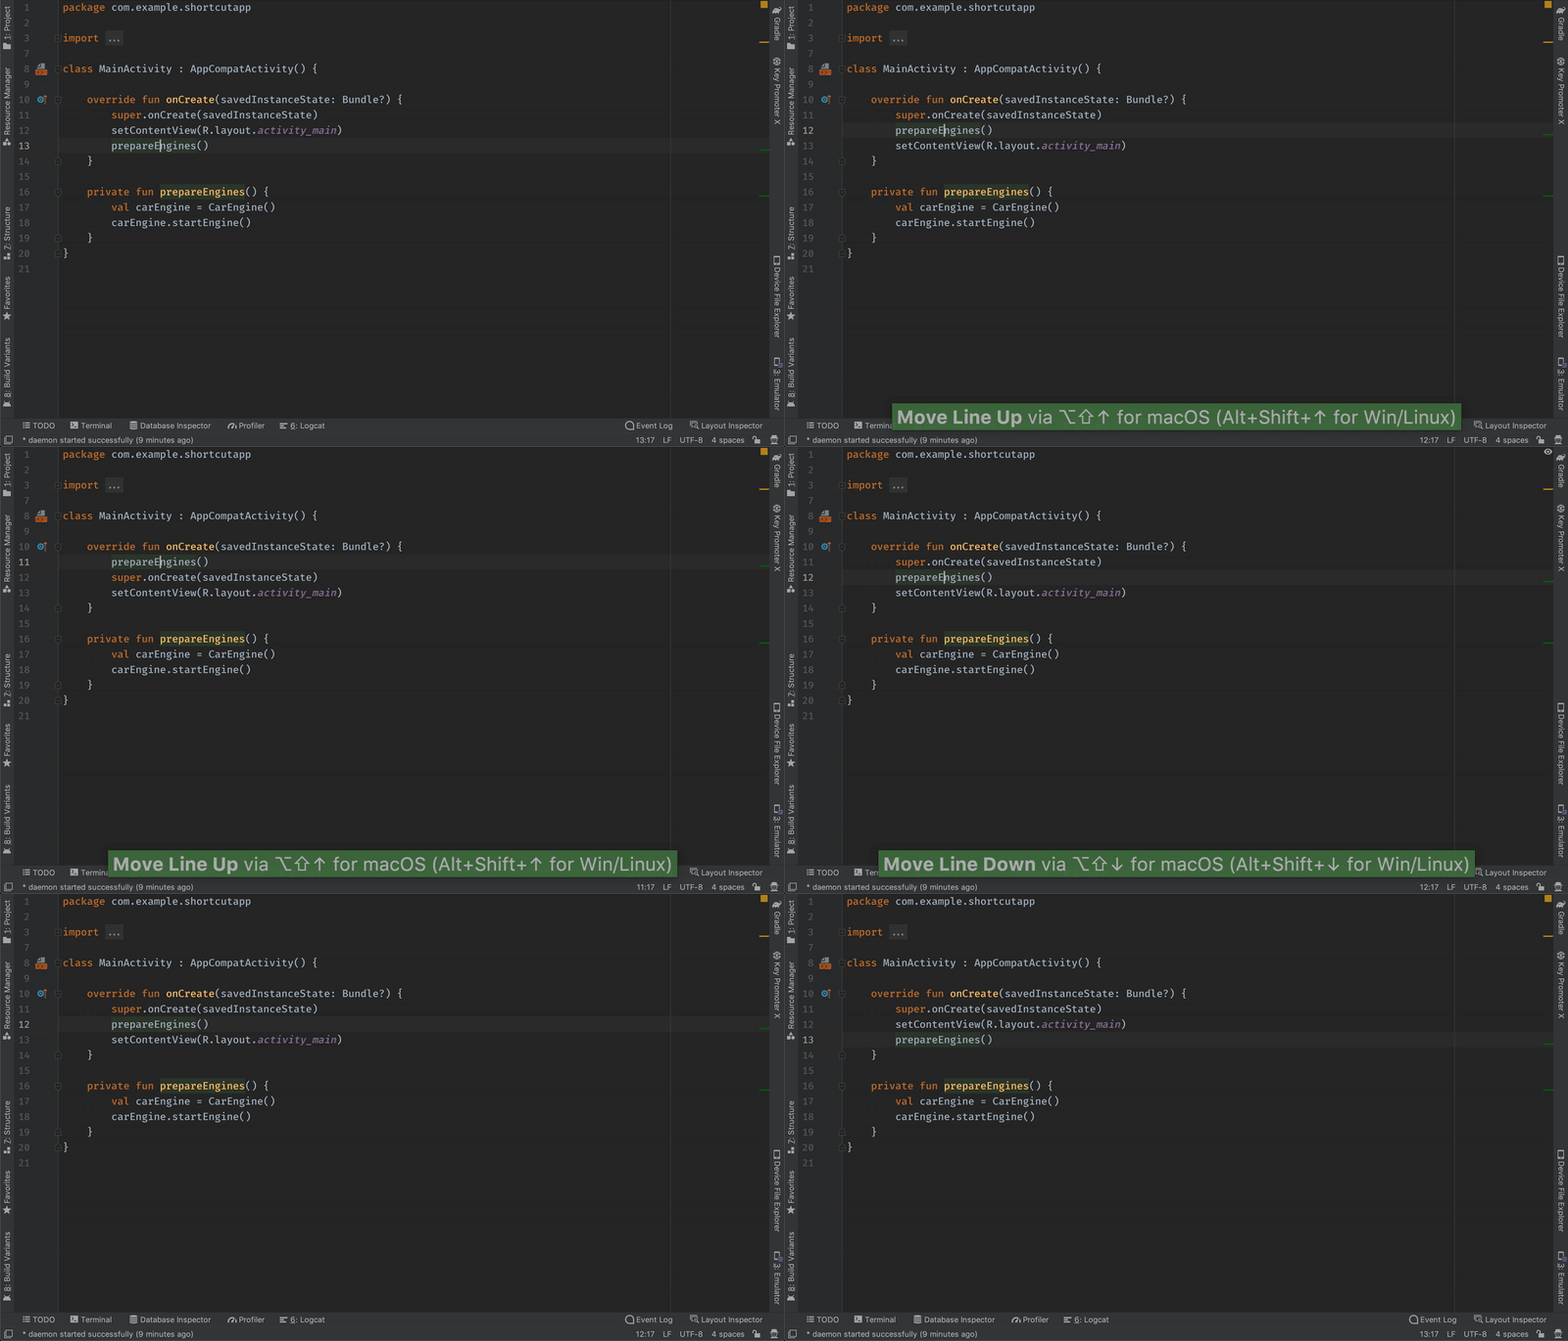
(macOS: alt + shift + up arrow or down arrow Windows/Linux: ctrl + shift + up arrow or down arrow) – on selected lines or a whole line beneath the cursor.
INTELLIGENT SELECTION
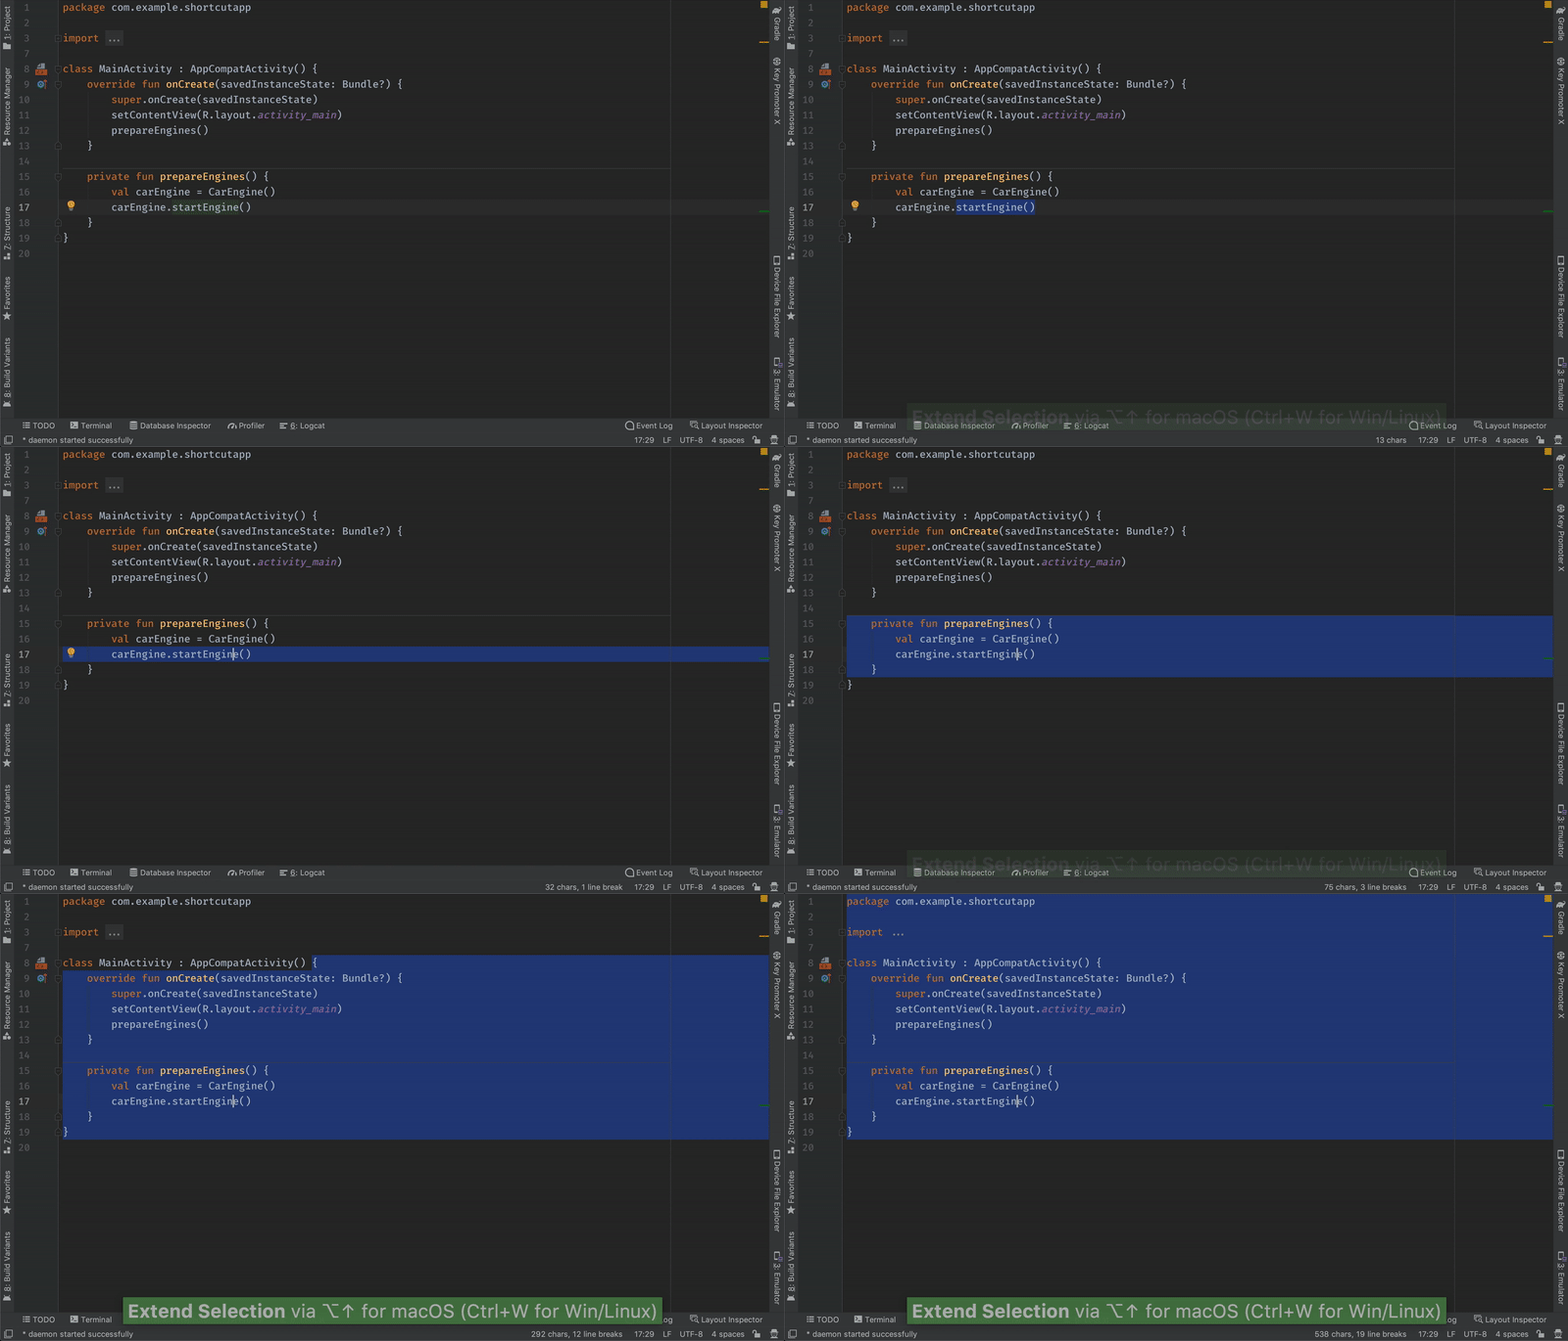
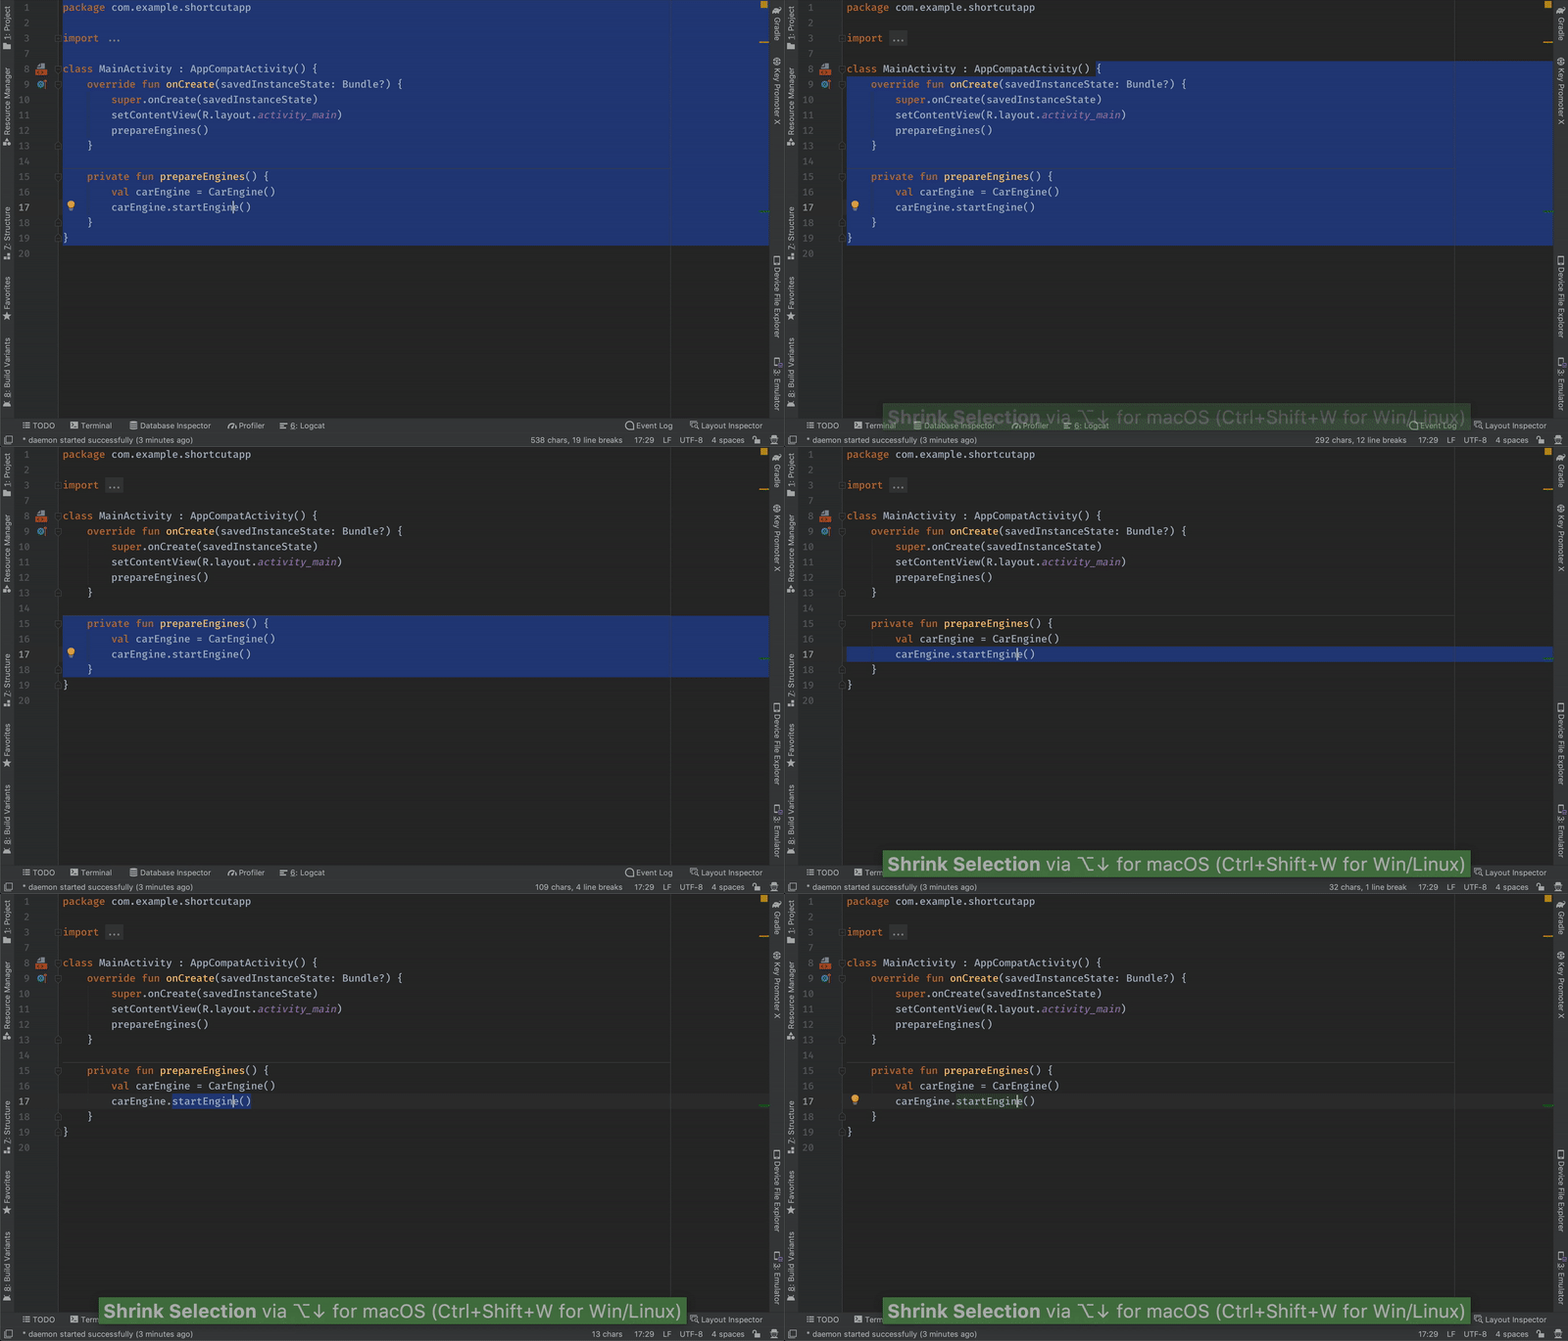
EXTEND: (macOS: alt + up arrow Windows/Linux: extend: ctrl + W ) or SHRINK: (macOS: alt + down arrow Windows/Linux: ctrl + shift + W)
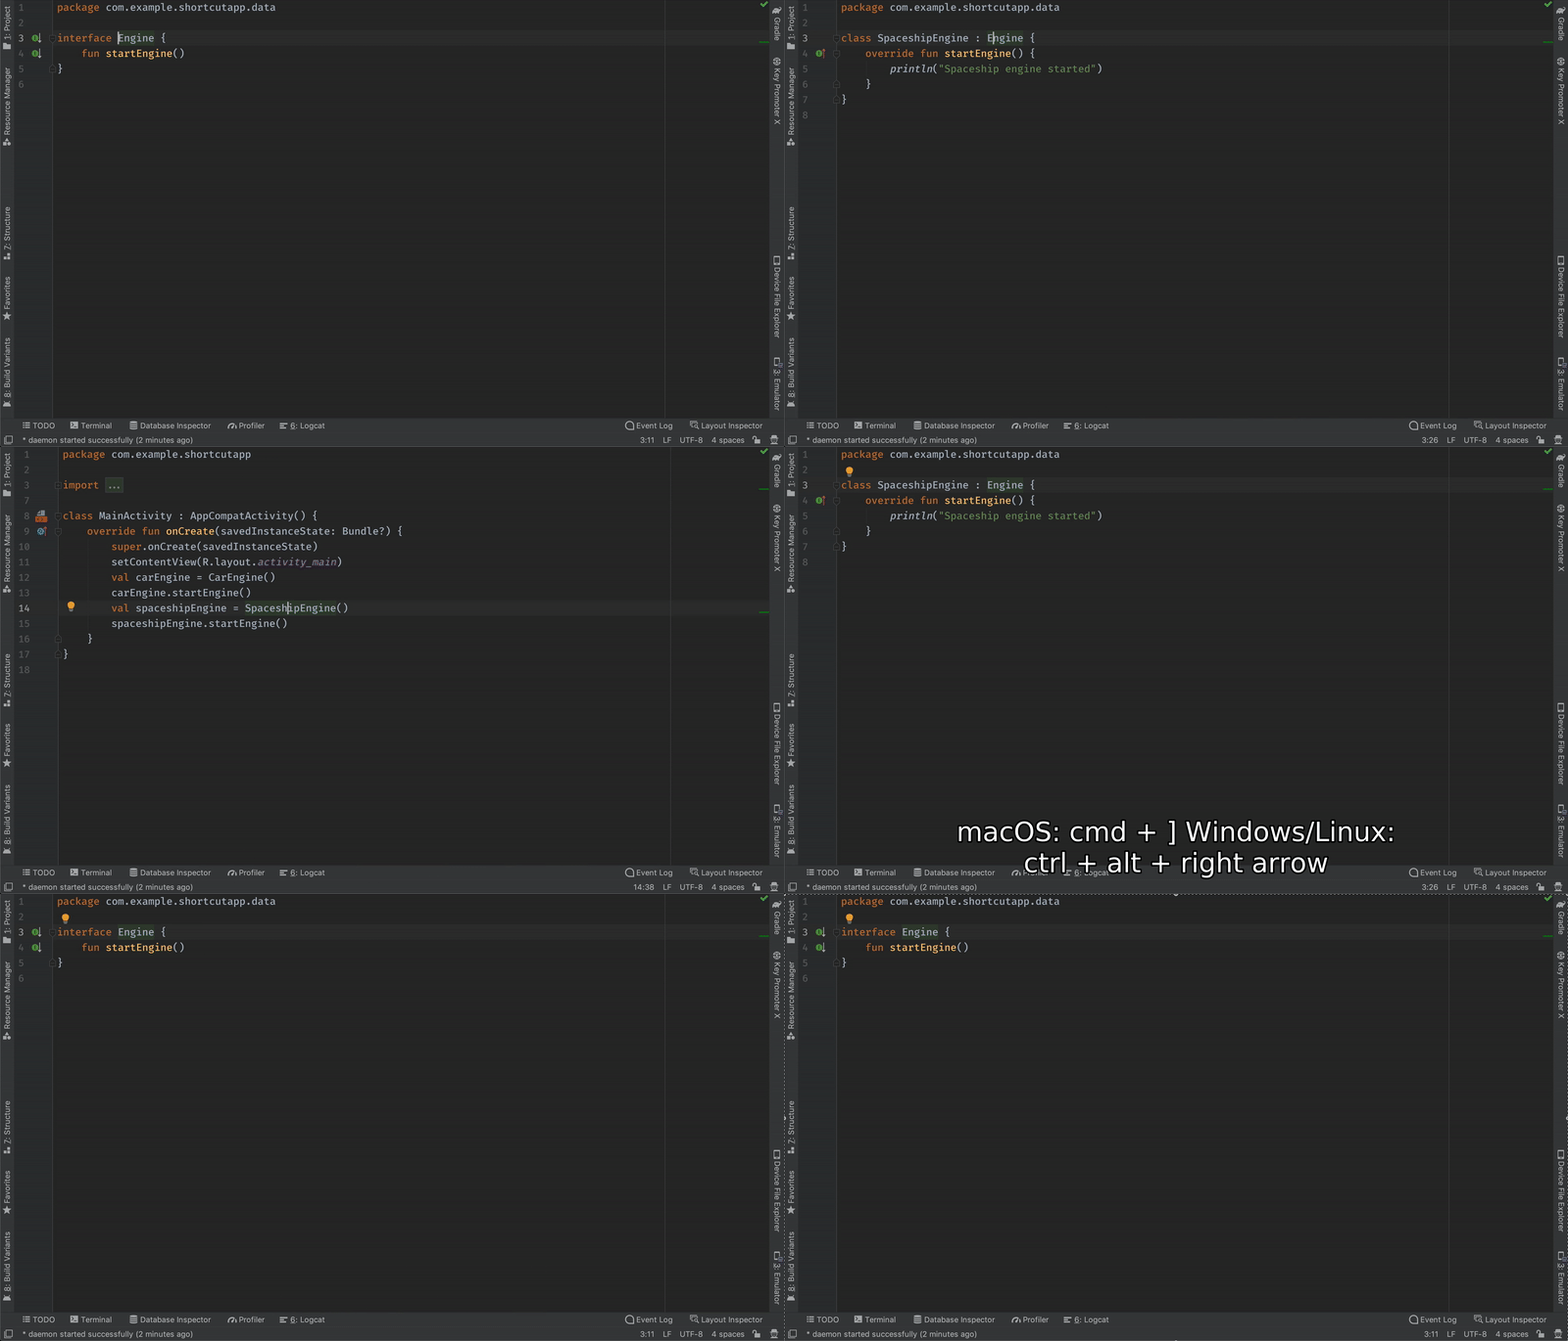
Let you go back (macOS: cmd + [ Windows/Linux: ctrl + alt + left arrow) and forth (macOS: cmd + ] Windows/Linux: ctrl + alt + right arrow) within the last location in the editor.
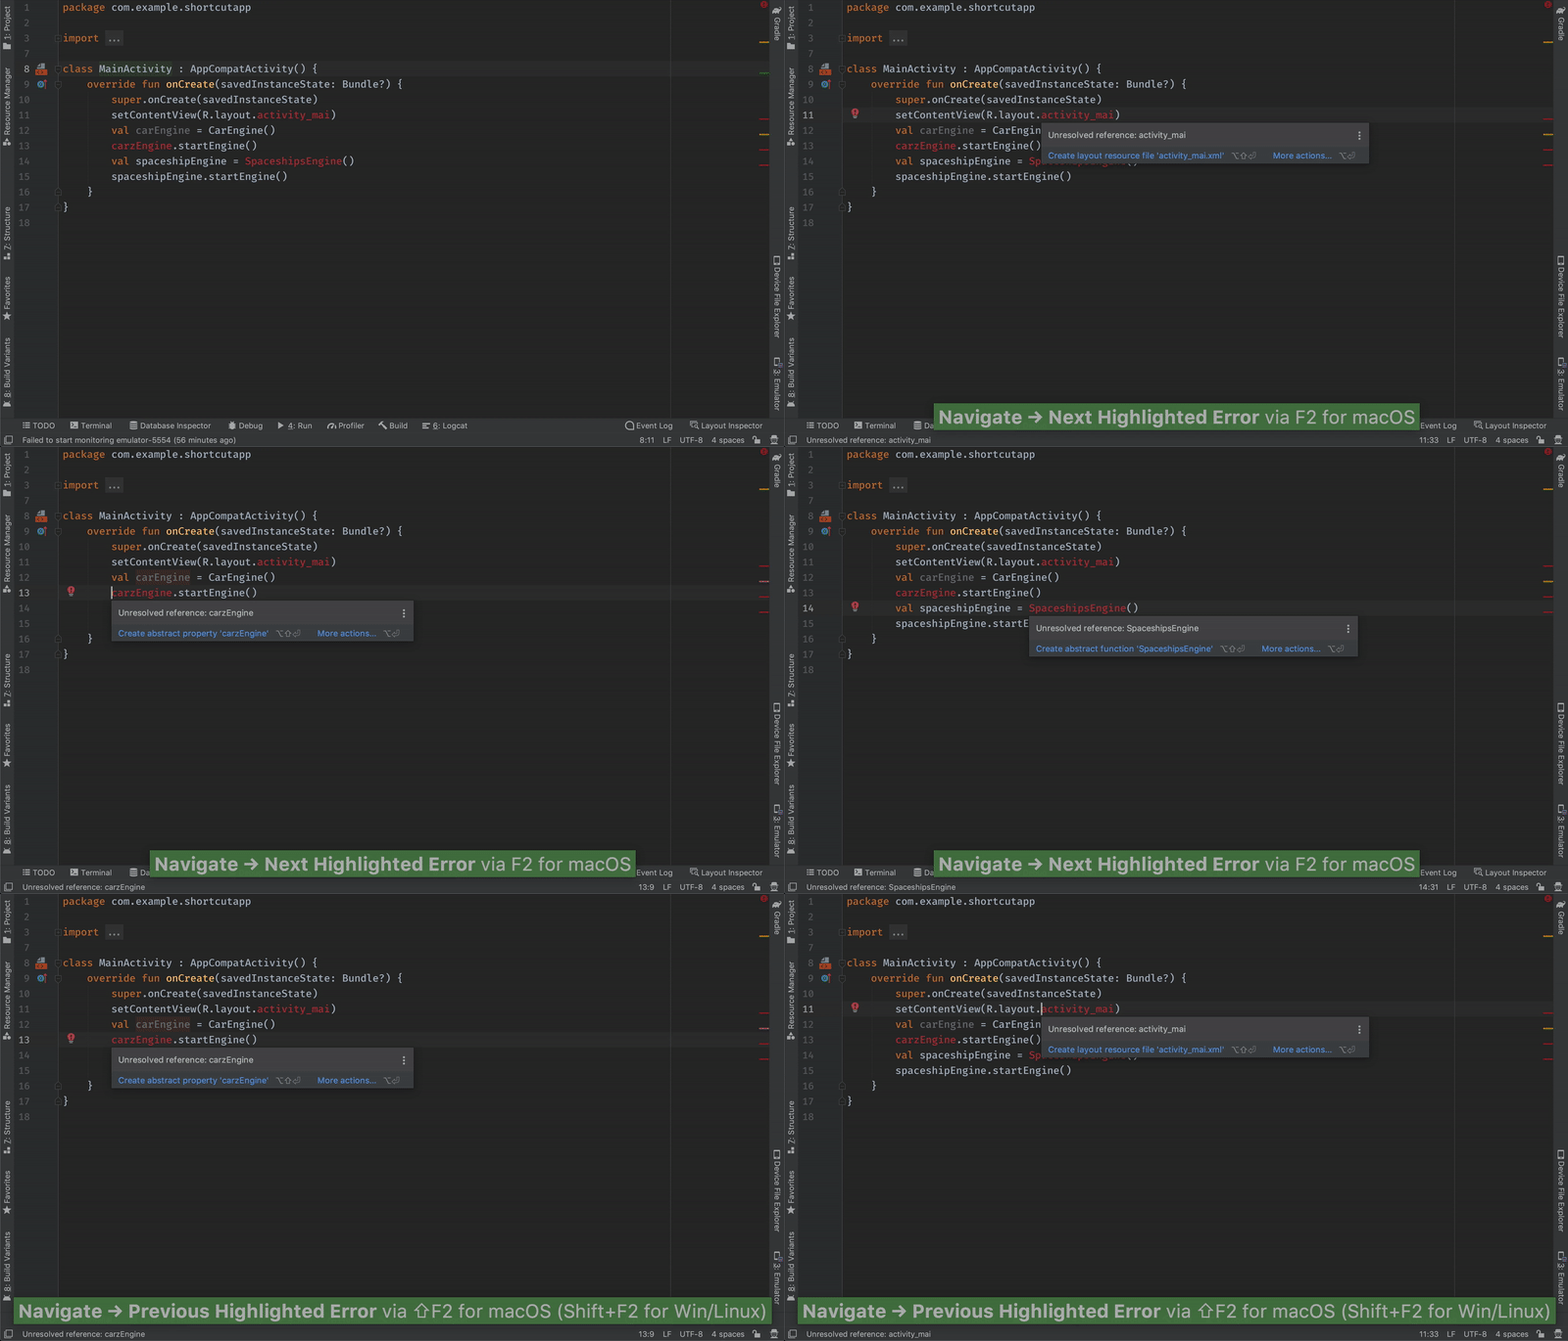
GO TO ERROR
NEXT ERROR: (macOS/Windows/Linux: F2) or PREVIOUS ERROR (macOS/Windows/Linux: shift + F2).
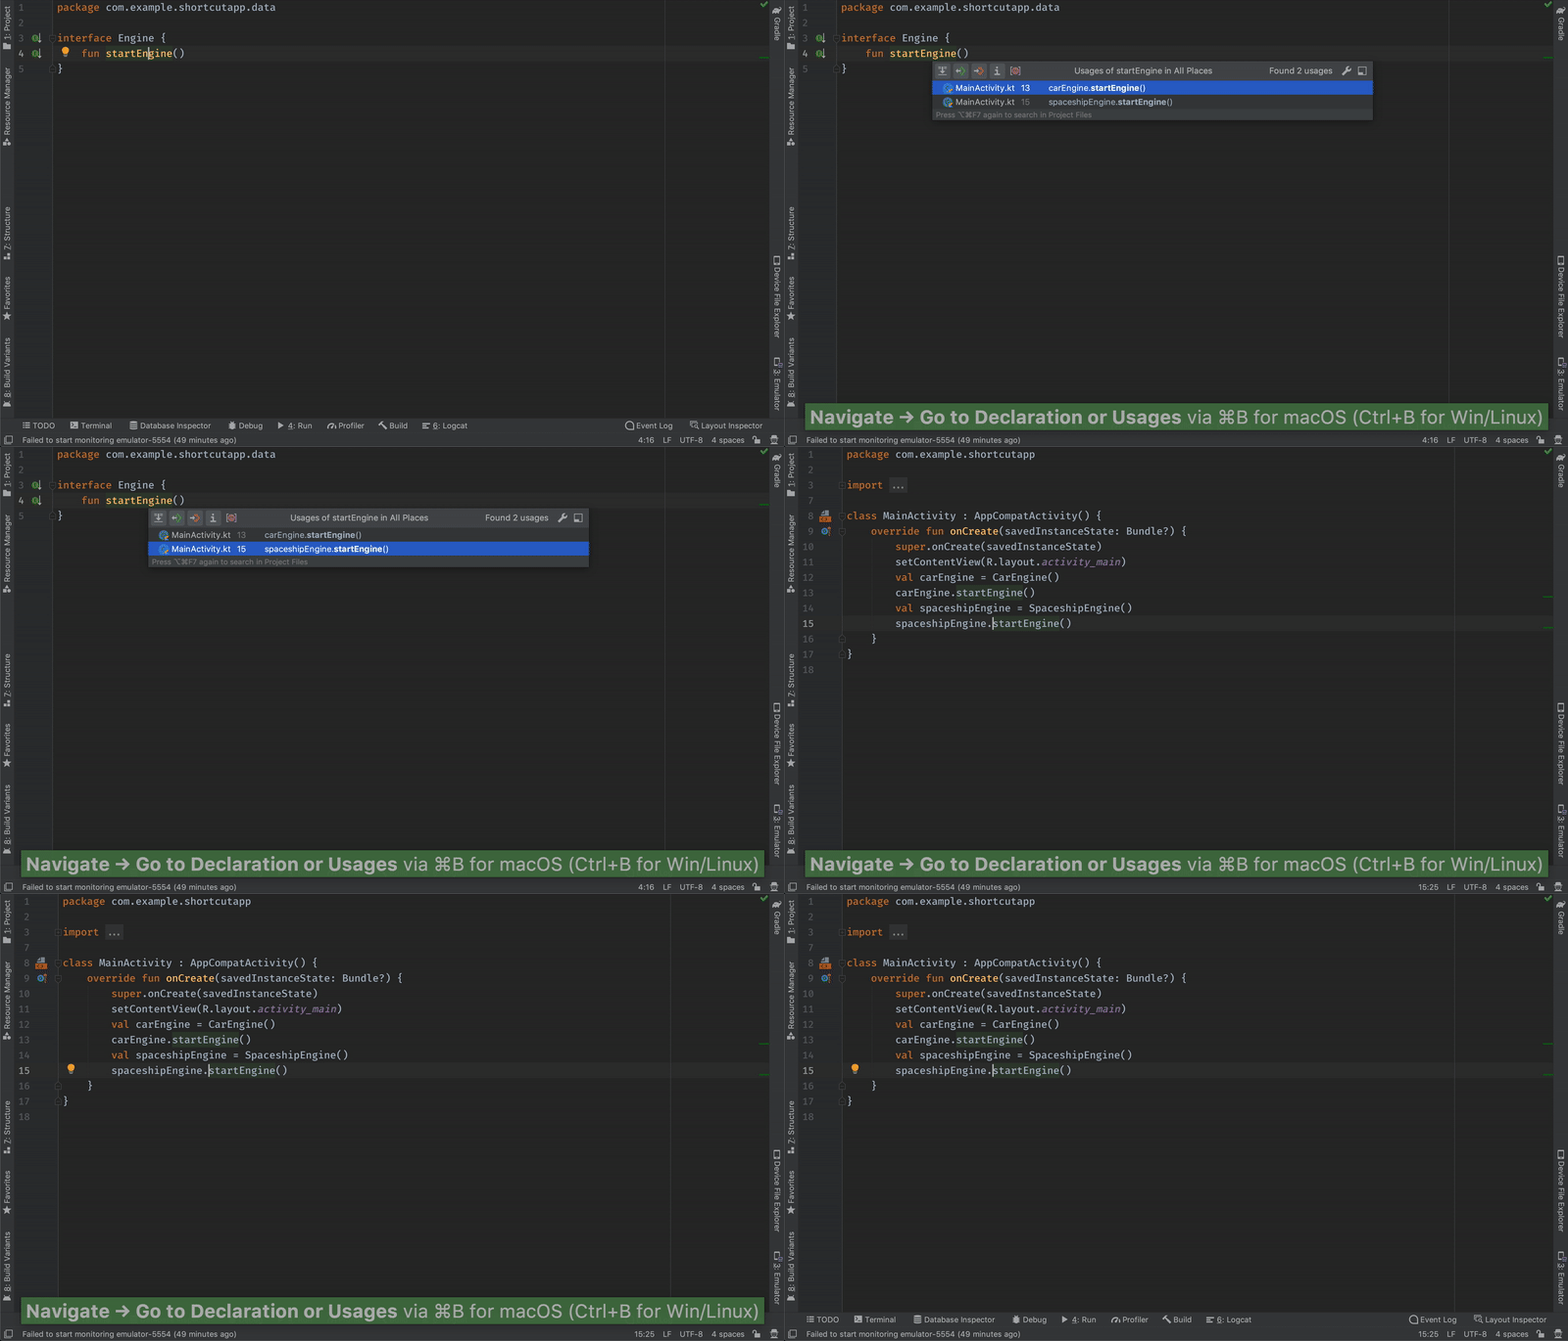
GO TO DECLARATION / SHOW USAGES
(macOS: cmd + B Windows/Linux: ctrl + B)
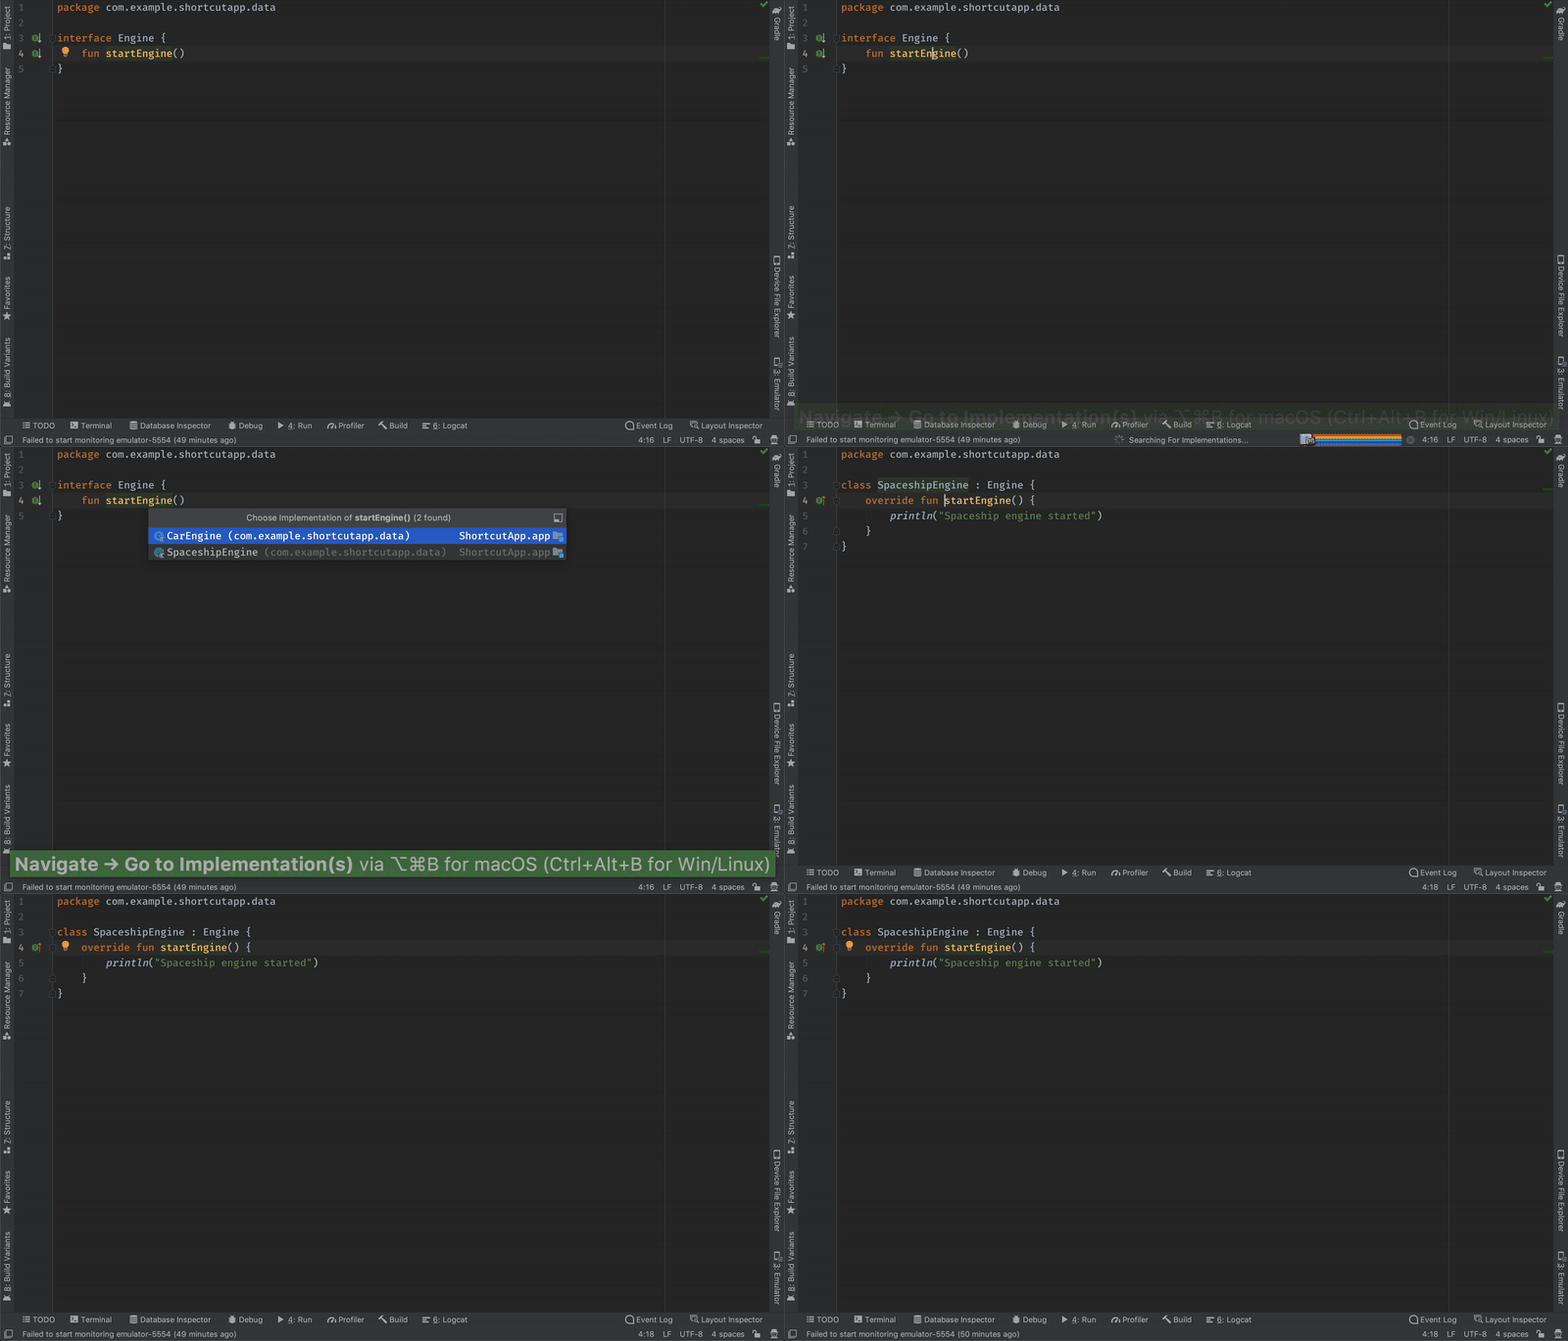
GO TO IMPLEMENTATION
(macOS: cmd + option + B Windows/Linux: ctrl + alt + B)
QUICK DEFINITION POP-UP
(macOS: alt + space Windows/Linux: ctrl + shift + I)
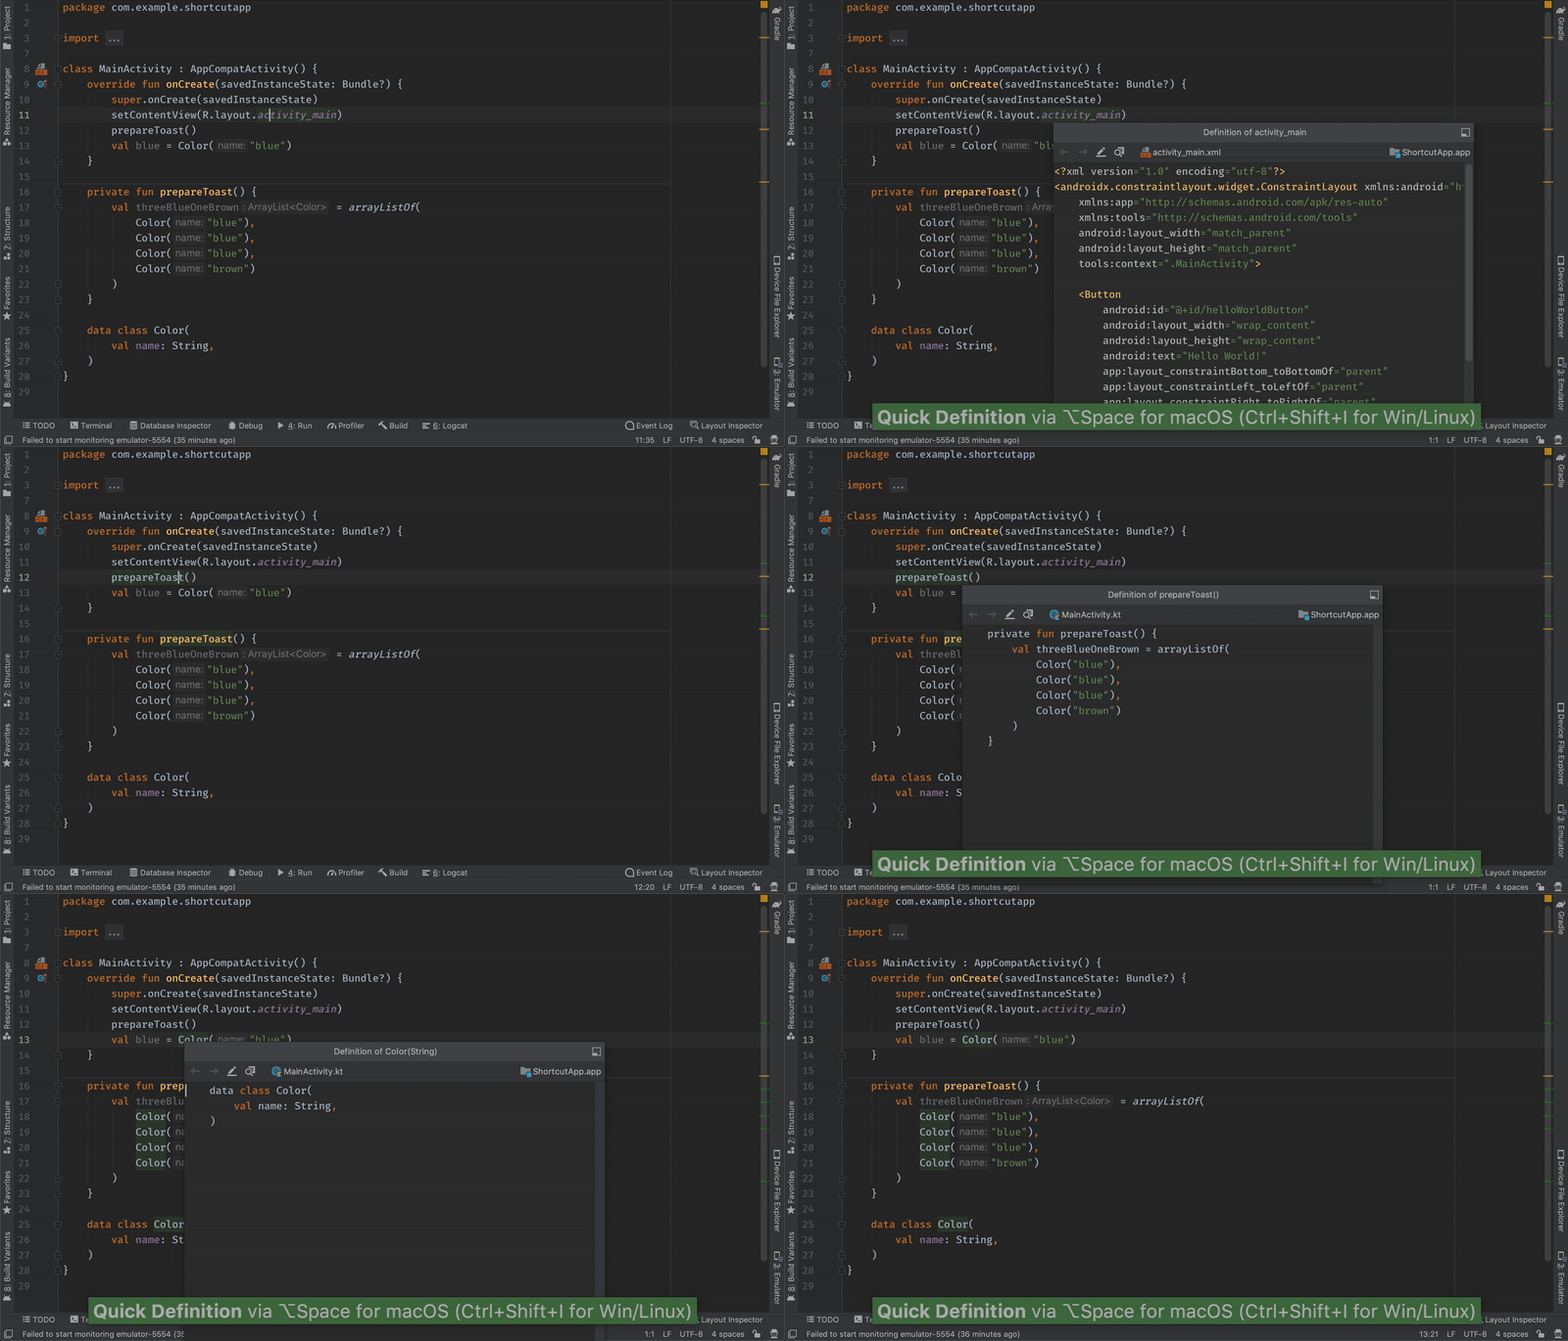
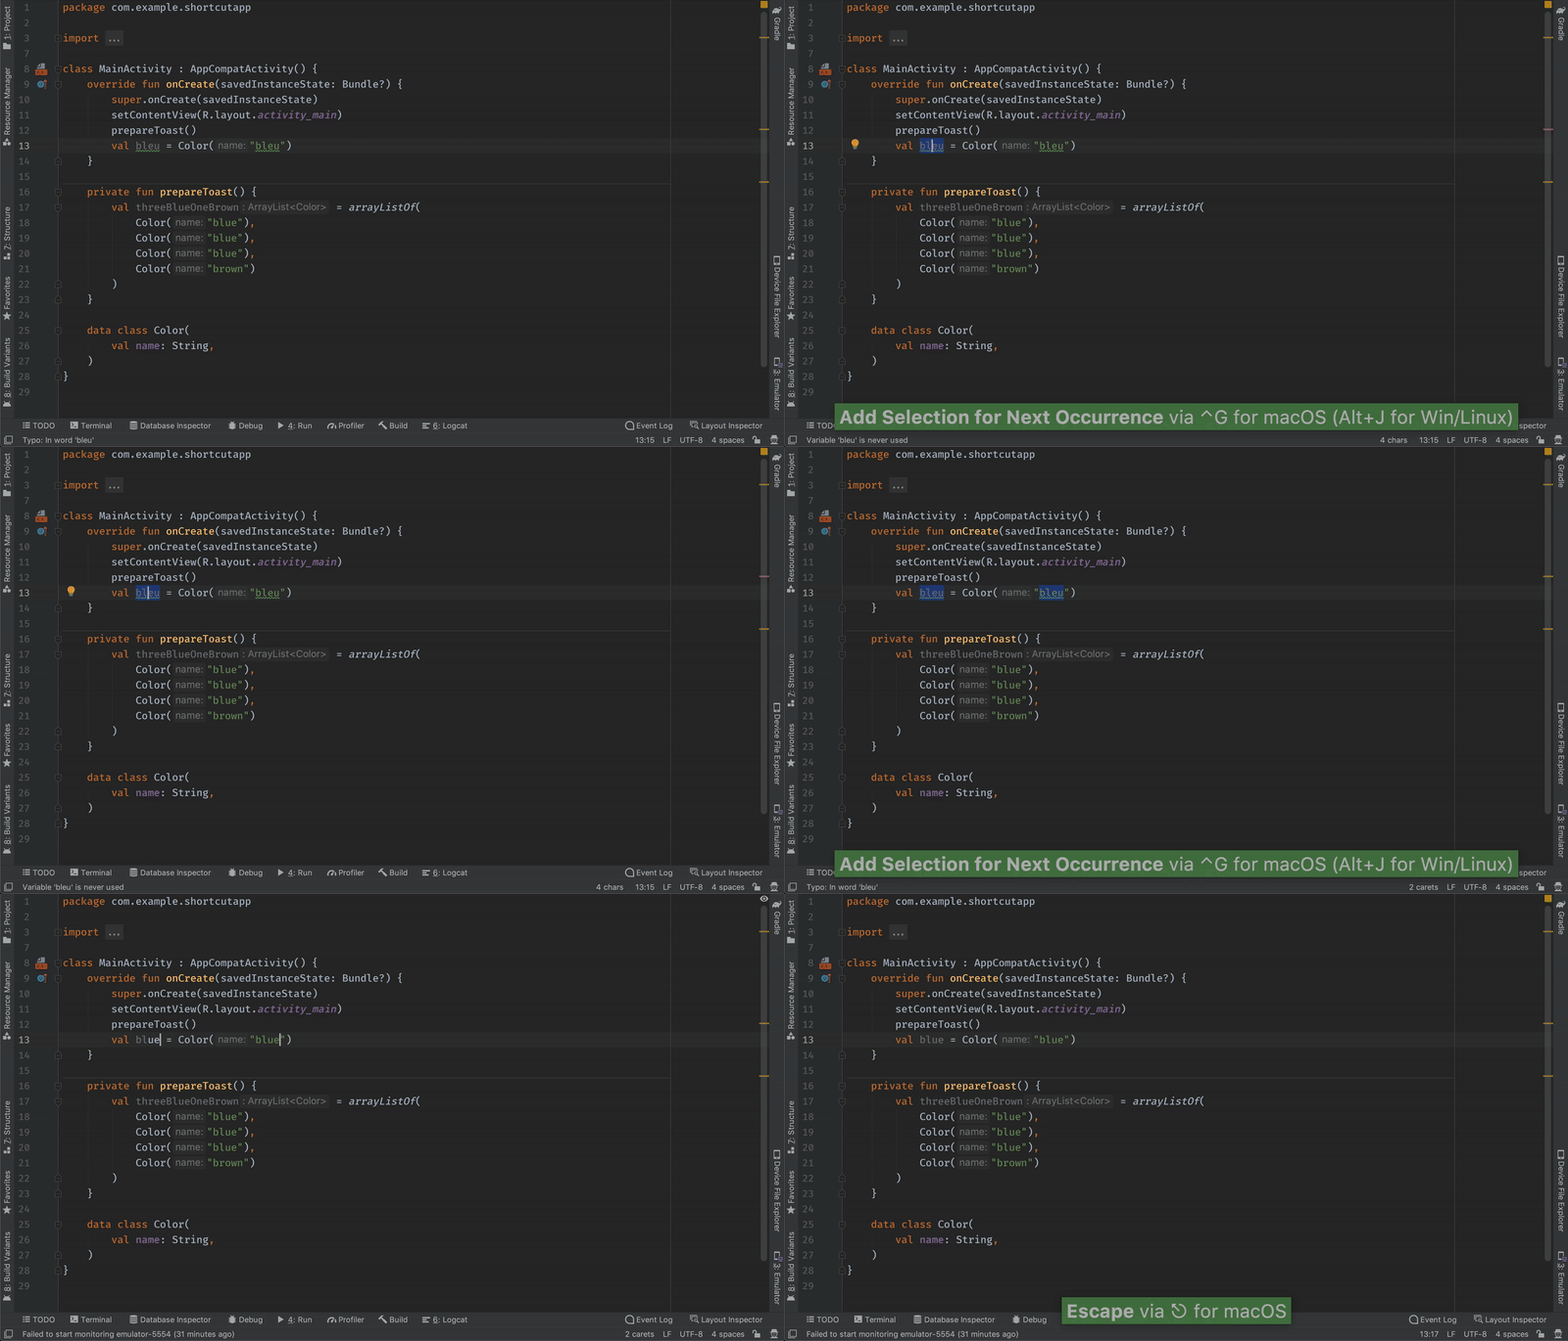
MULTI-CURSOR / SELECT NEXT OCCURRENCE
(macOS: ctrl + g Windows/Linux: alt + J) on selected text or text beneath the cursor.
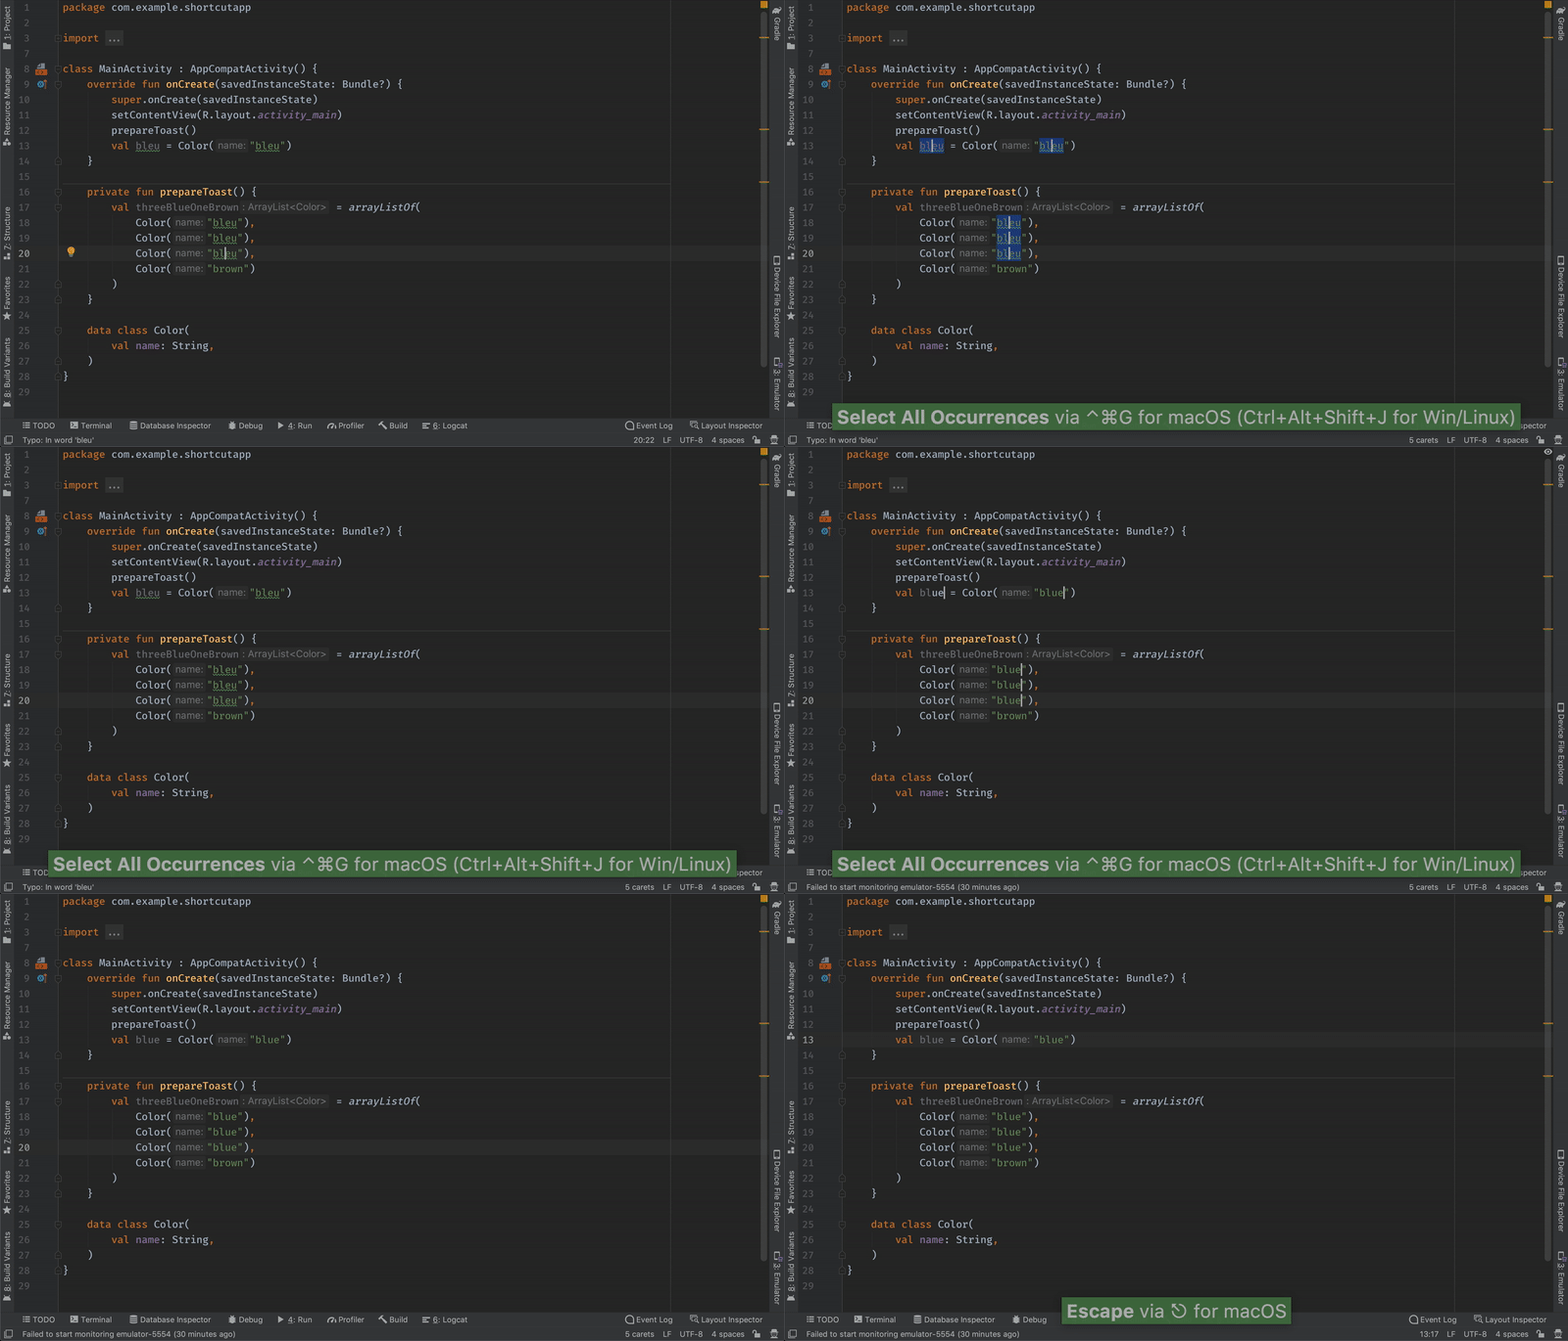
MULTI-CURSOR / SELECT ALL OCCURRENCE
(macOS: ctrl + cmd + g Windows/Linux: ctrl + alt + shift + J) on selected text
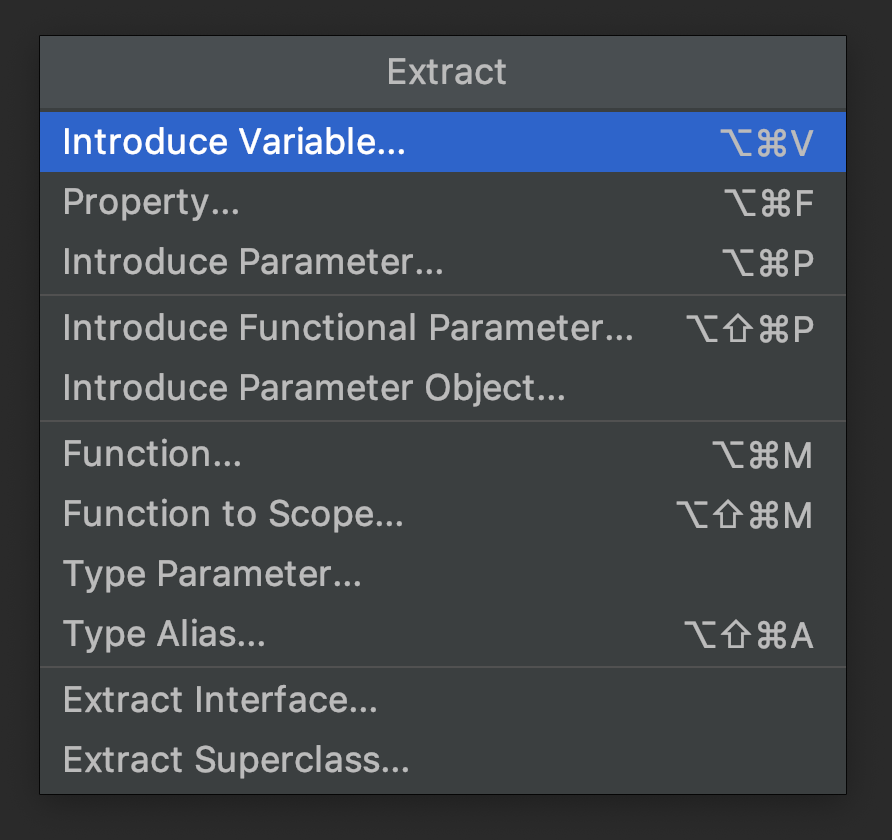
EXTRACT POP-UP
No shortcut for a pop-up, but there are plenty for specific extraction.
Revision of the basics — Day 5
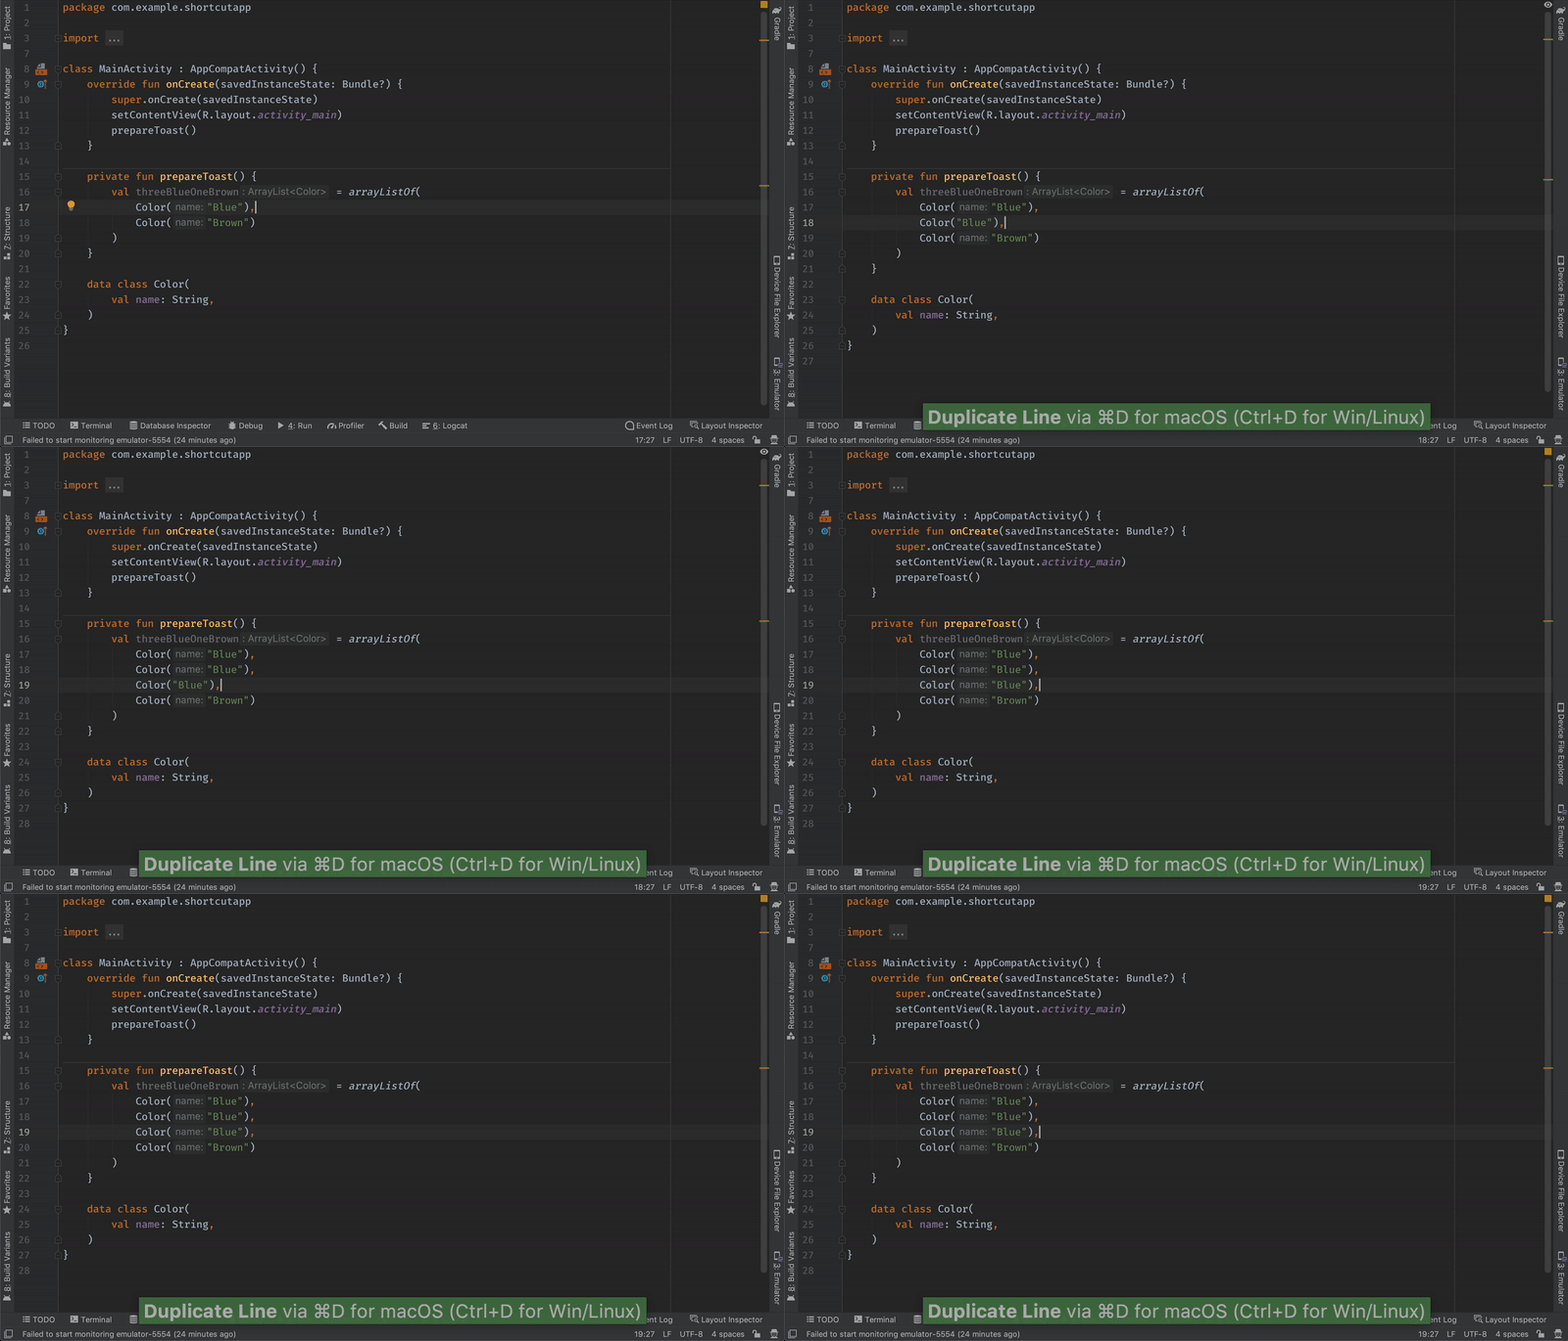
DUPLICATE CURRENT LINE
(macOS: cmd + D Windows/Linux: ctrl + D)
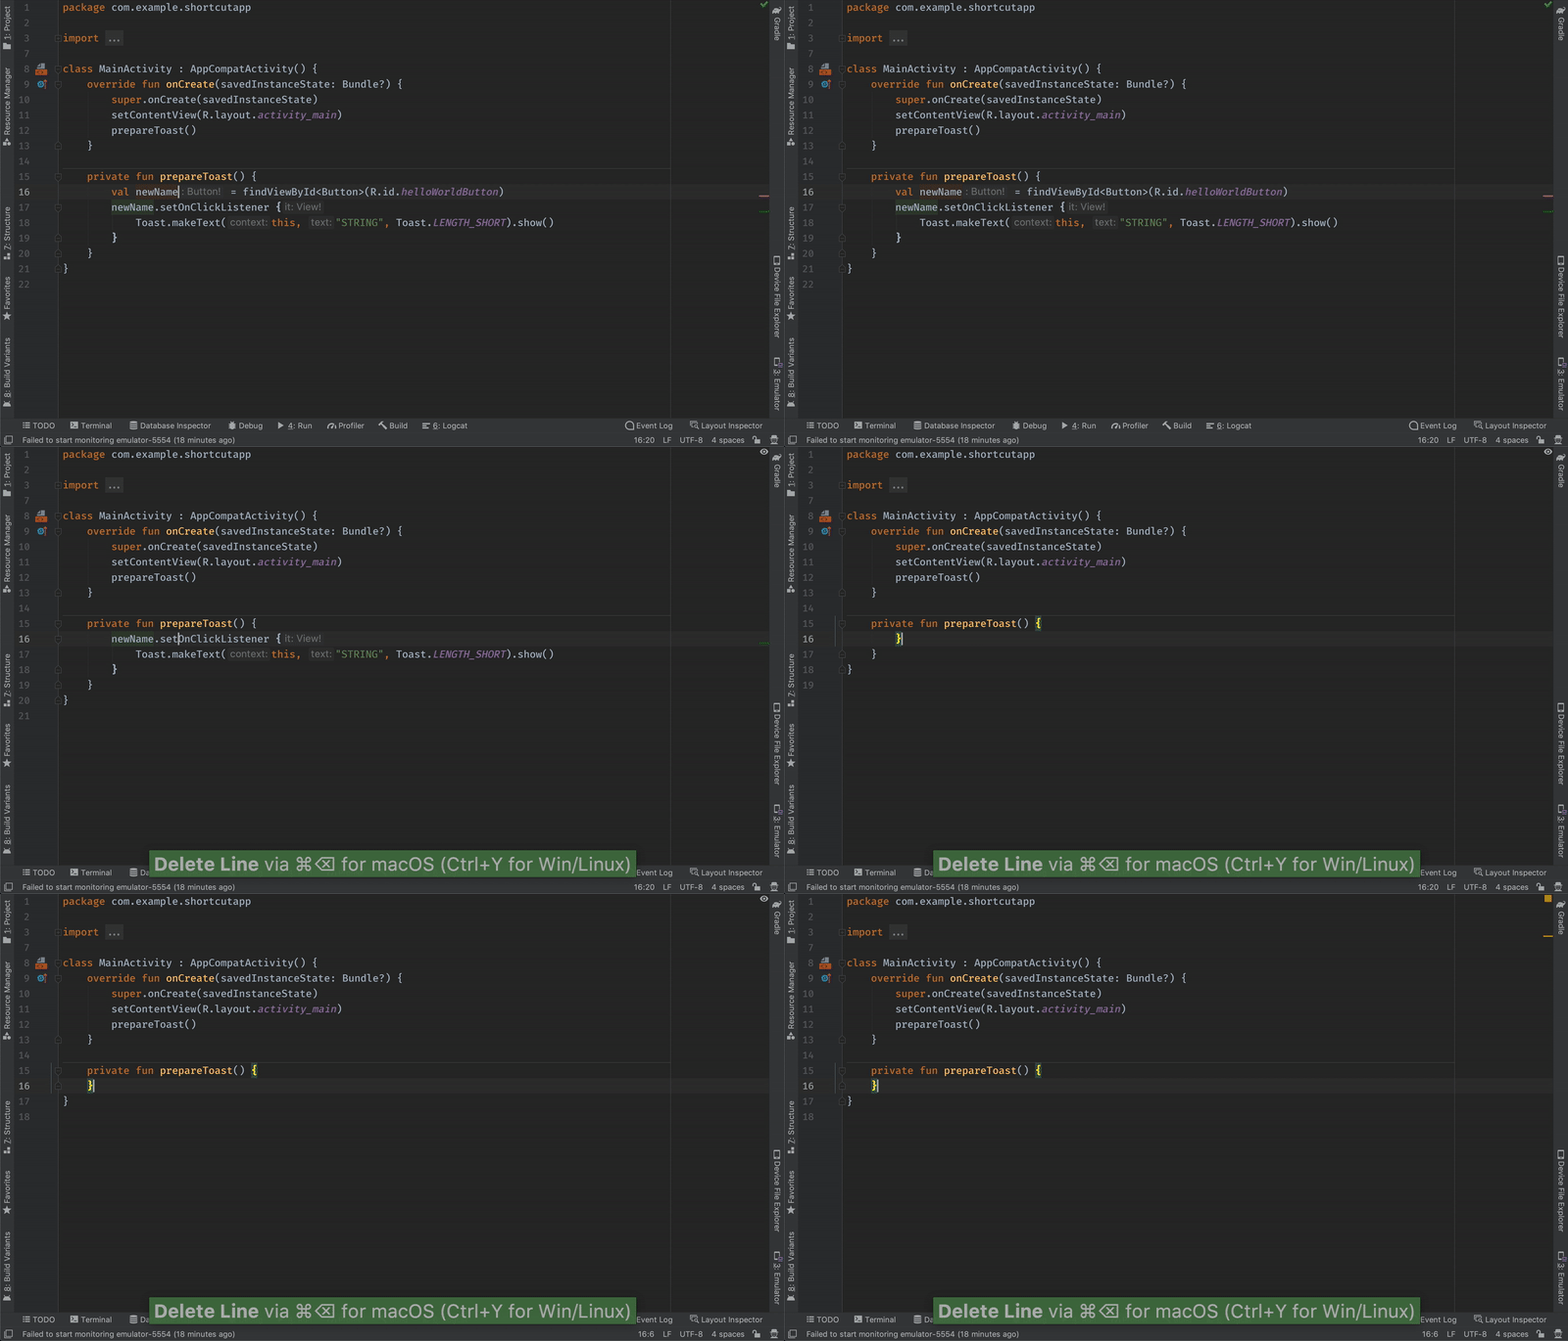
REMOVE CURRENT LINE
(macOS: cmd + backspace Windows/Linux: Ctrl+Shift+L)
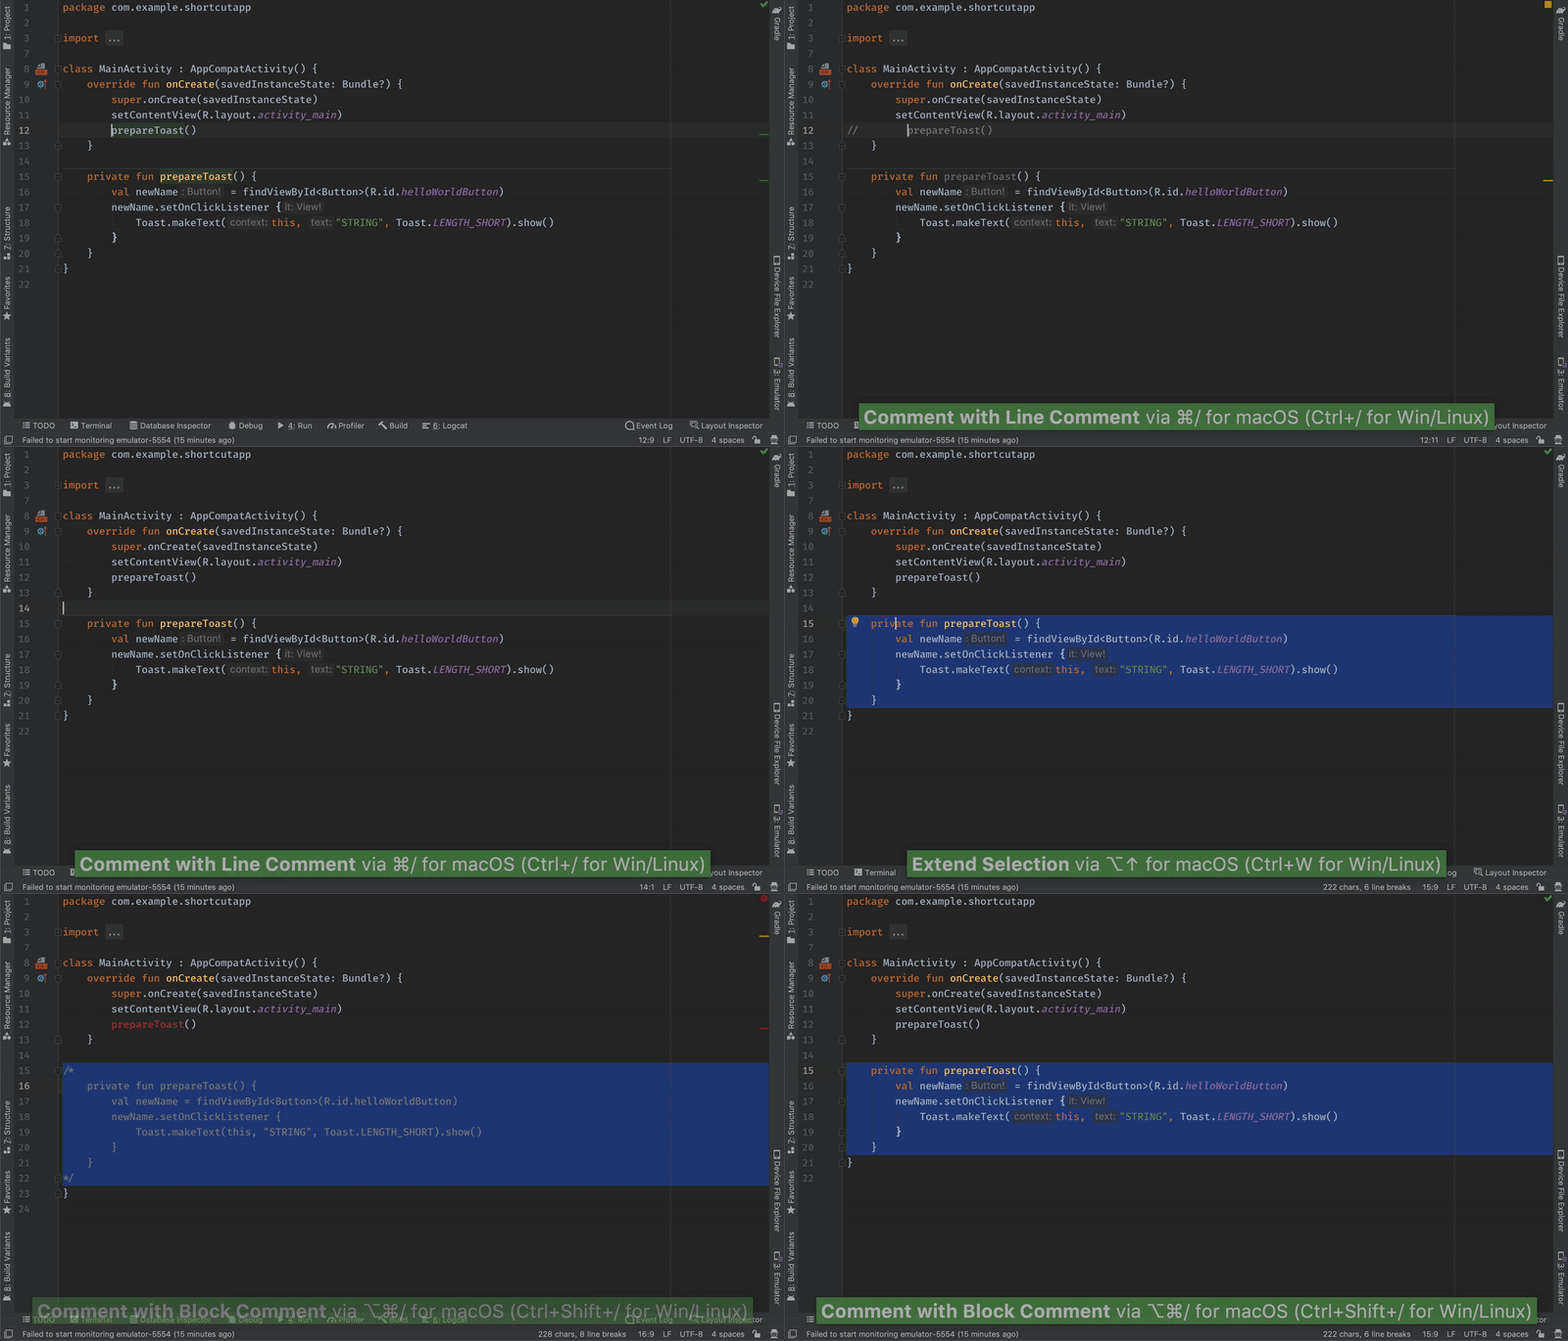
COMMENTING CODE
You can comment or uncomment lines and blocks of code using: LINE COMMENT (macOS: cmd + / Windows/Linux: ctrl + /) comments or uncomments the current line or selected block with single-line comments (//…). BLOCK COMMENT (macOS: cmd + option + / Windows/Linux: ctrl + shift + / encloses the selected block in a block comment (/*...*/).
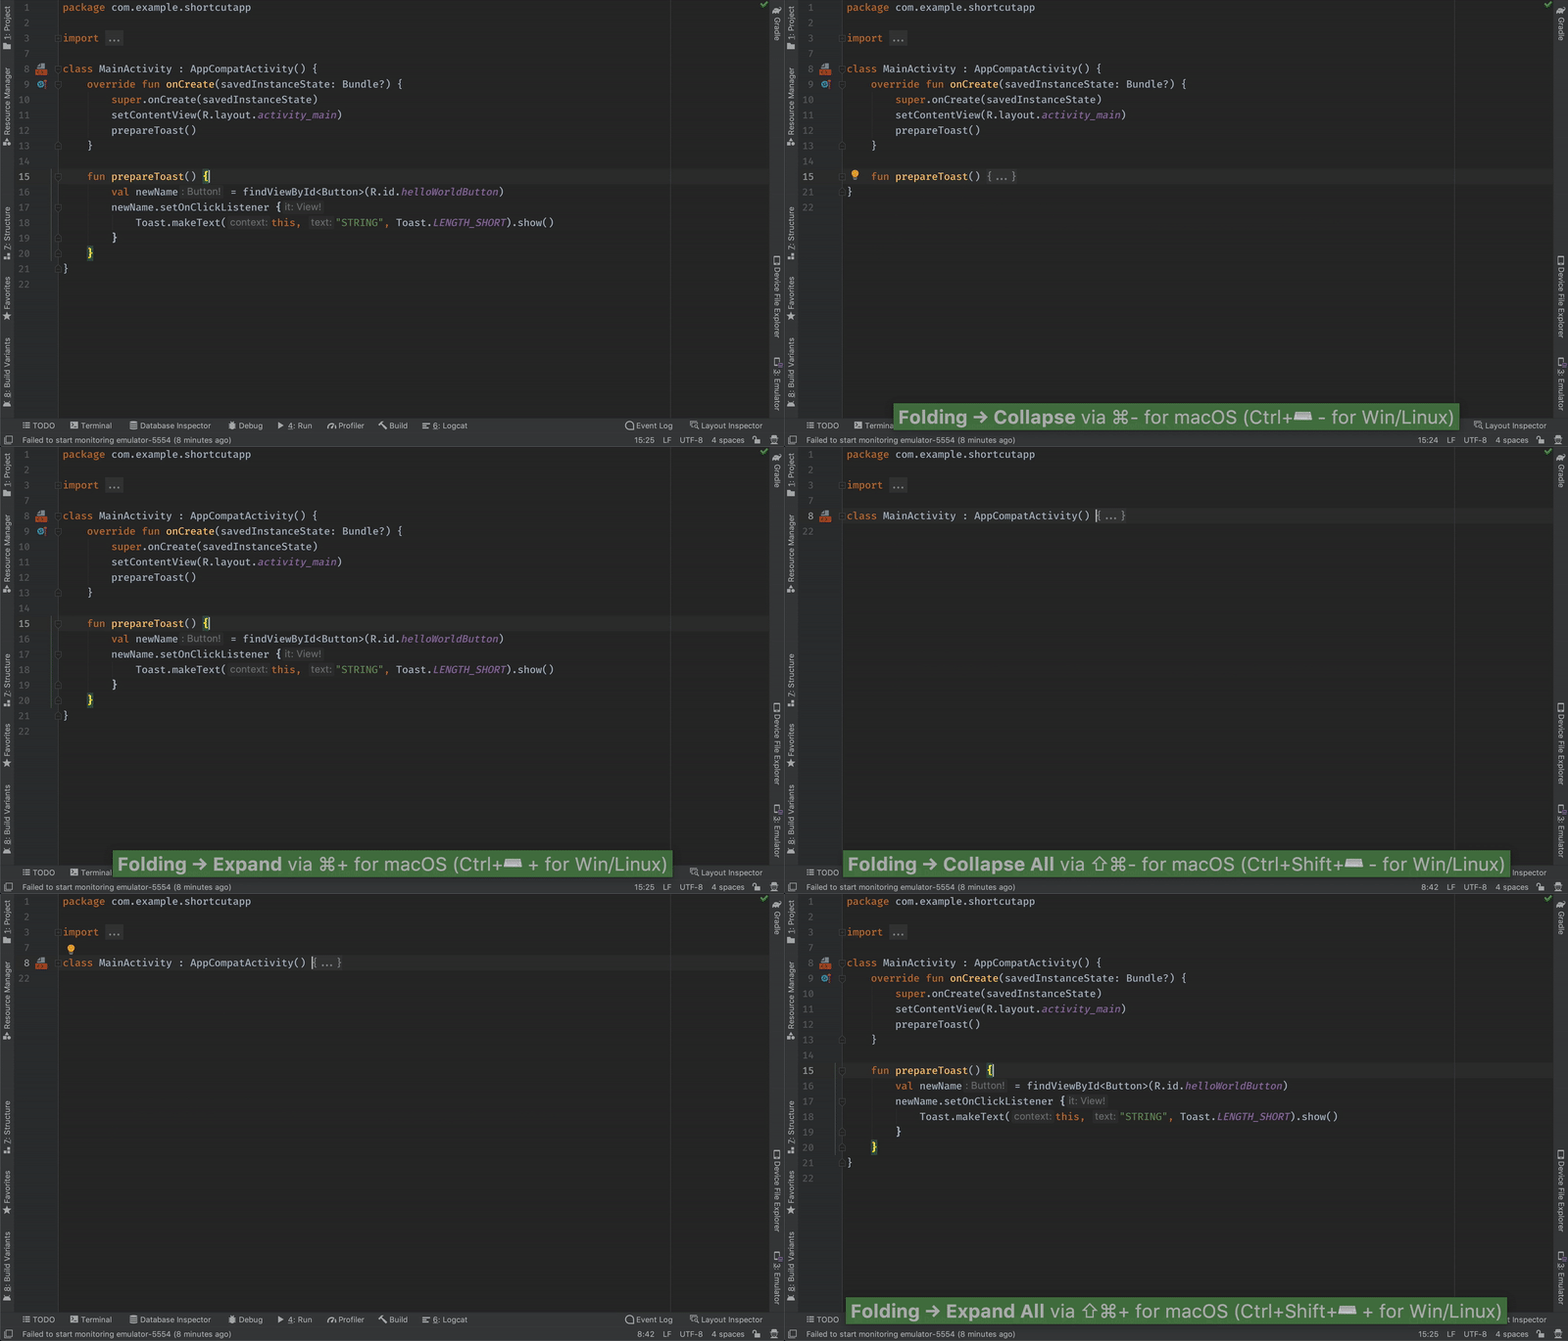
COLLAPSE / EXPAND METHOD
(macOS: cmd + plus or minus Windows/Linux: ctrl + plus or minus) – but if you want to do it with all methods in file pick (macOS: cmd + shift + plus or minus Windows/Linux: ctrl + shift + plus or minus).
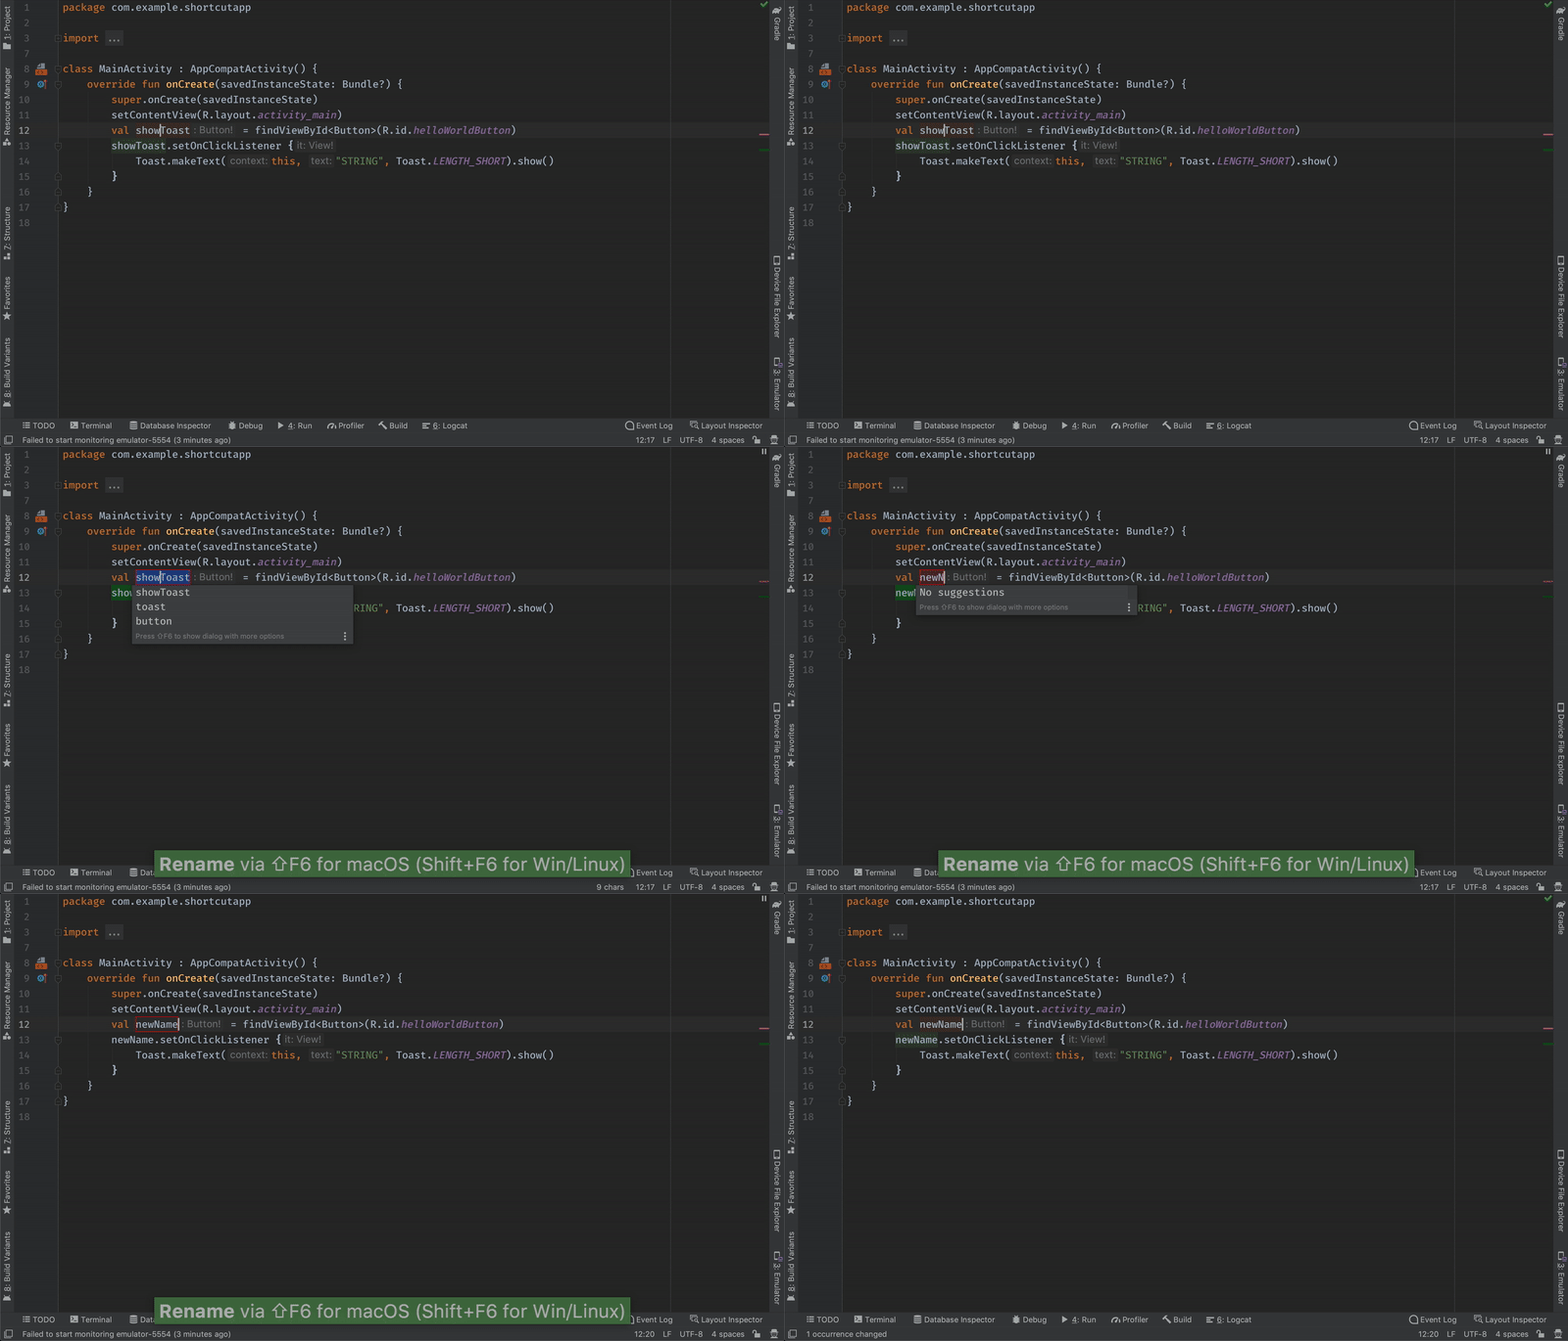
RENAME
(macOS/Windows/Linux: shift + F6) – will rename selected phrase or phrase beneath the cursor.
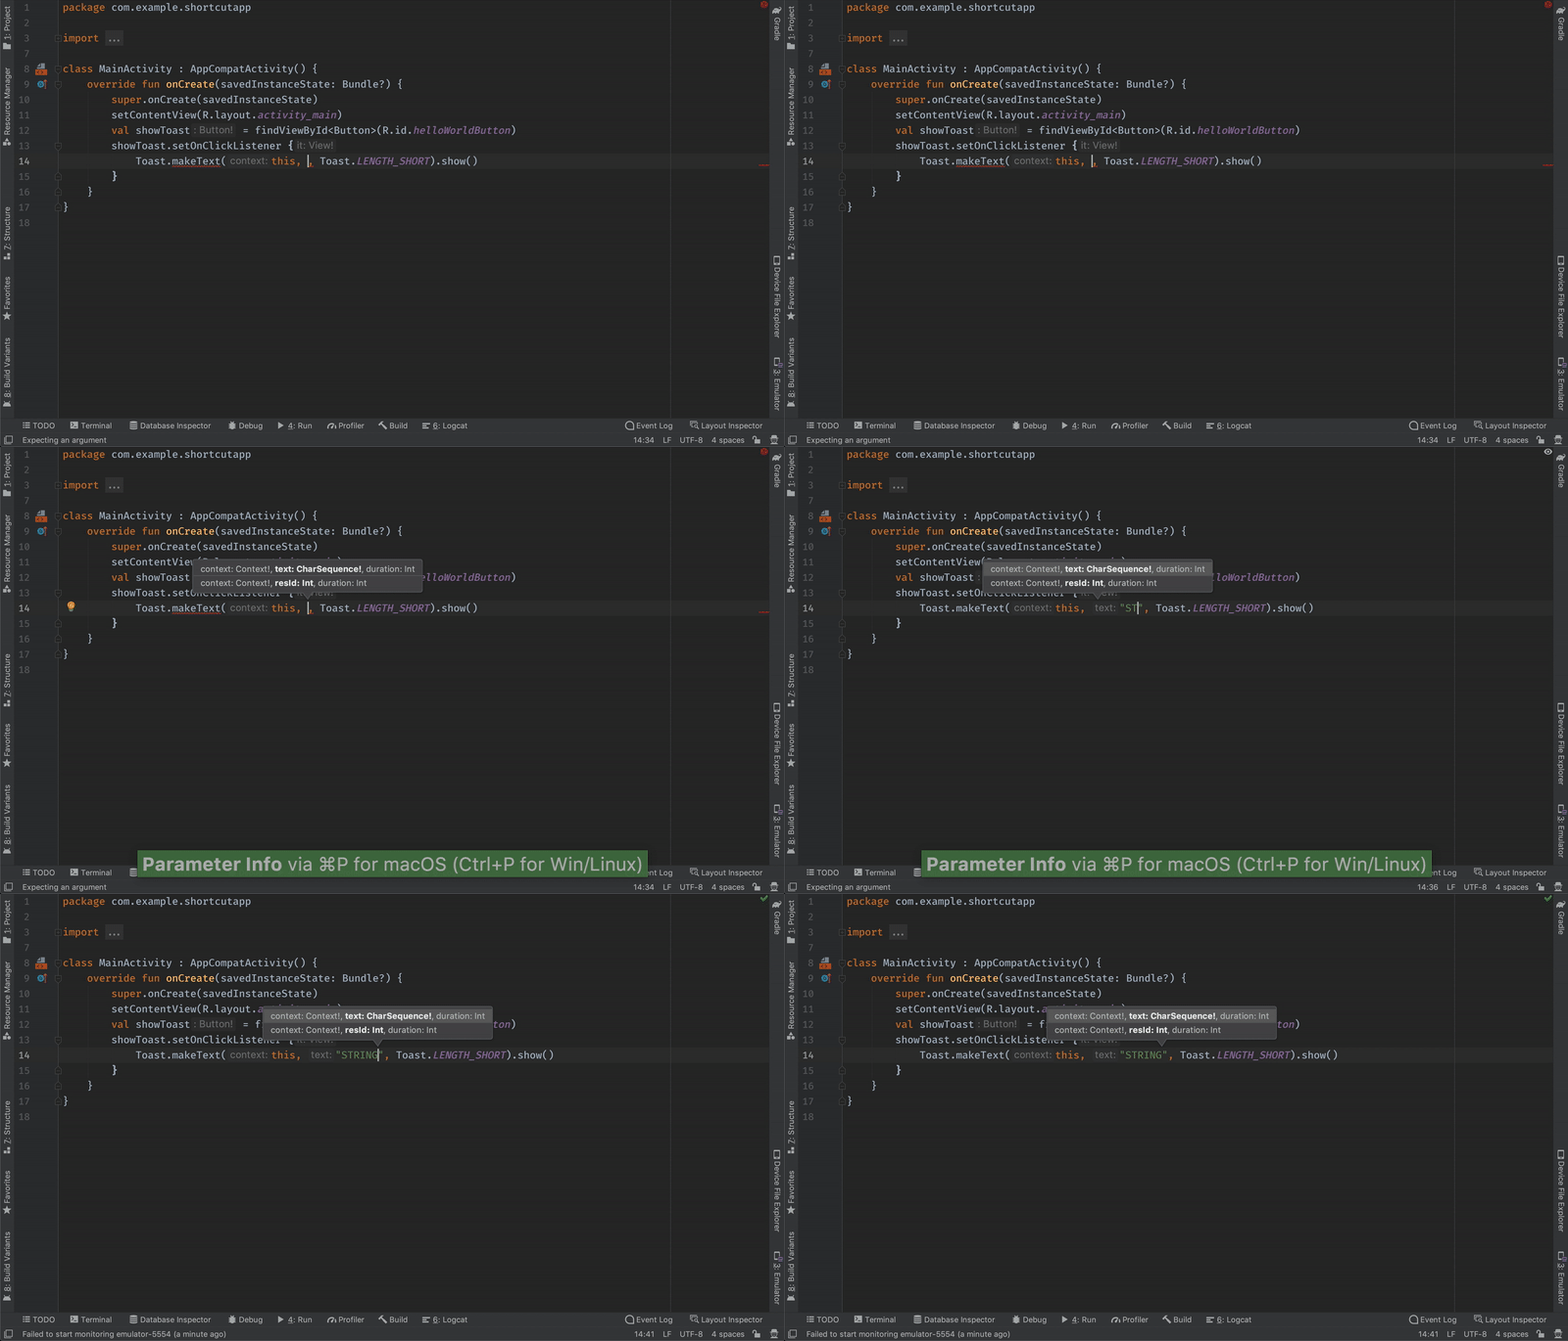
SHOW PARAMETERS
(macOS: cmd + P Windows/Linux: ctrl + P) – show a list of possible parameters for all constructors, and highlights current based on commas and position.
Building, running, and debugging — Day 6
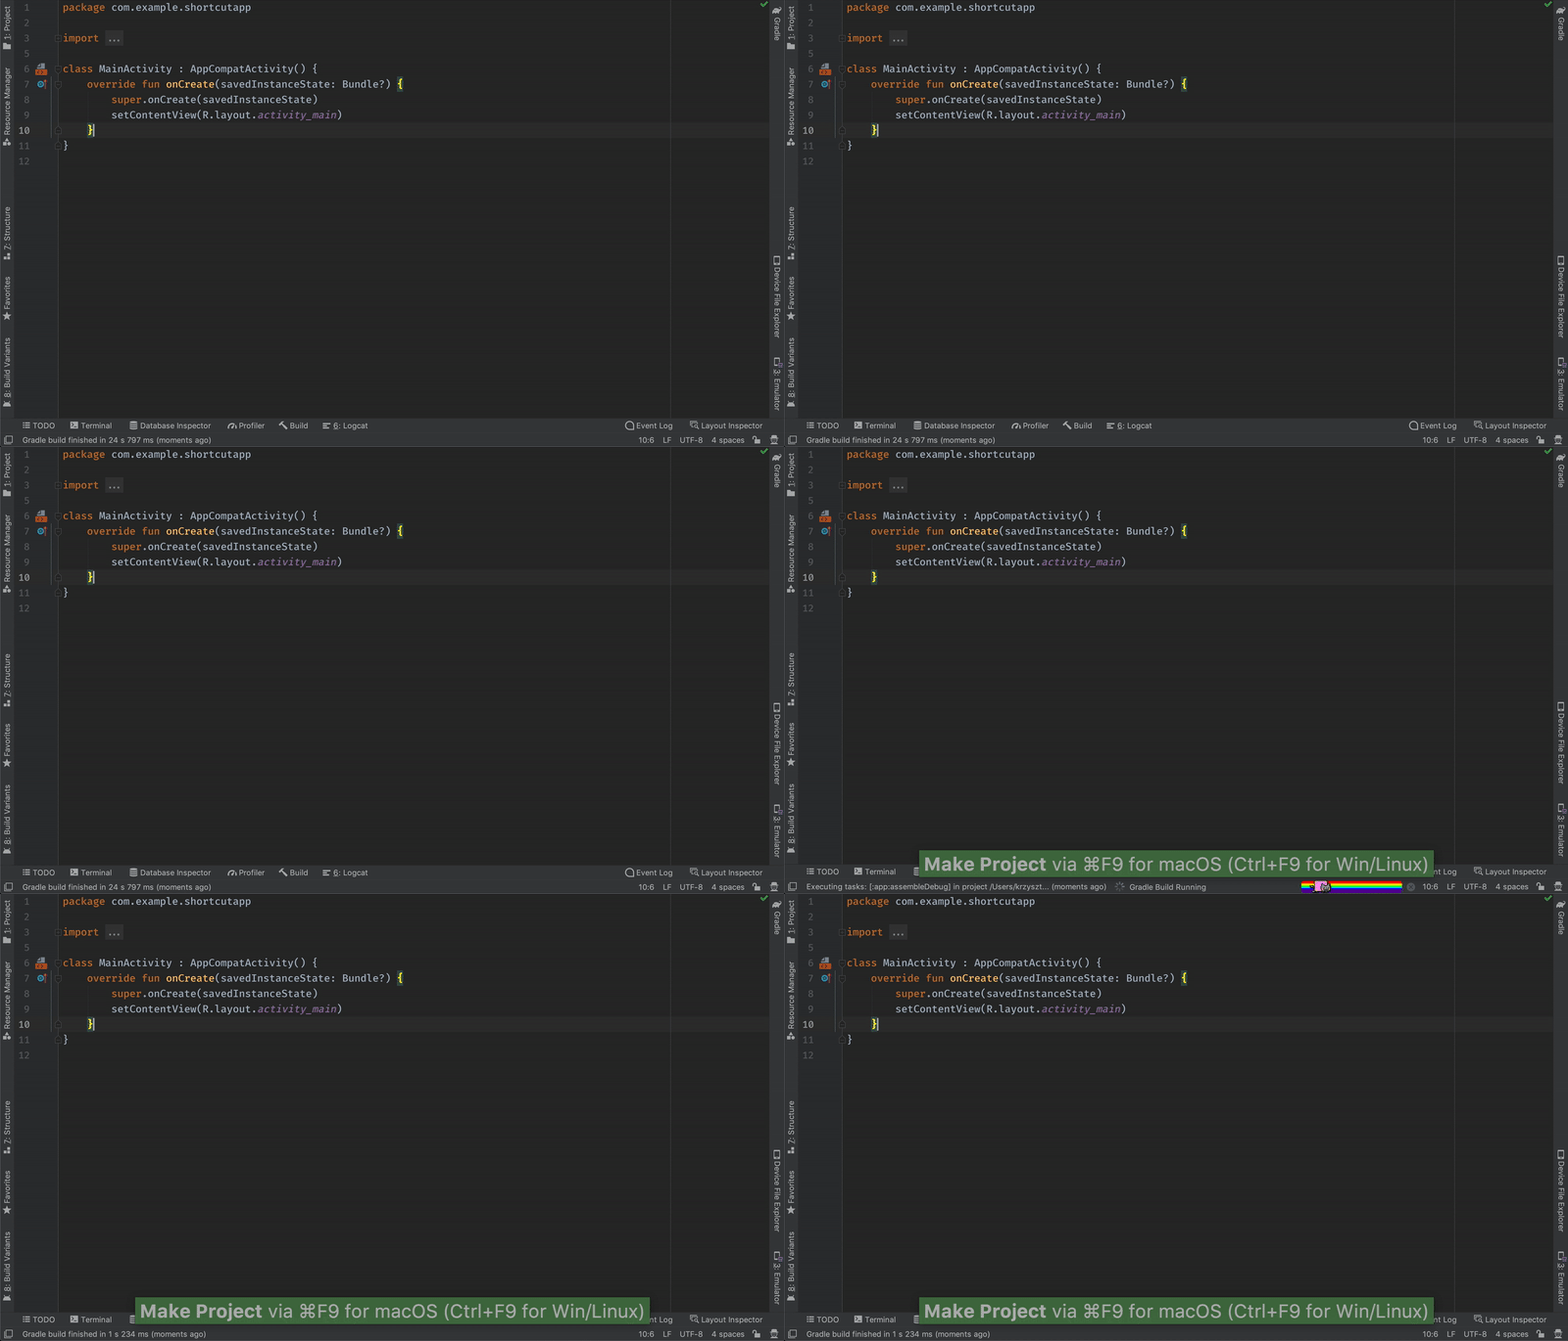
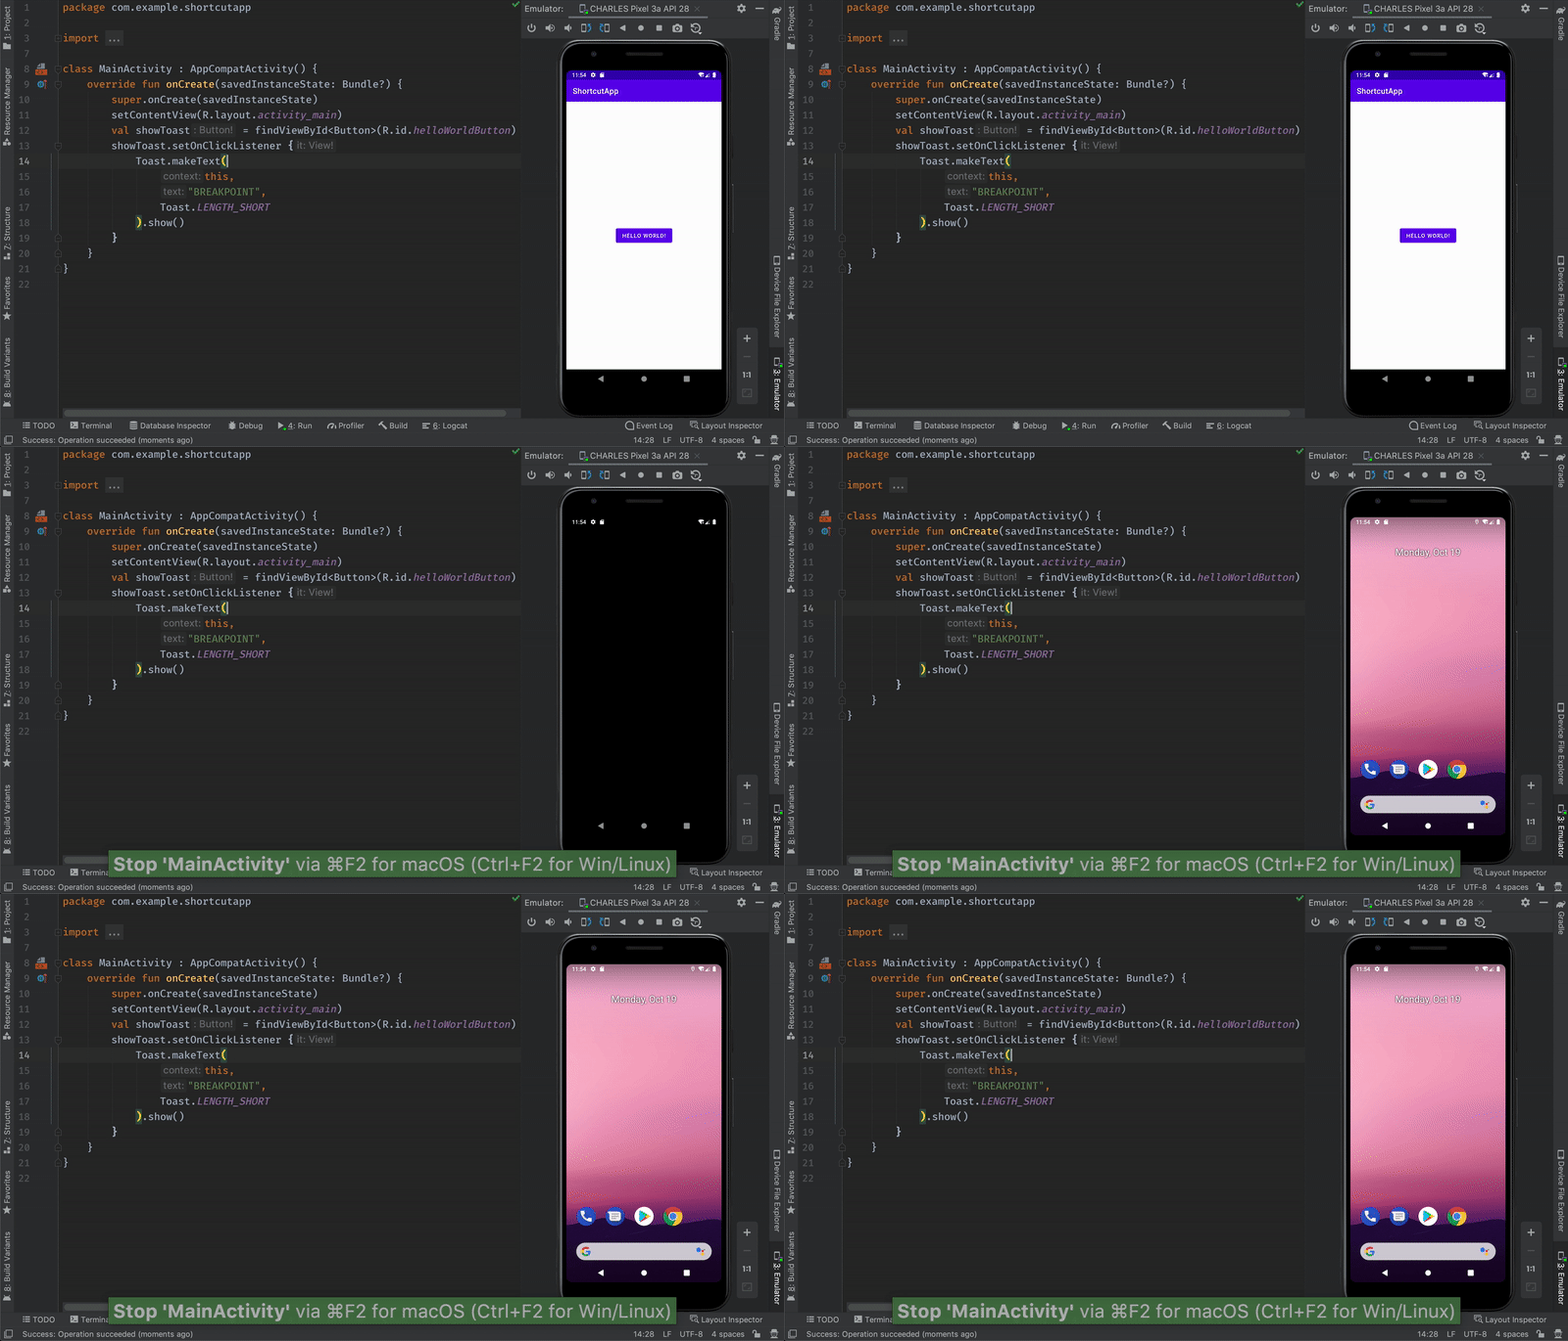
BUILD PROJECT
(macOS: cmd + F9 Windows/Linux: ctrl + F9)
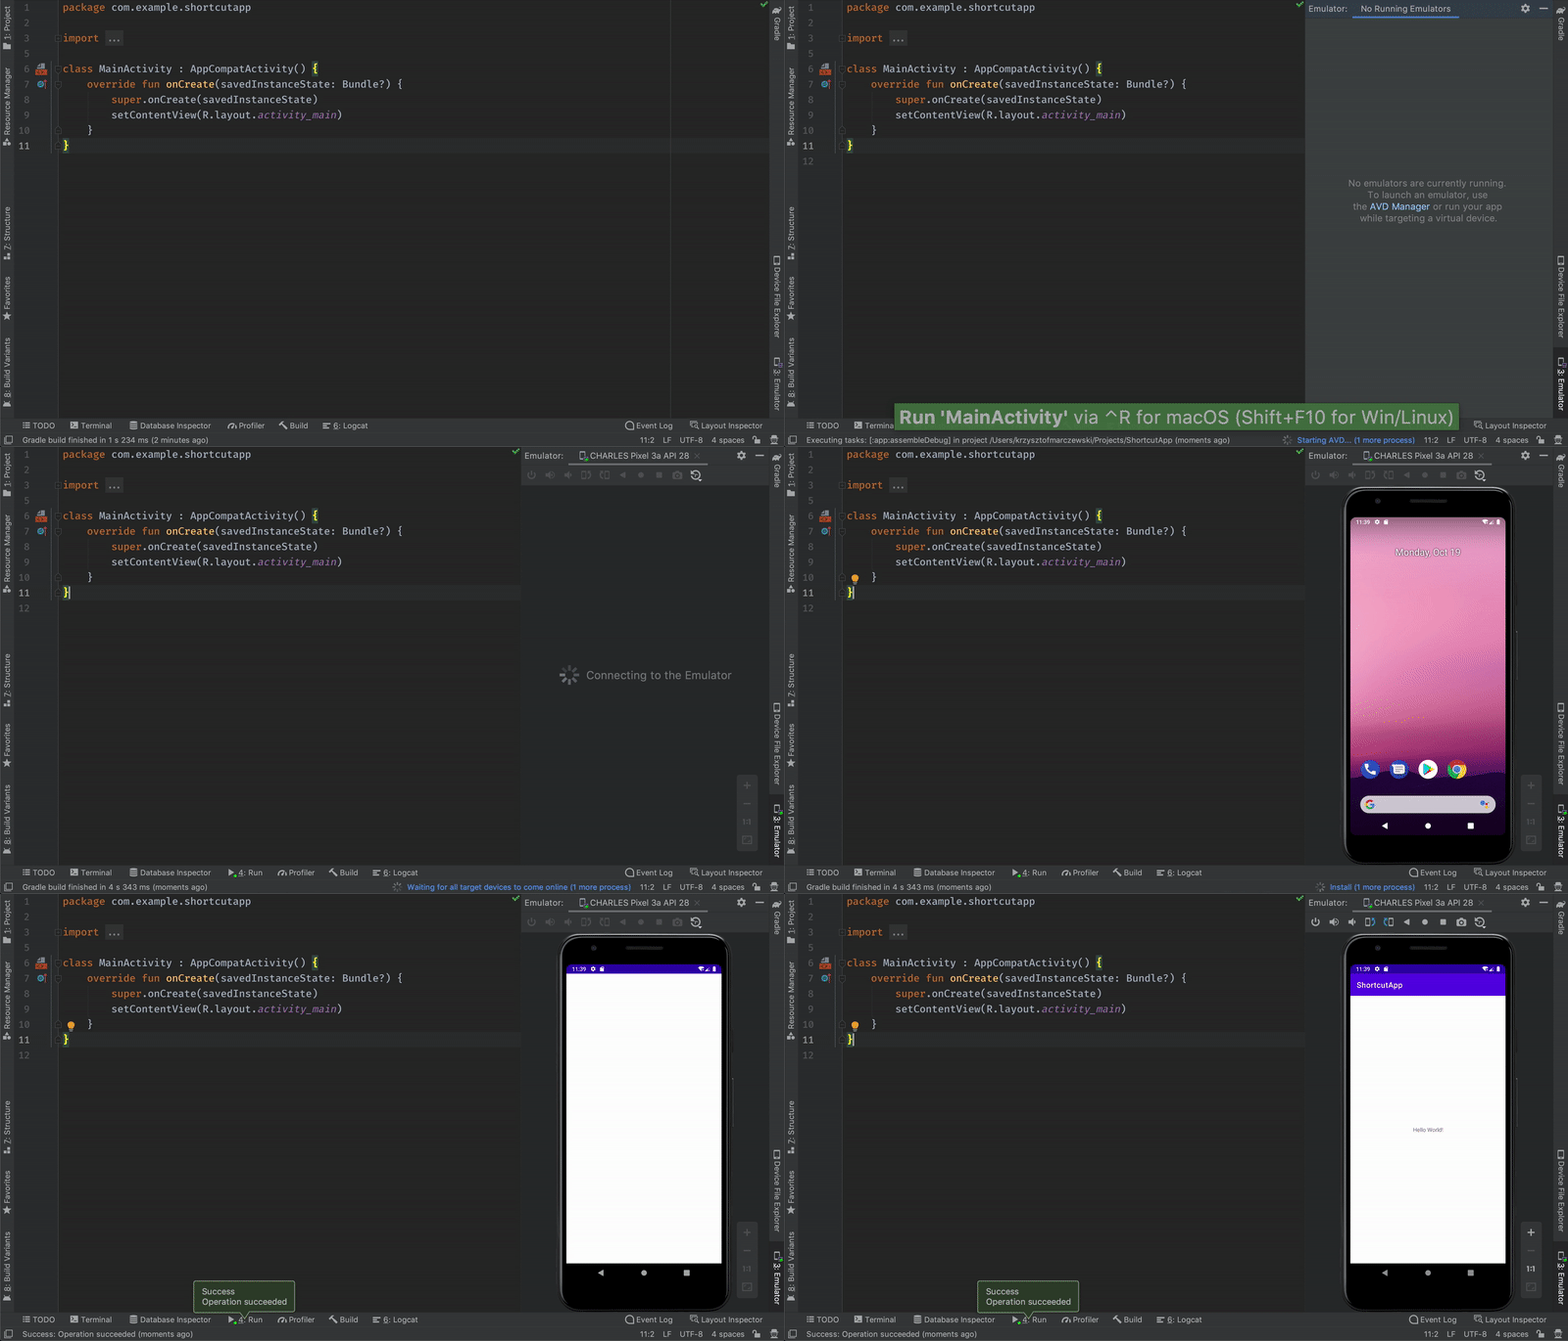
RUN APP
(macOS: ctrl + R Windows/Linux: shift + F10) – will build and install app plus turn on an emulator if not opened yet.
STOP APP
(macOS: cmd + F2 Windows/Linux: ctrl + F2)
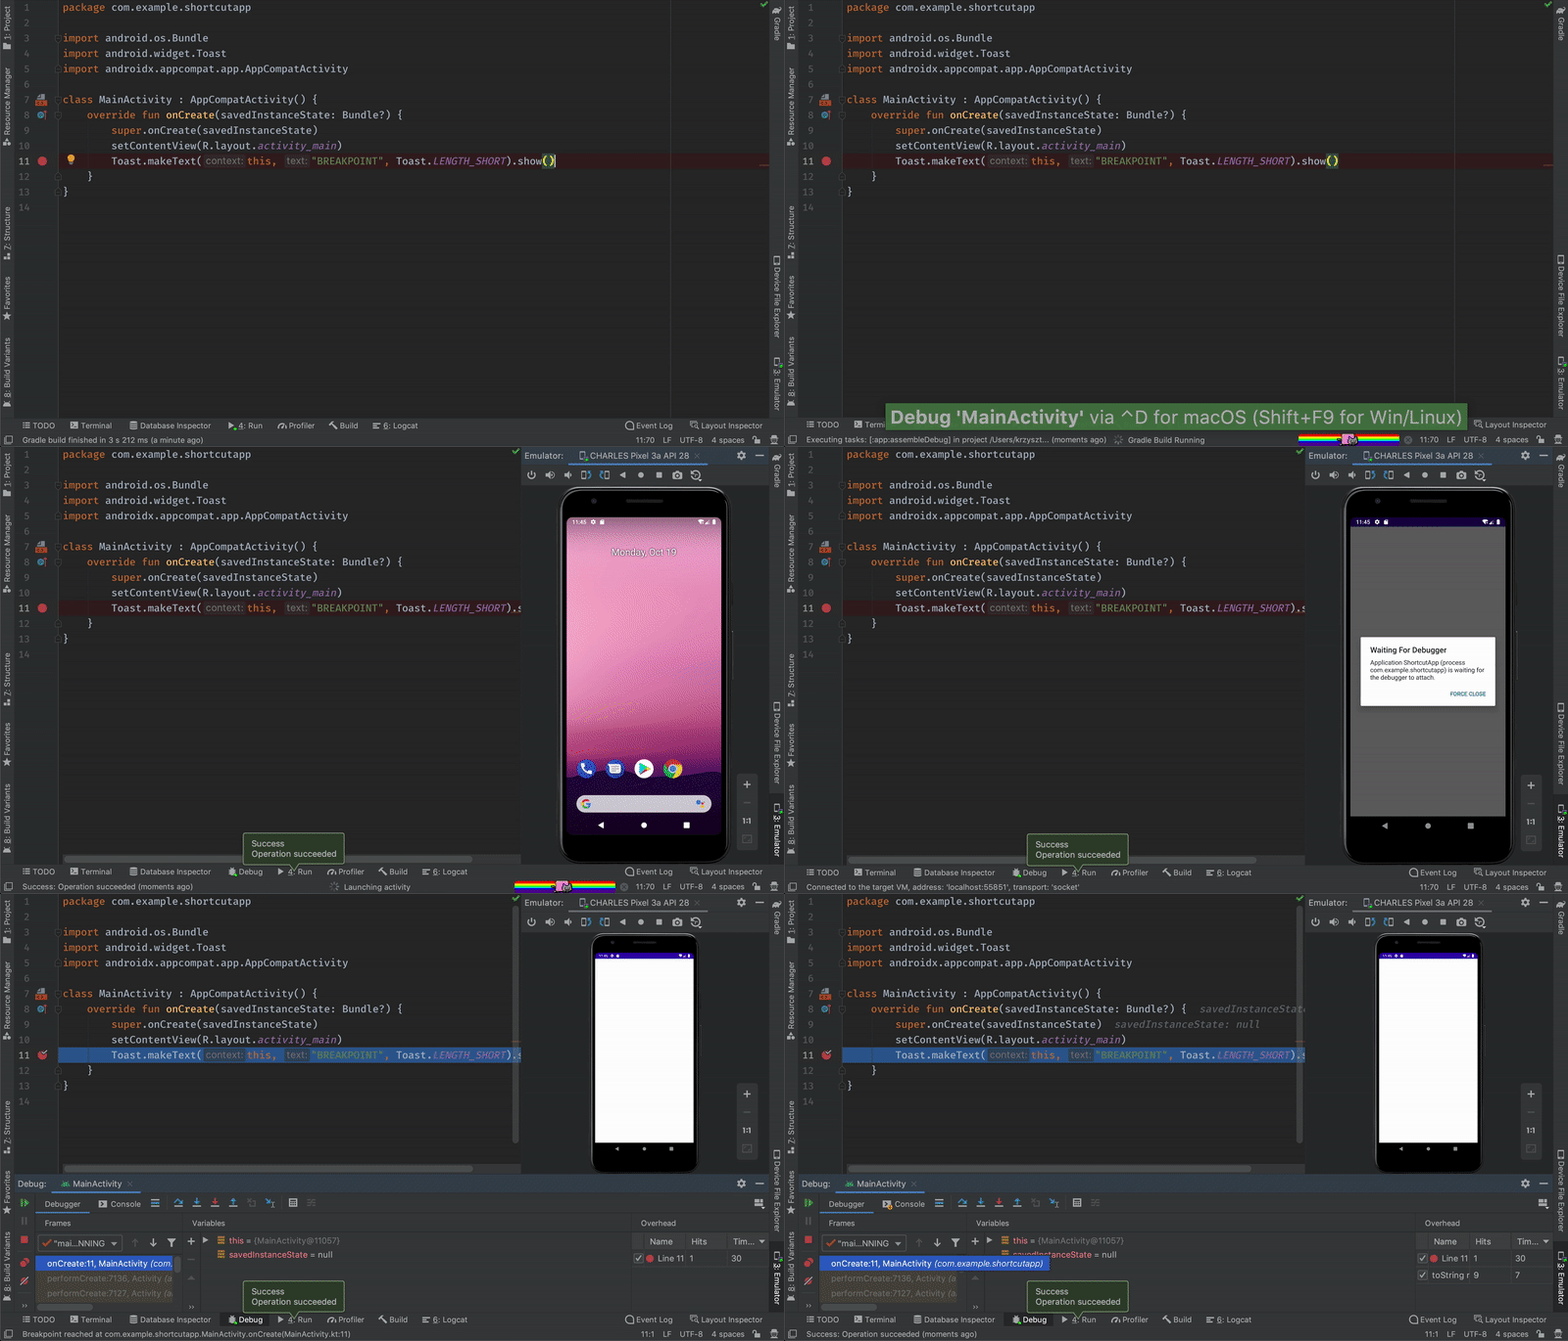
RUN APP IN DEBUG MODE
(macOS: ctrl + D Windows/Linux: shift + F9) – turn on the emulator if not opened yet.
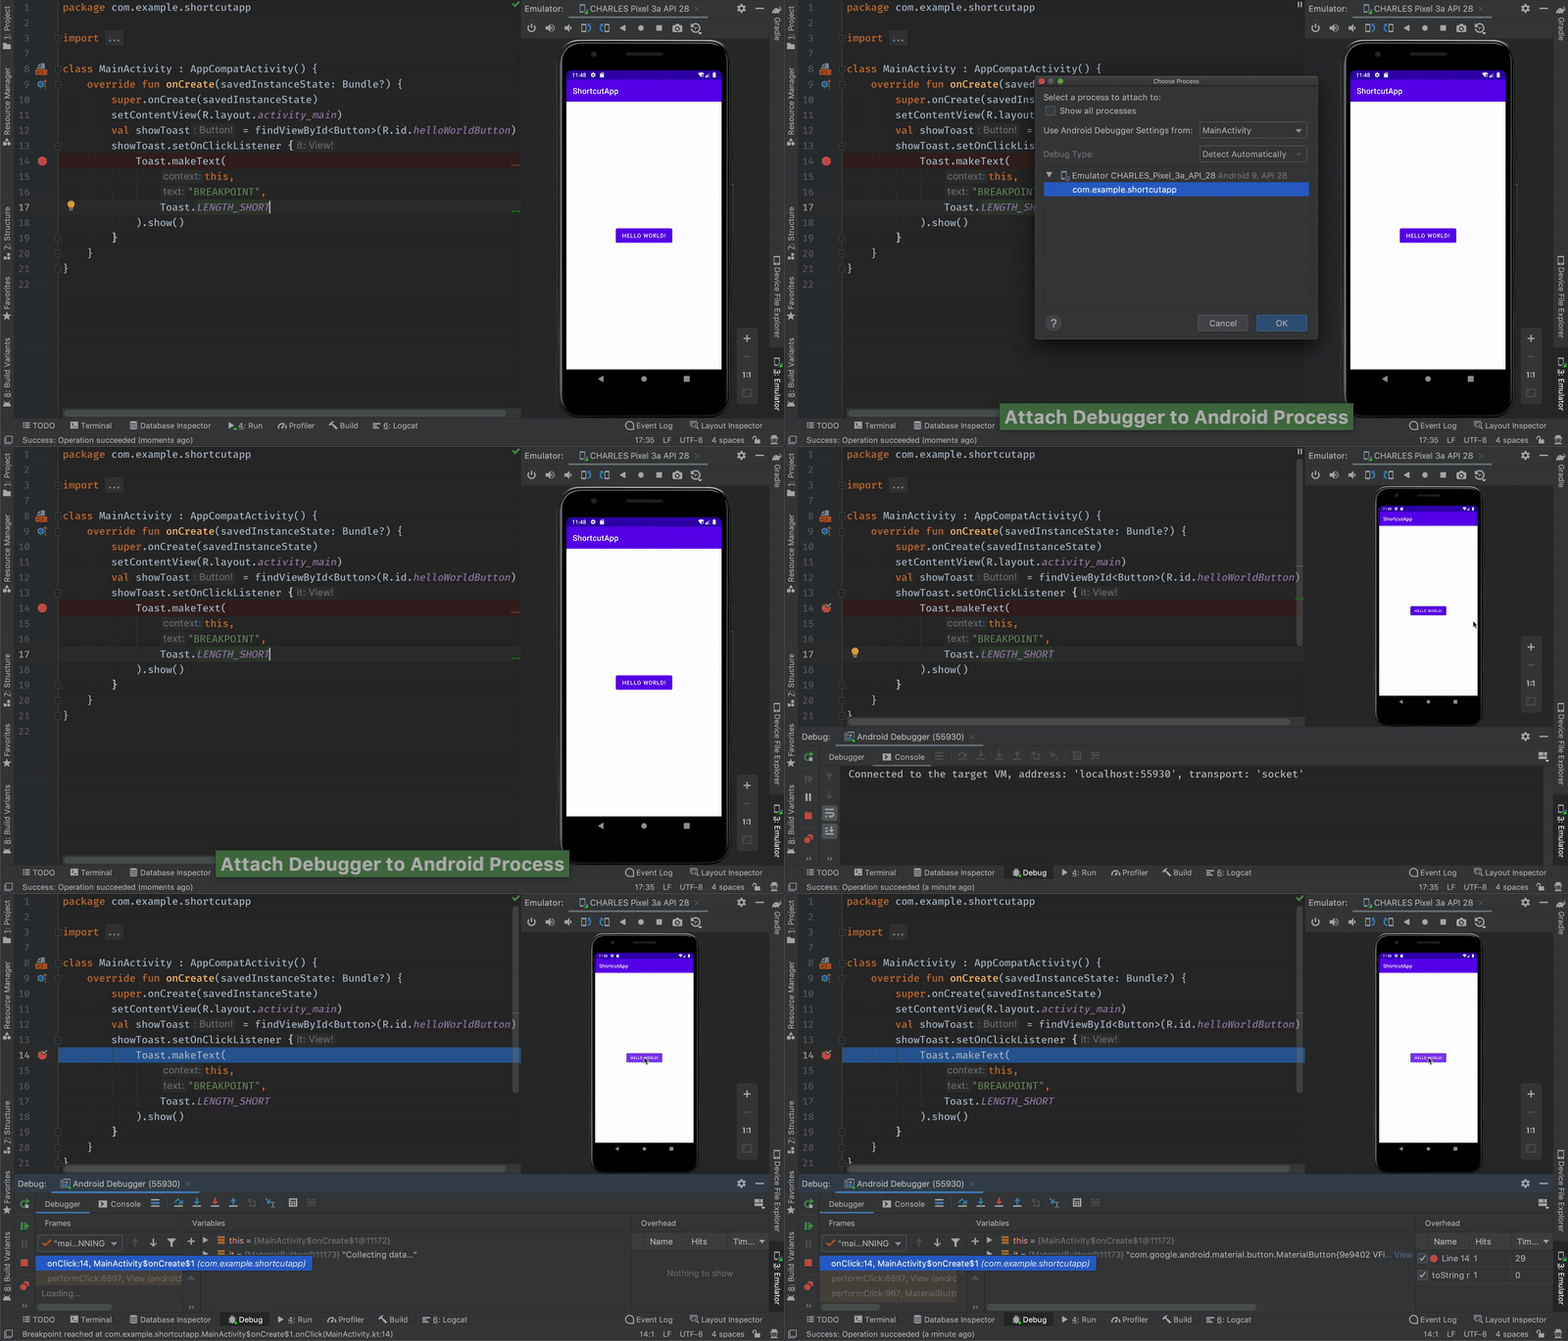
ATTACH DEBUGGER
(no shortcut — assign ctrl + shift + D) – it’s common for beginner devs (including me in the past), to re-run the app in debug mode in order to debug. If you’ve got already opened the app, and you want to start debugging, just attach a debugger to the currently running android process.
Other tips and tricks — Day 7
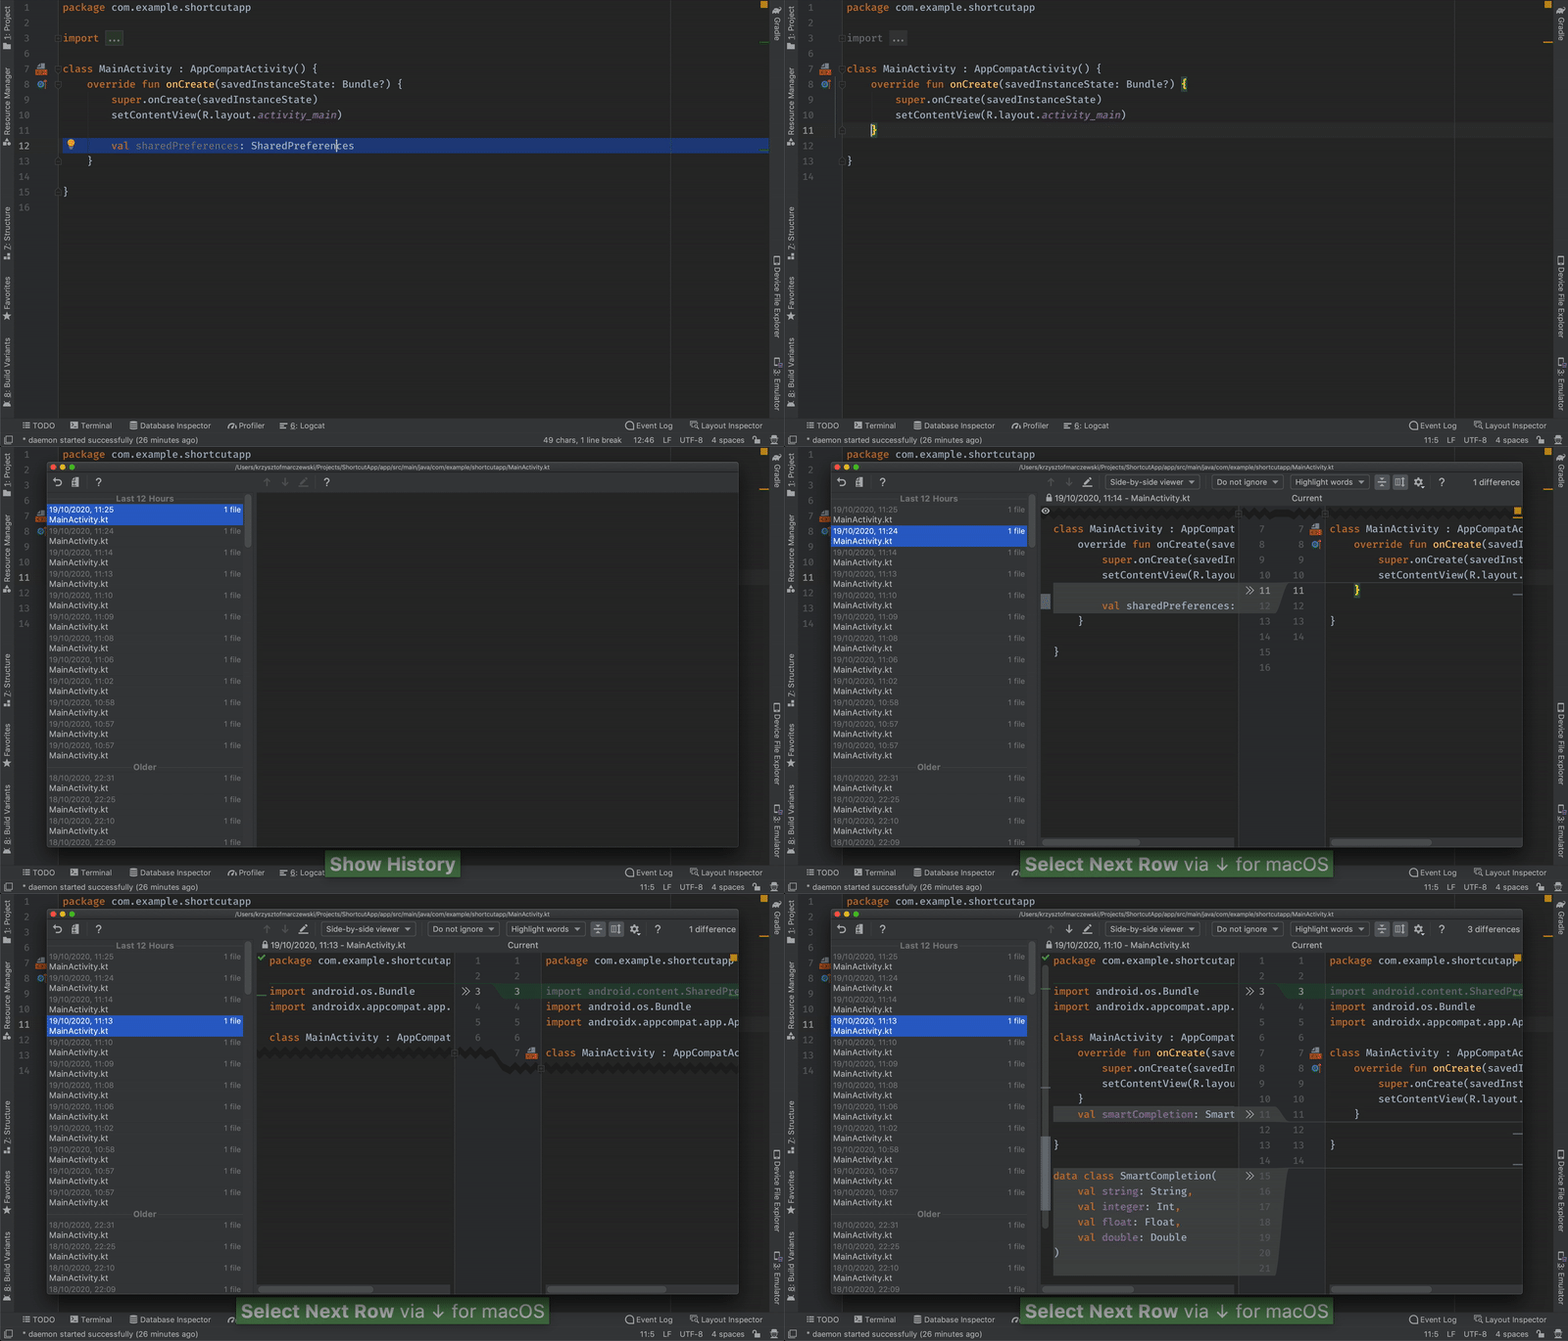
HISTORY
If you’re not using a hierarchy panel like me, assign it to ctrl + h. Very useful when specific code from the past was better than current – here’s the way to restore it. Find actionlocal history -> show history .
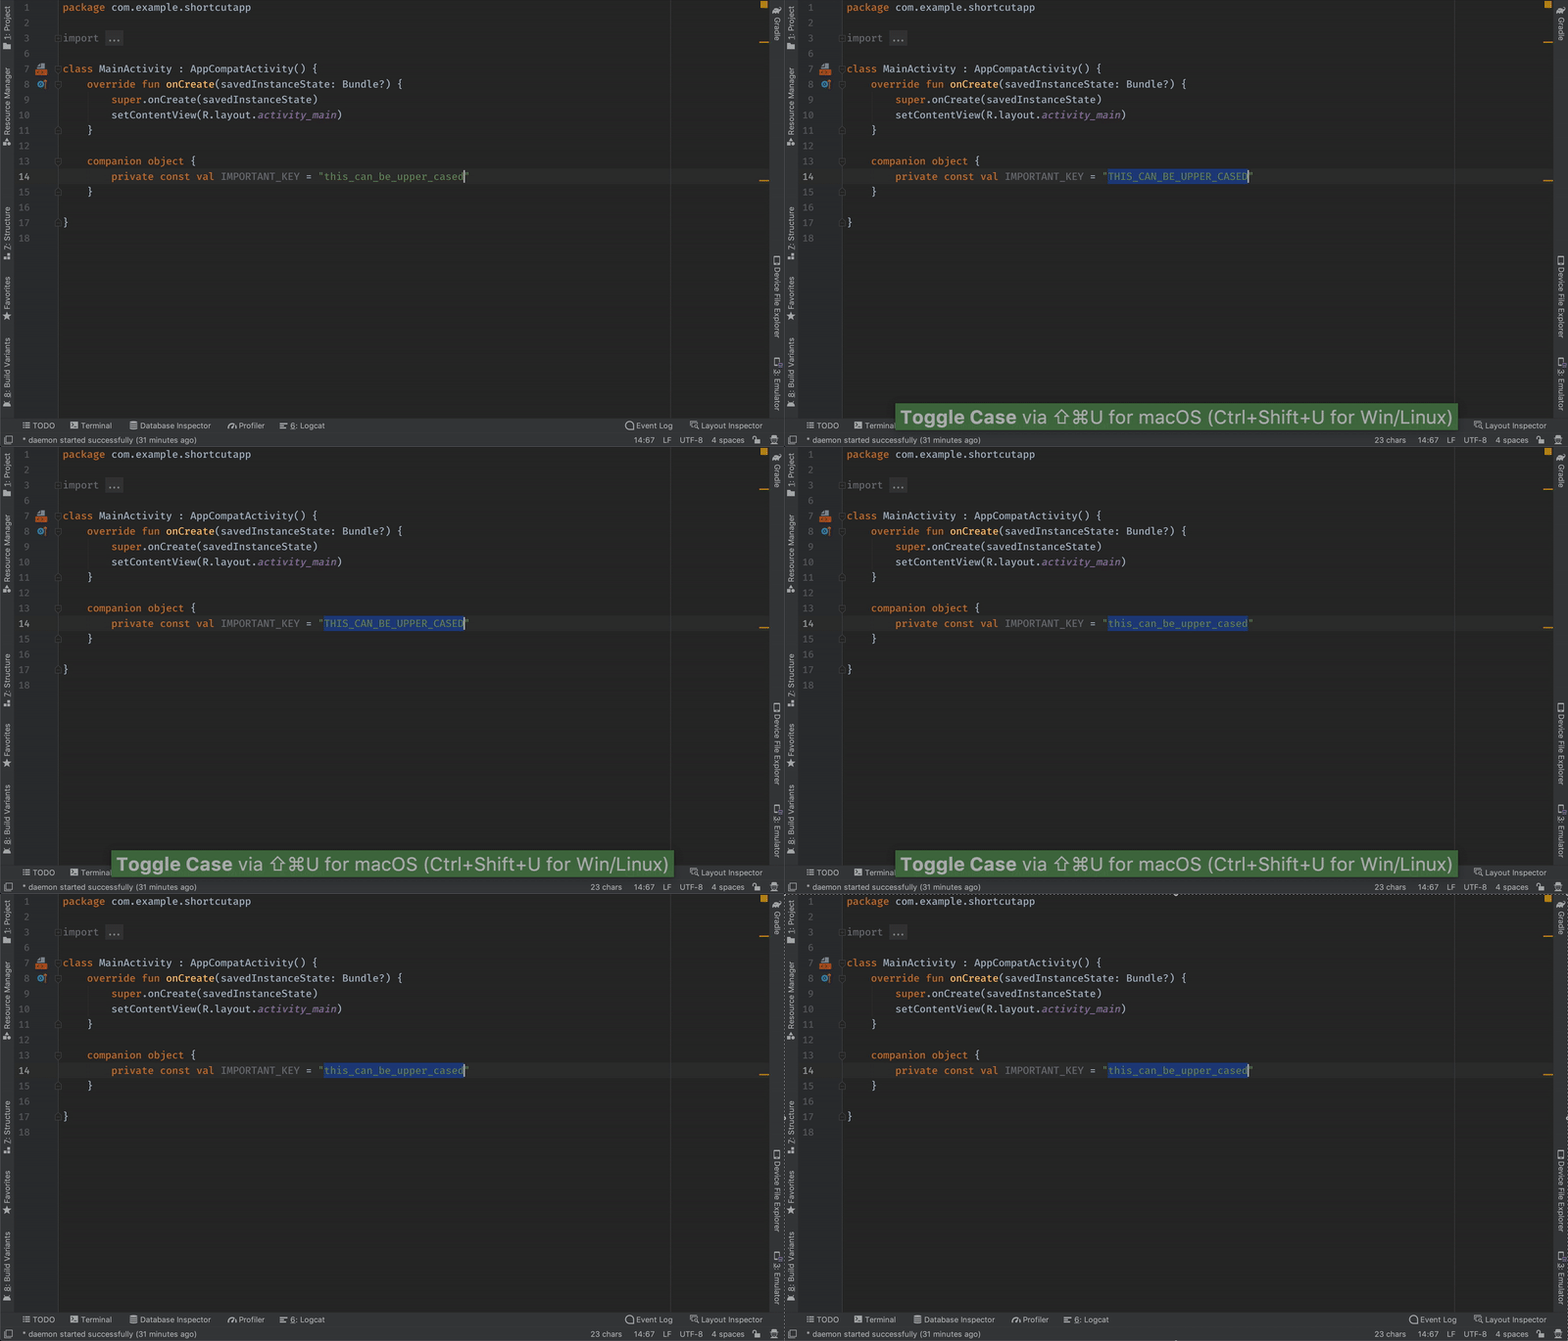
TOGGLE CASE
(macOS: cmd + shift + U Windows/Linux: ctrl + shift + U) – helps easily change the text to lowercase or uppercase.
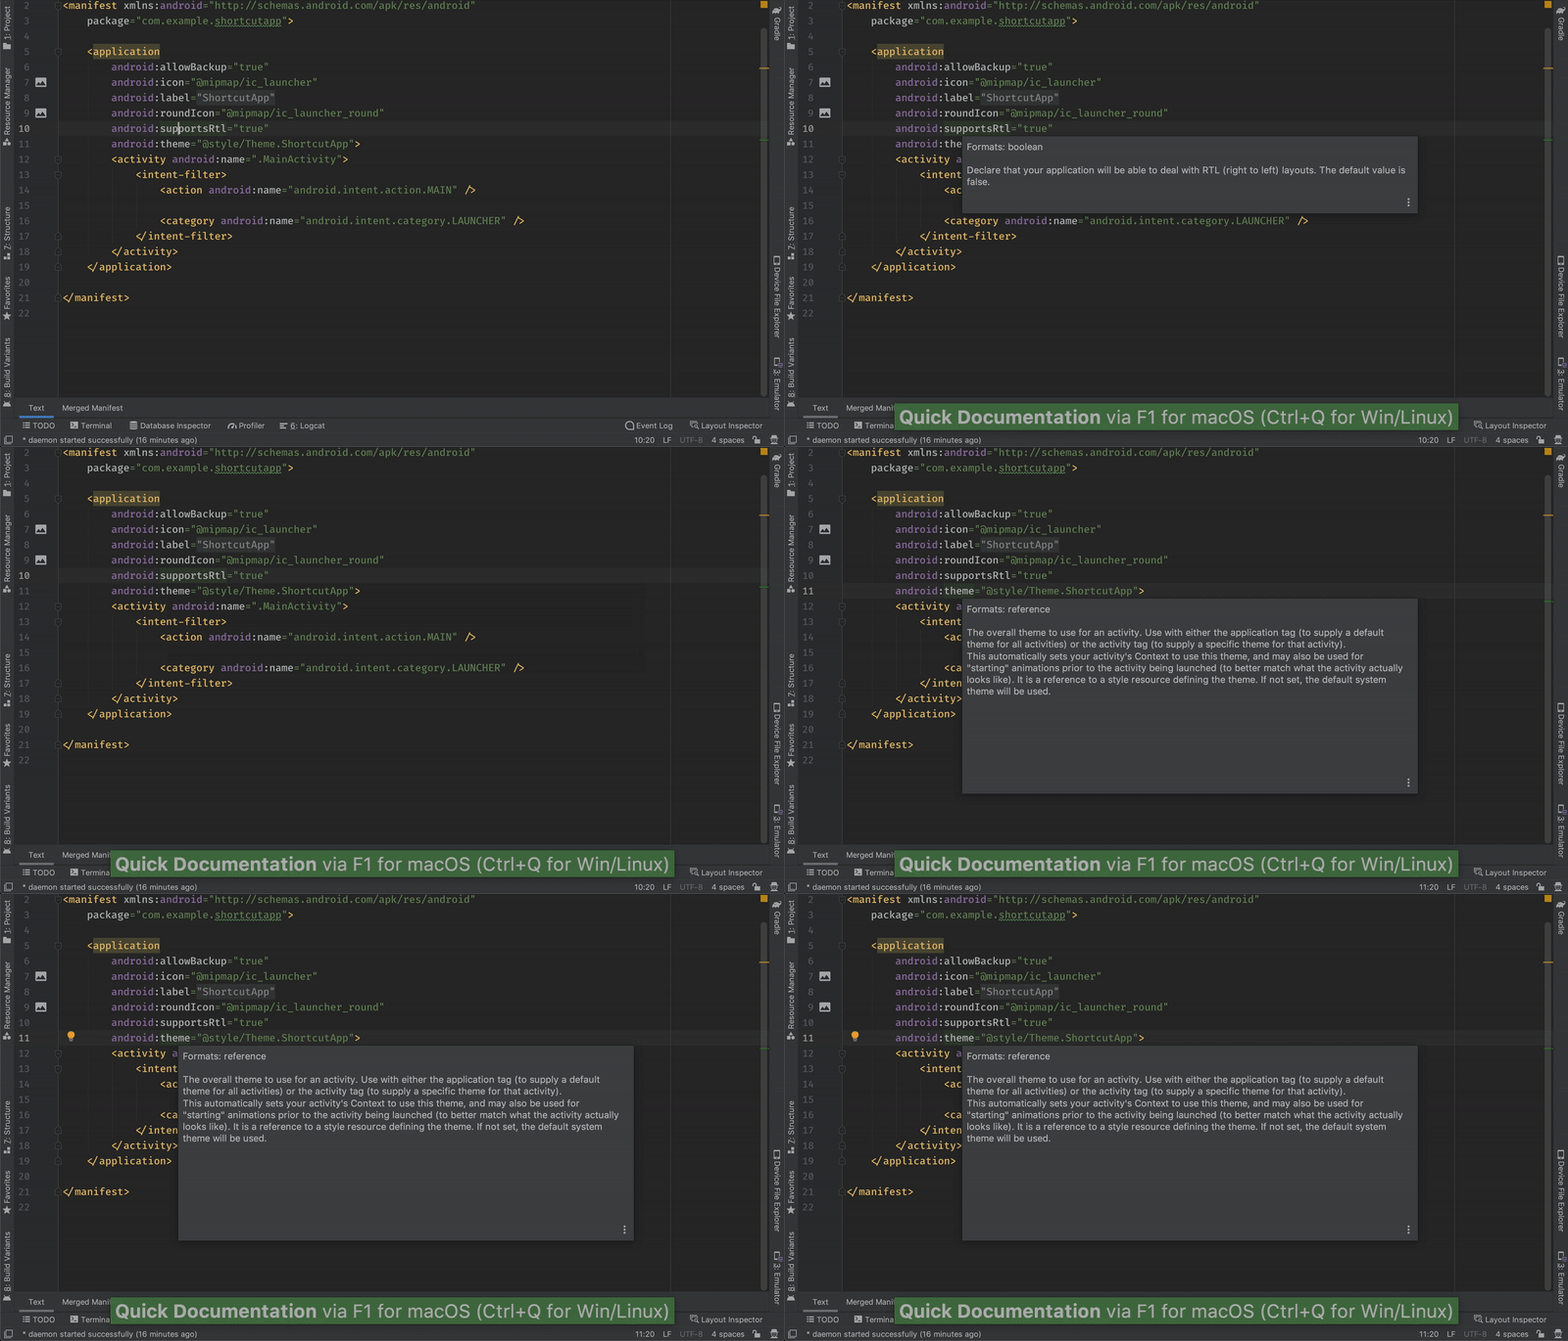
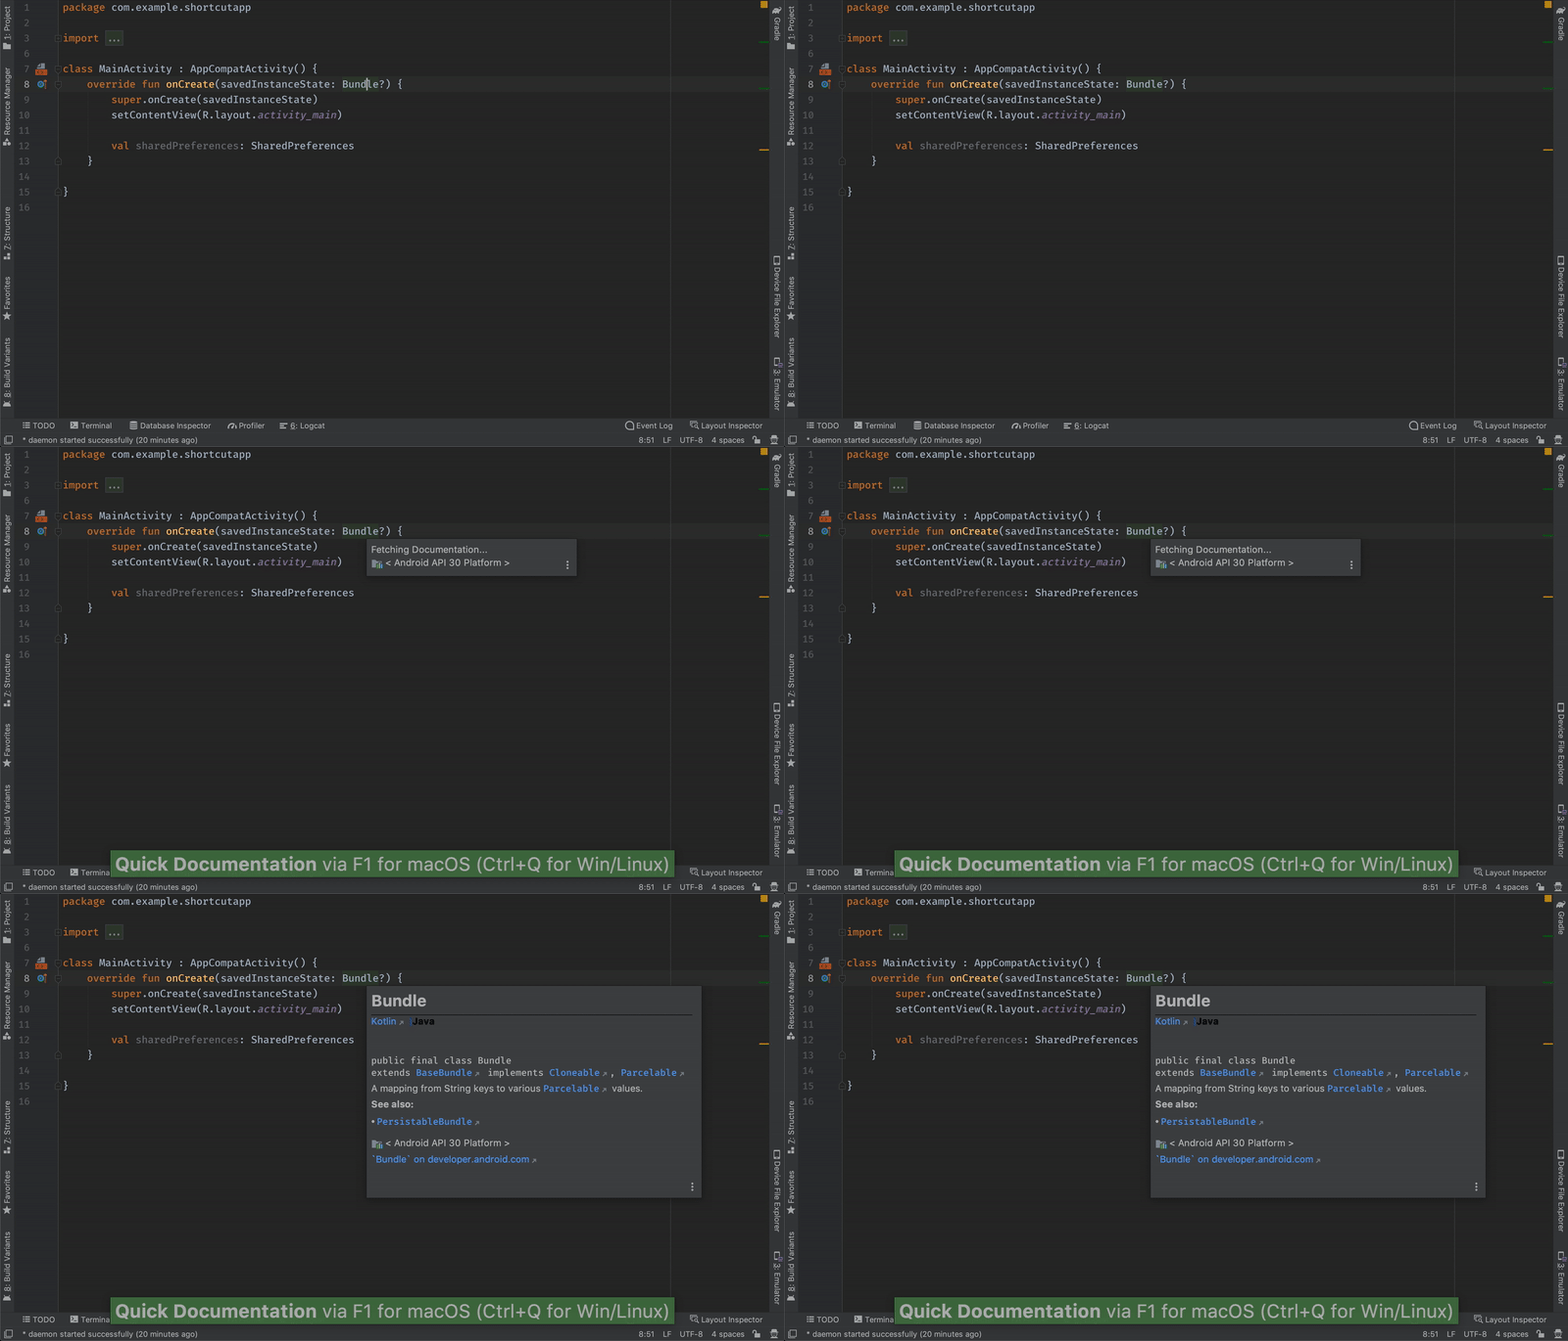
QUICK DOCUMENTATION
(macOS: F1 Windows/Linux: ctrl + Q)
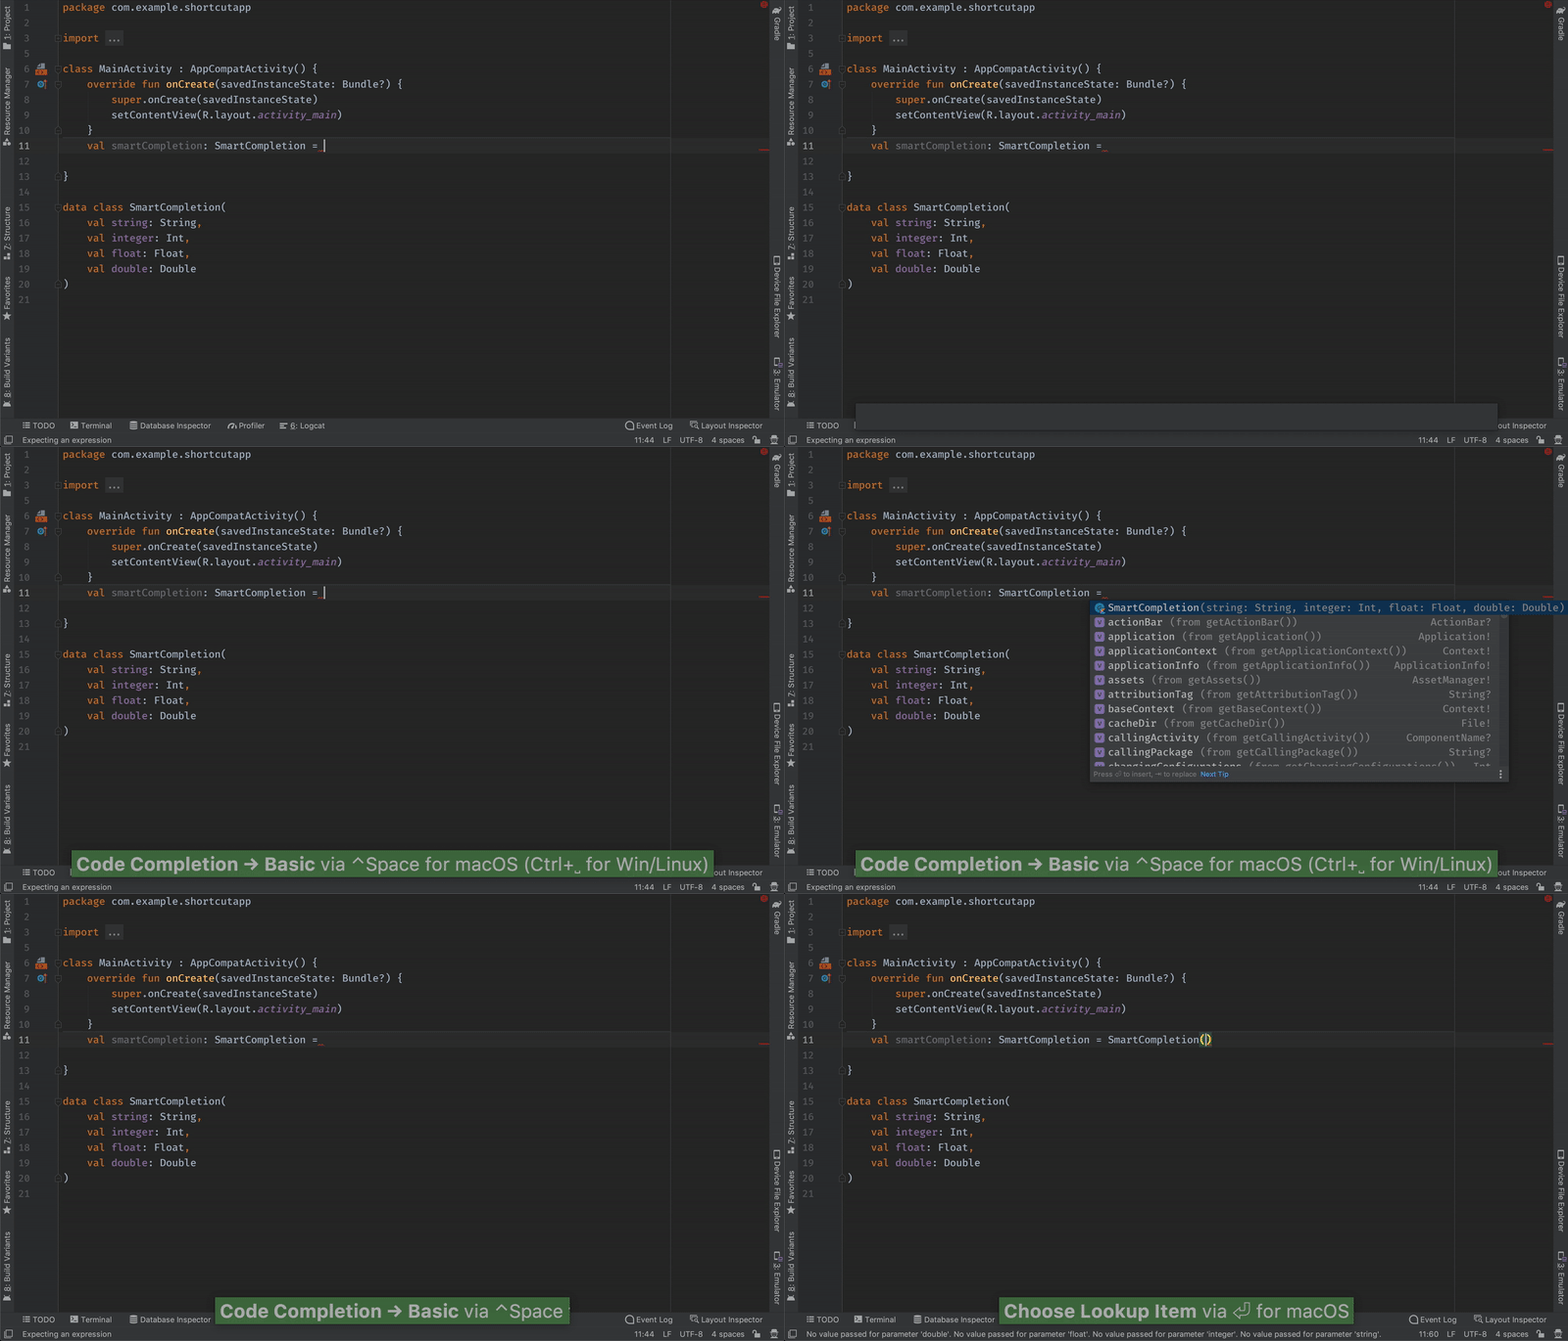
CODE COMPLETION
(macOS/Windows/Linux: ctrl + space)
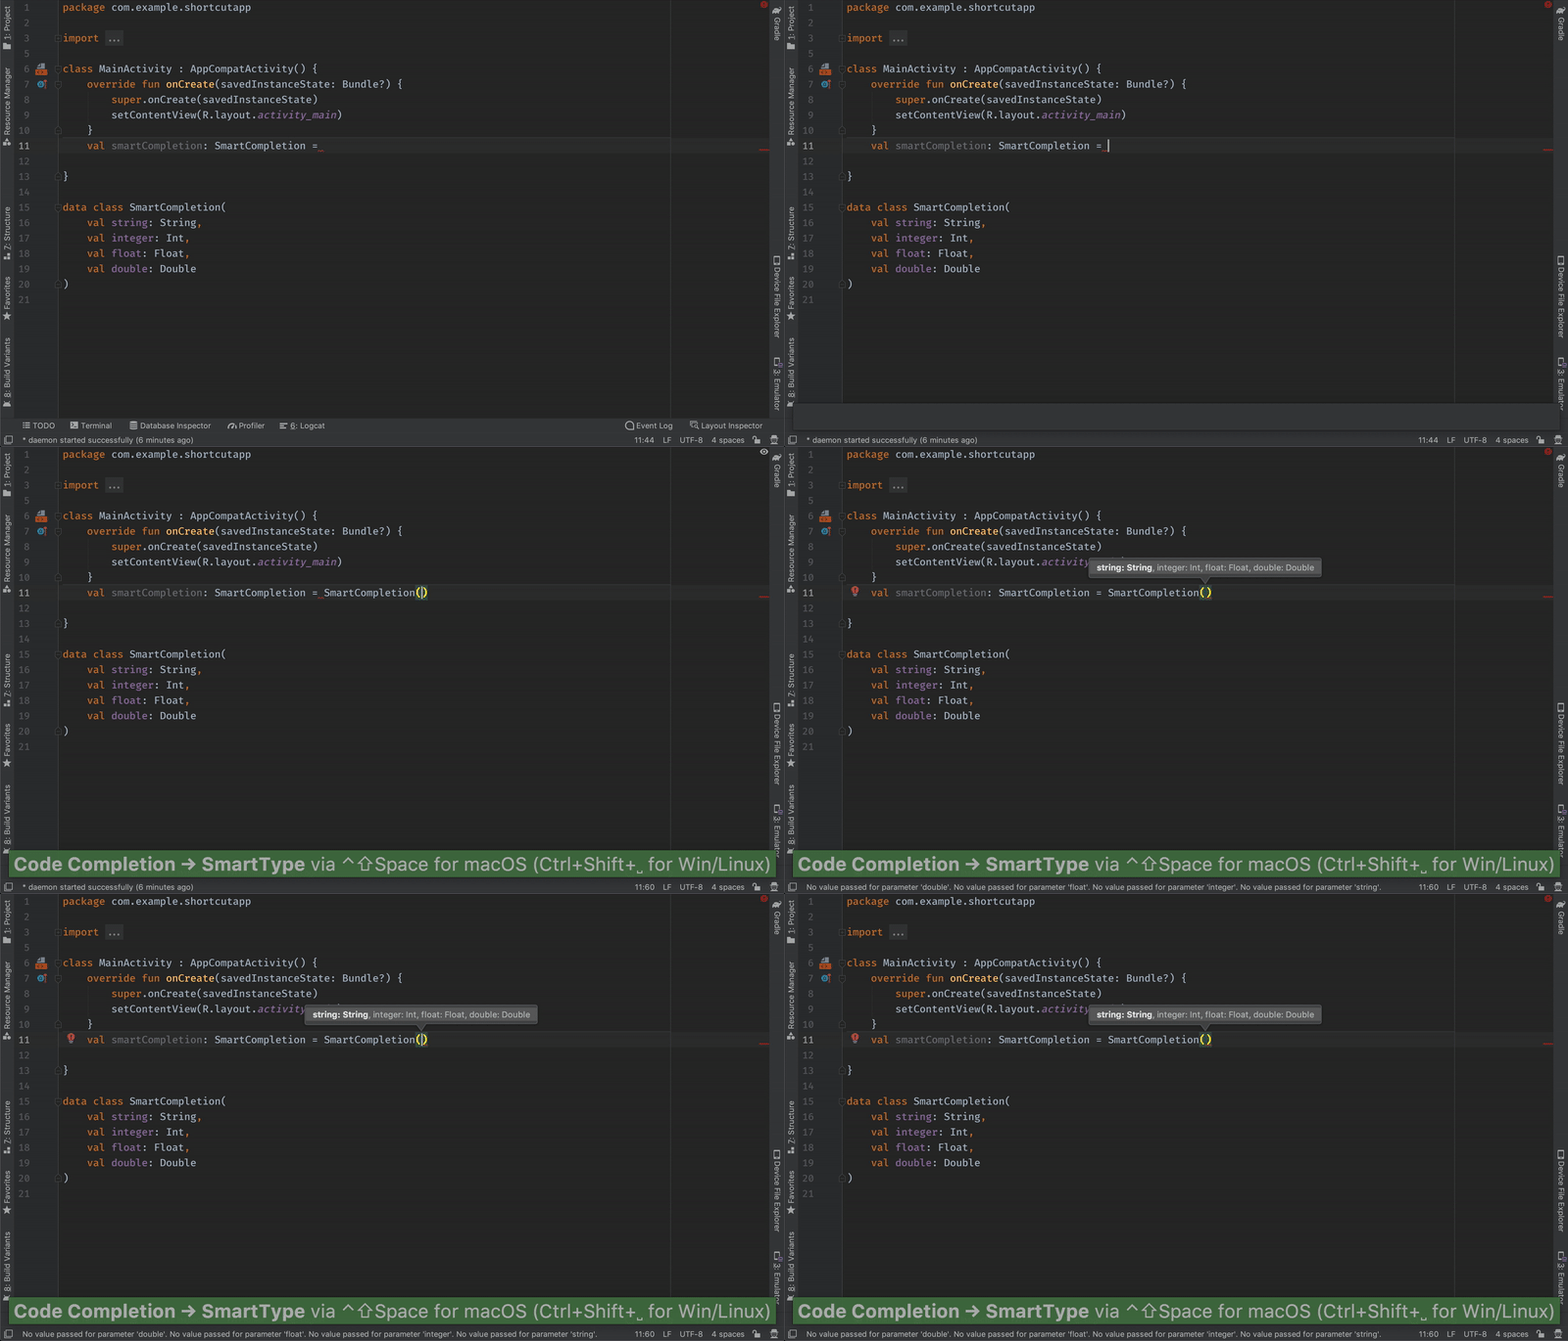
SMART CODE COMPLETION
(macOS/Windows/Linux: ctrl + shift + space) – filters the list of methods and variables by expected type.
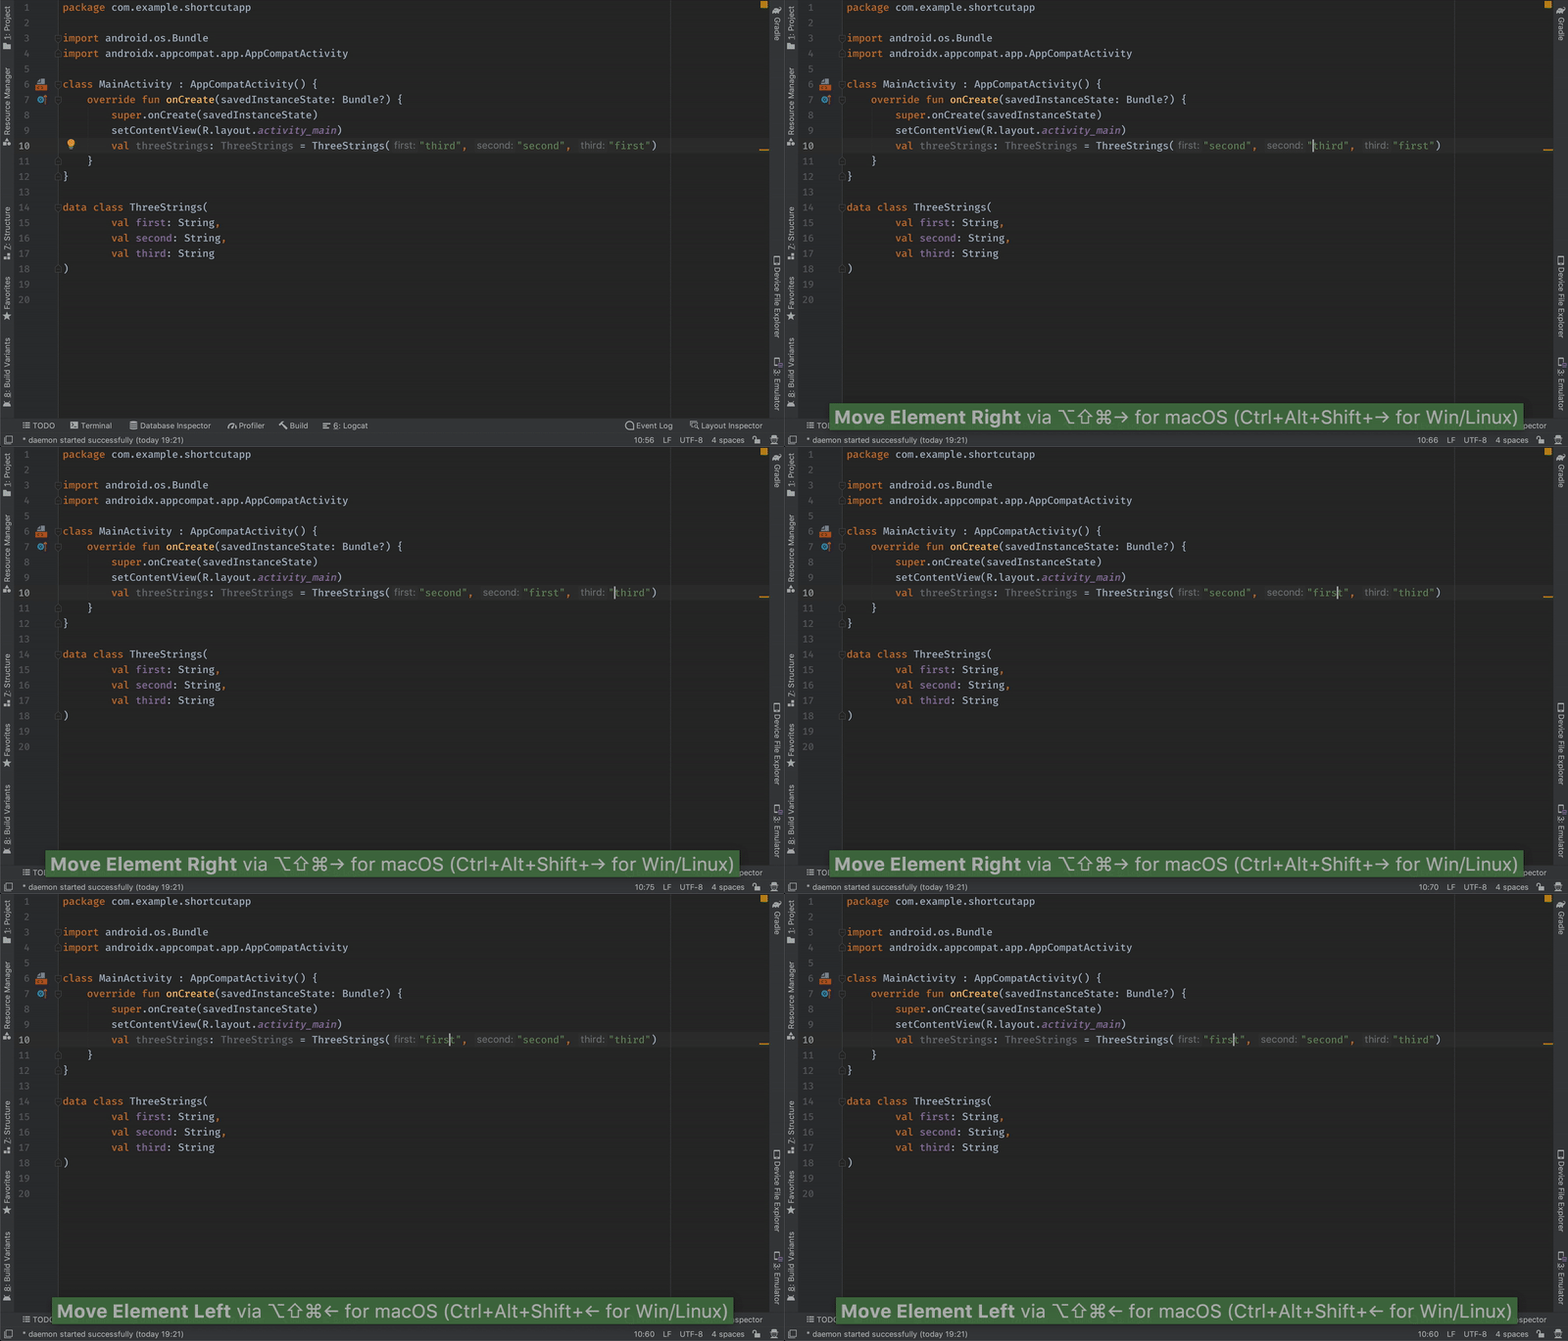
SWITCH ARGUMENTS
(macOS: cmd + option + shift + left arrow or right arrow Windows/Linux: ctrl + alt + shift + left arrow or right arrow)
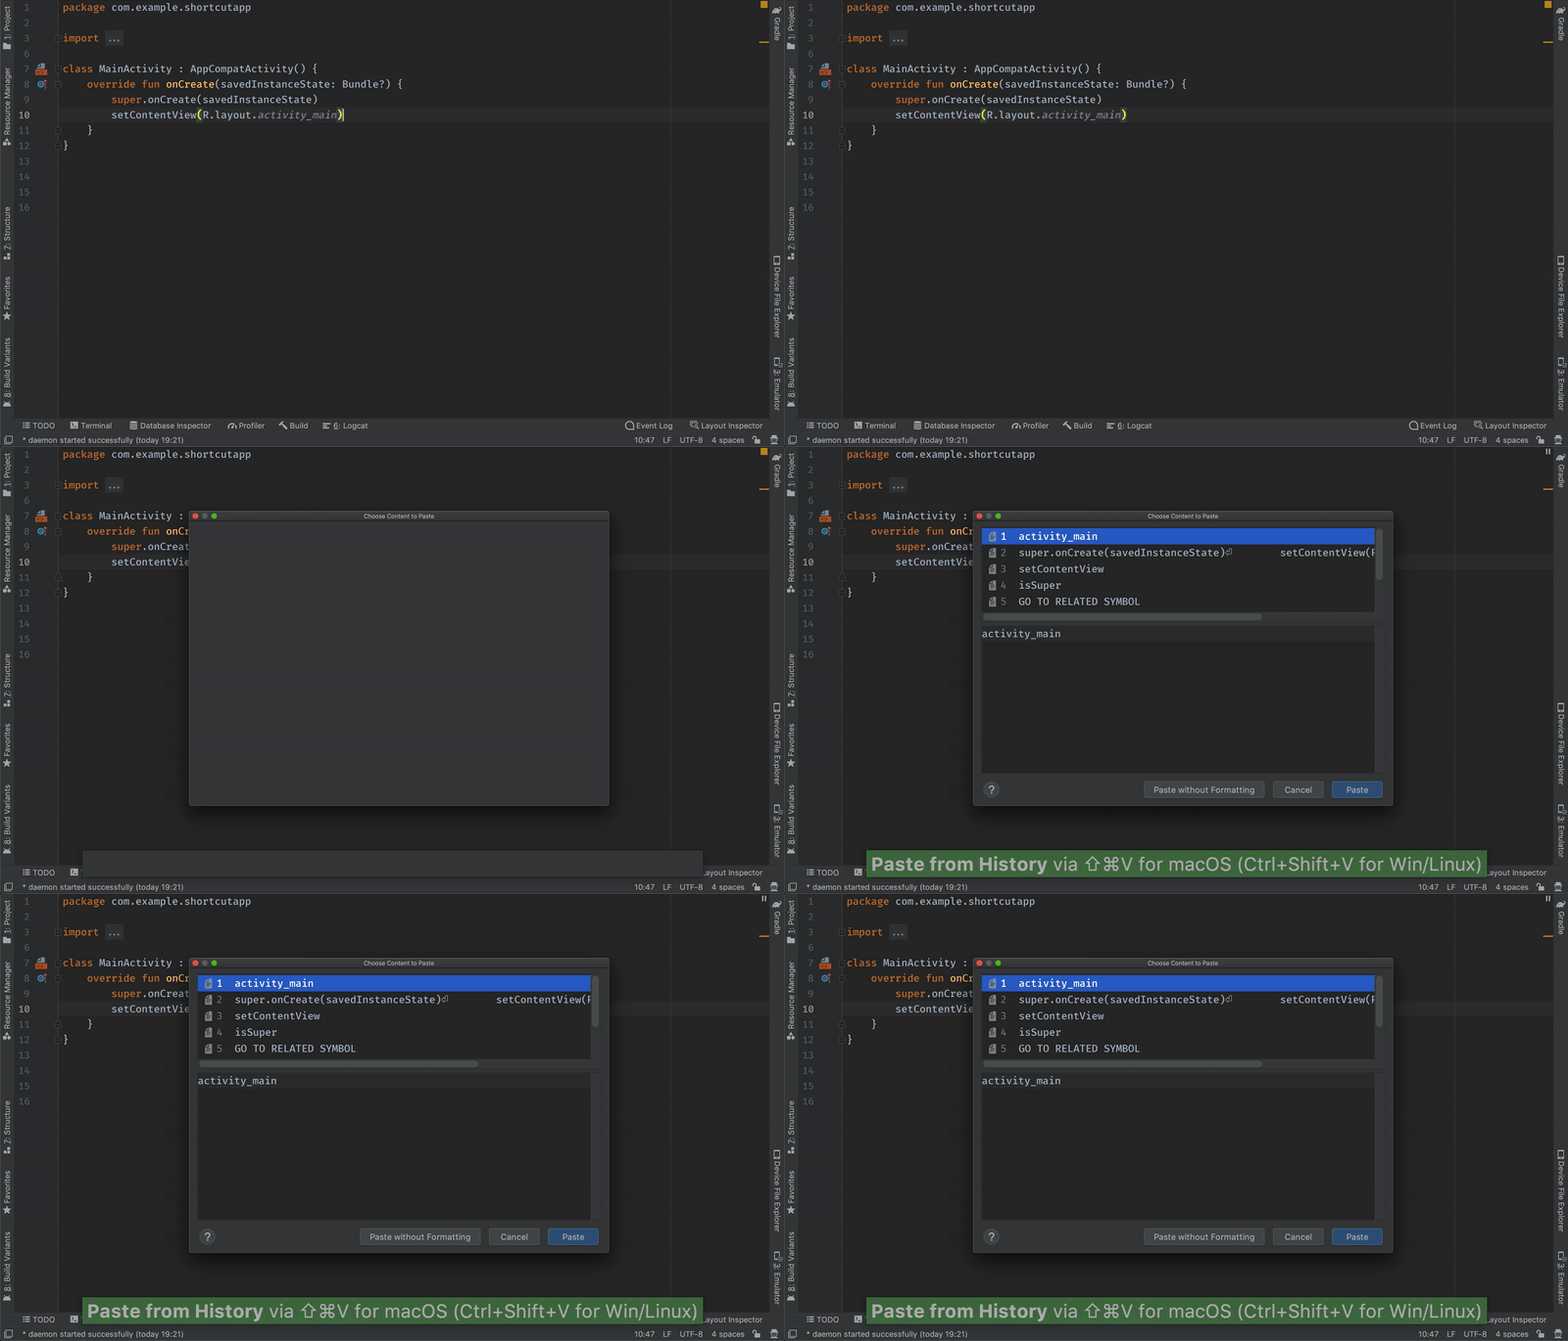
CLIPBOARD / PASTE FROM HISTORY
(macOS: cmd + shift + V Windows/Linux: ctrl + shift + V)
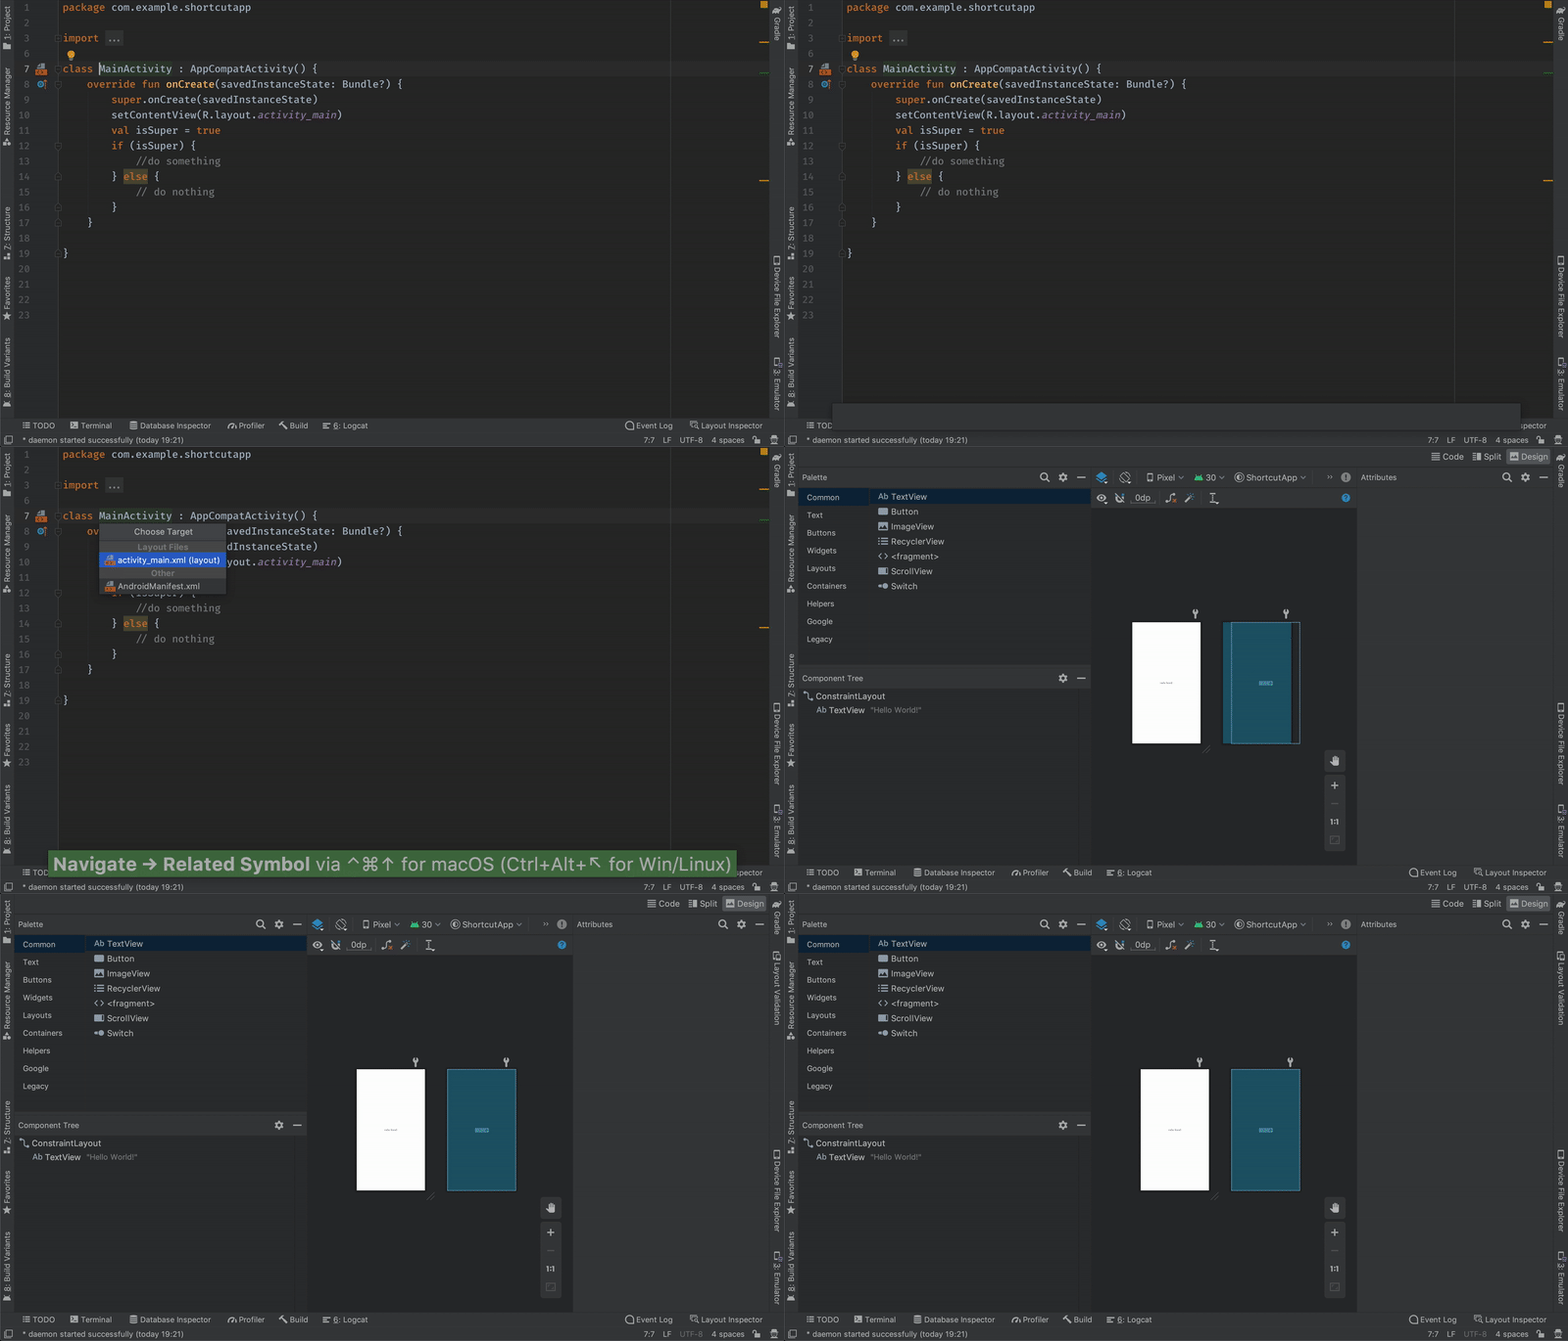
(macOS: ctrl + cmd + up arrow Windows/Linux: unknown) – linked xml/class file.
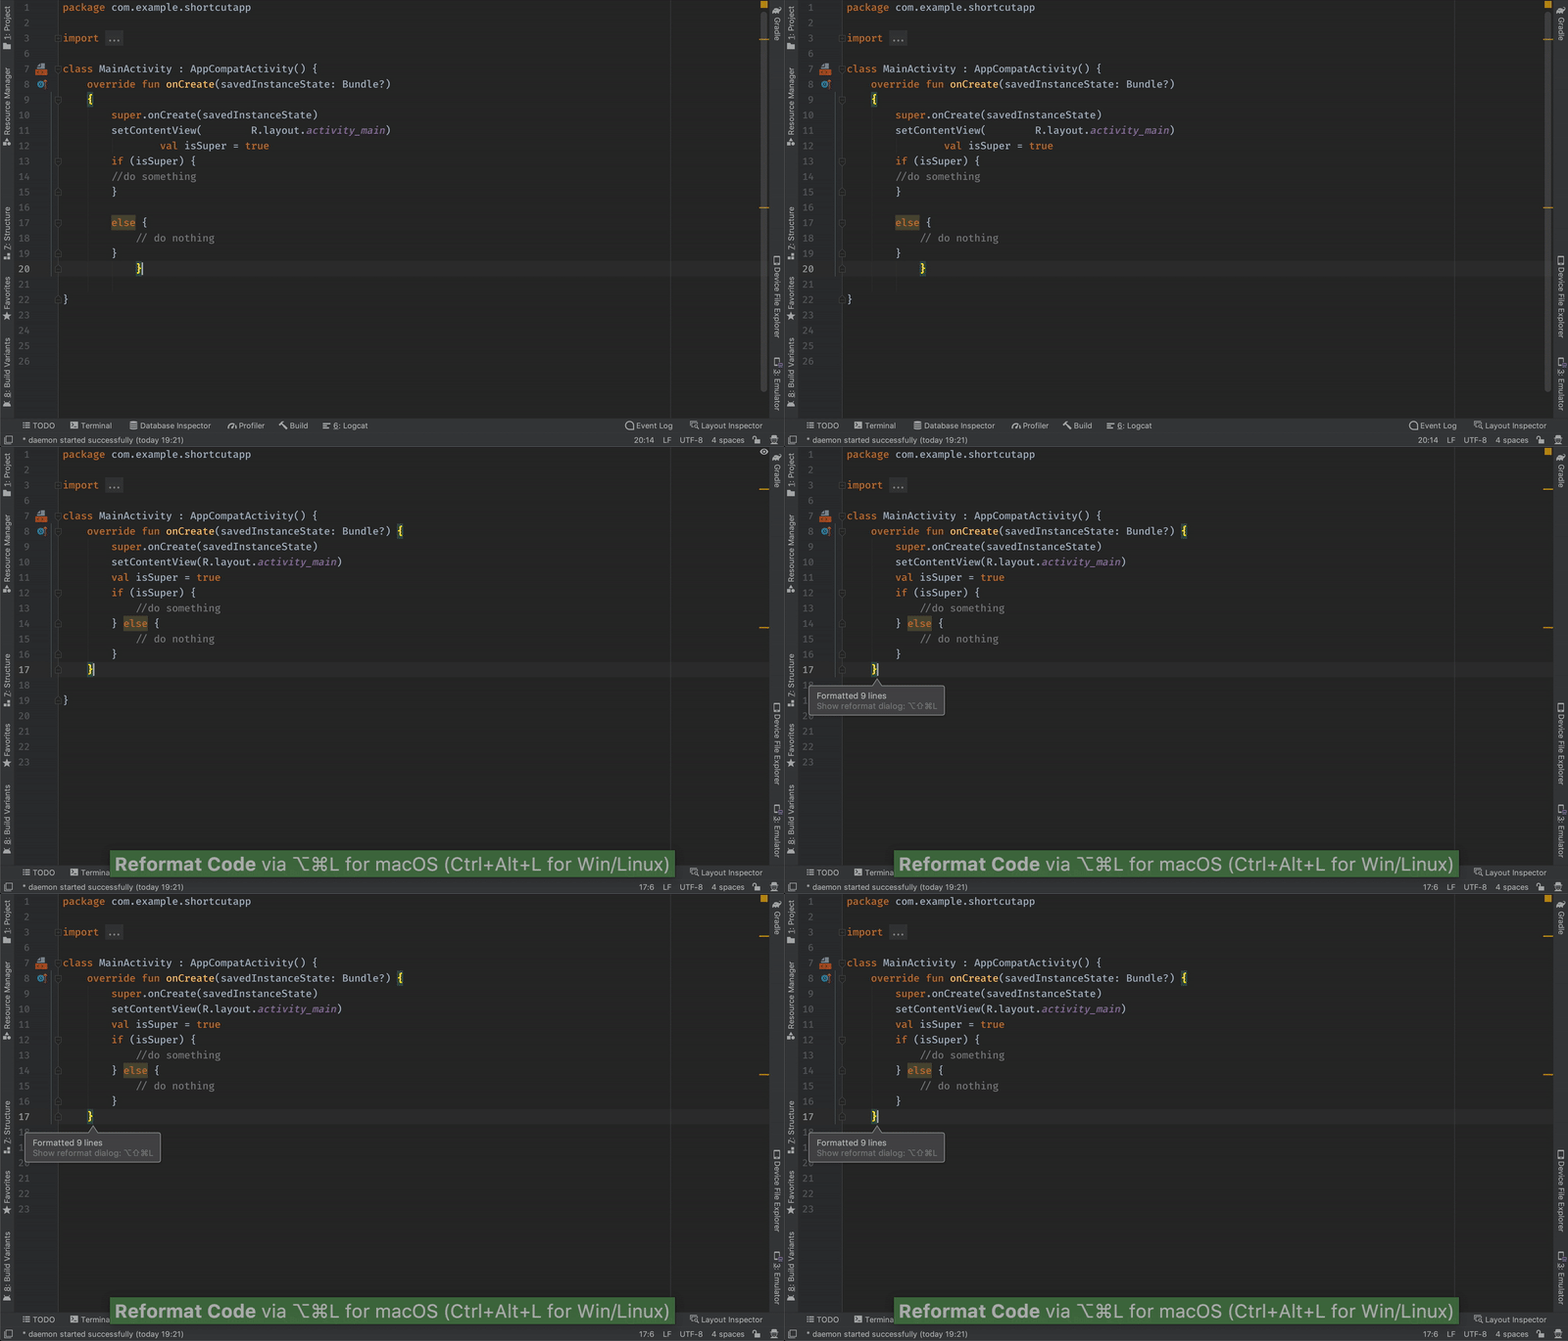
FORMAT CODE
(macOS: cmd + option + L Windows/Linux: ctrl + alt + L)
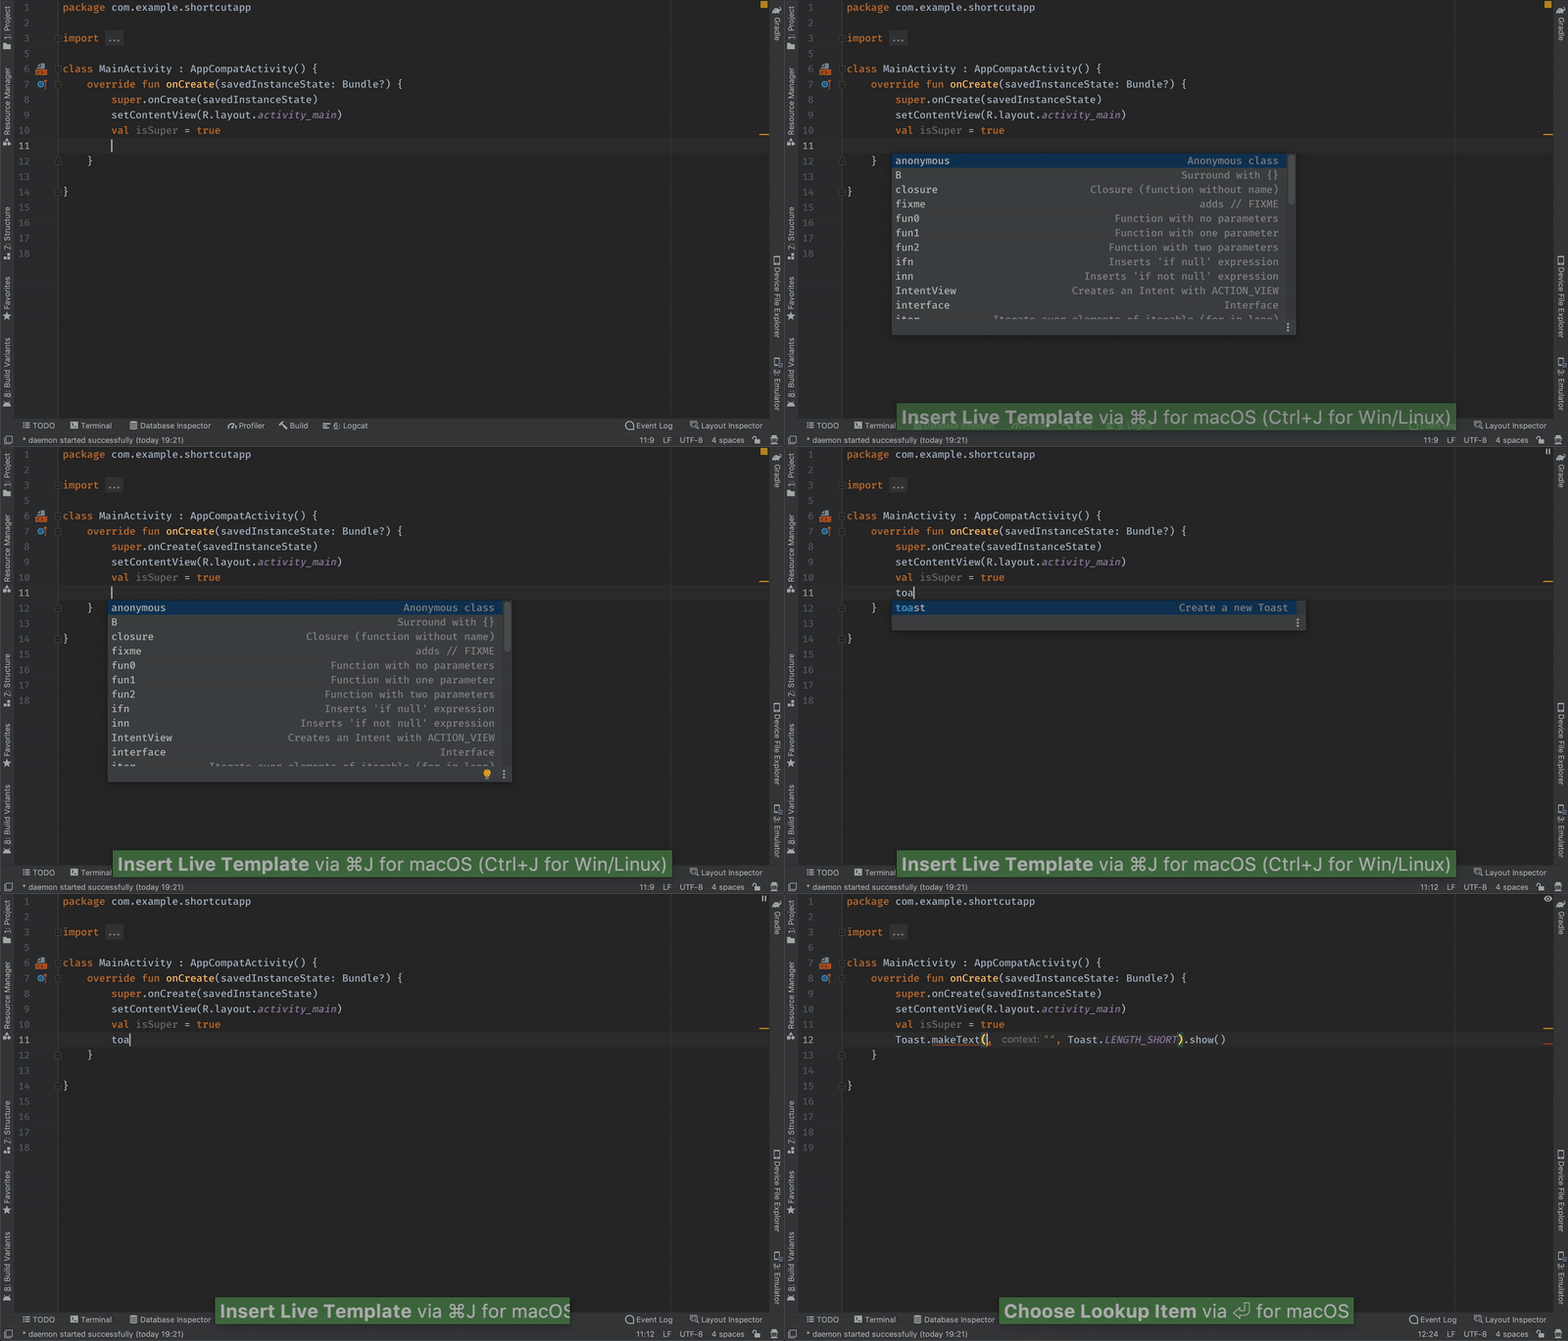
LIVE TEMPLATES
(macOS: cmd + J Windows/Linux: ctrl + J) – you can create your own templates in Preferences. Most common are these for making toast, logging, and creating todos.
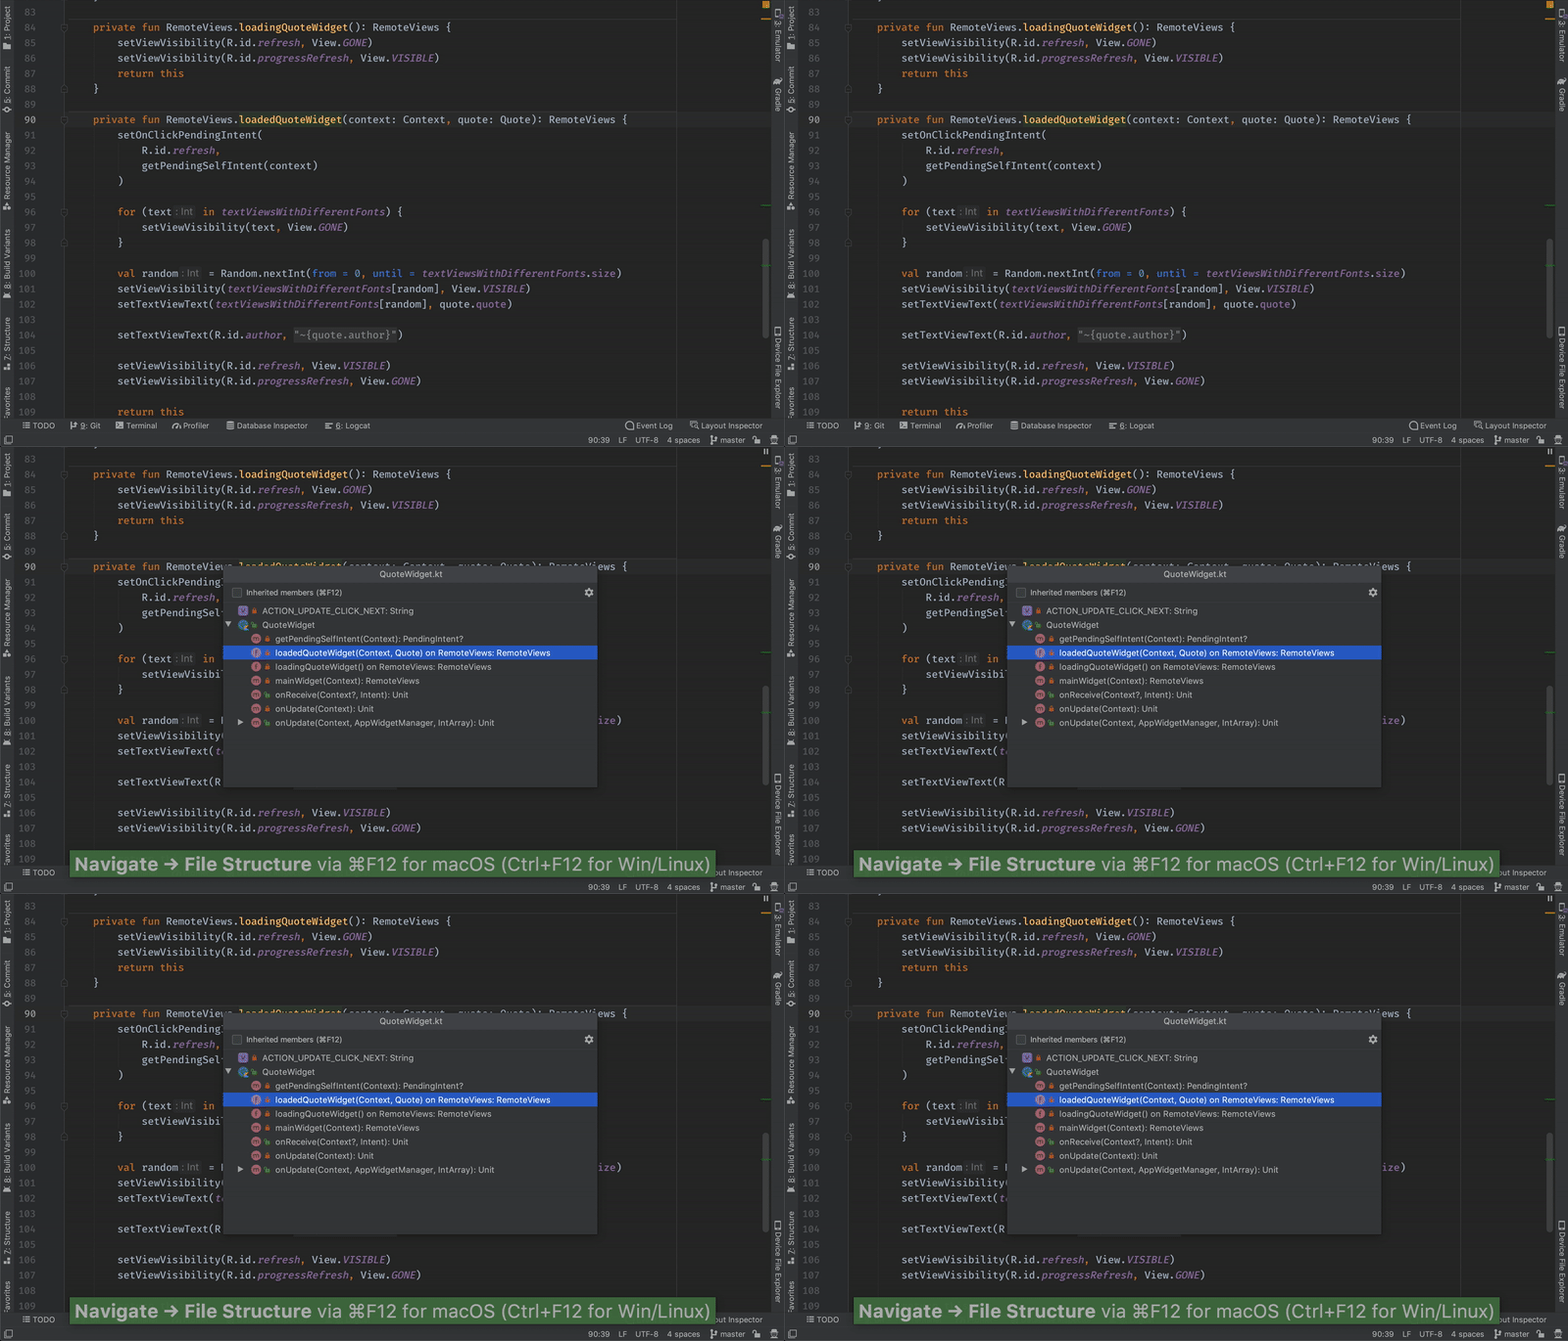
FILE STRUCTURE POP-UP
(macOS: cmd + F12 Windows/Linux: ctrl + F12) – pop-up version of Structure Panel.
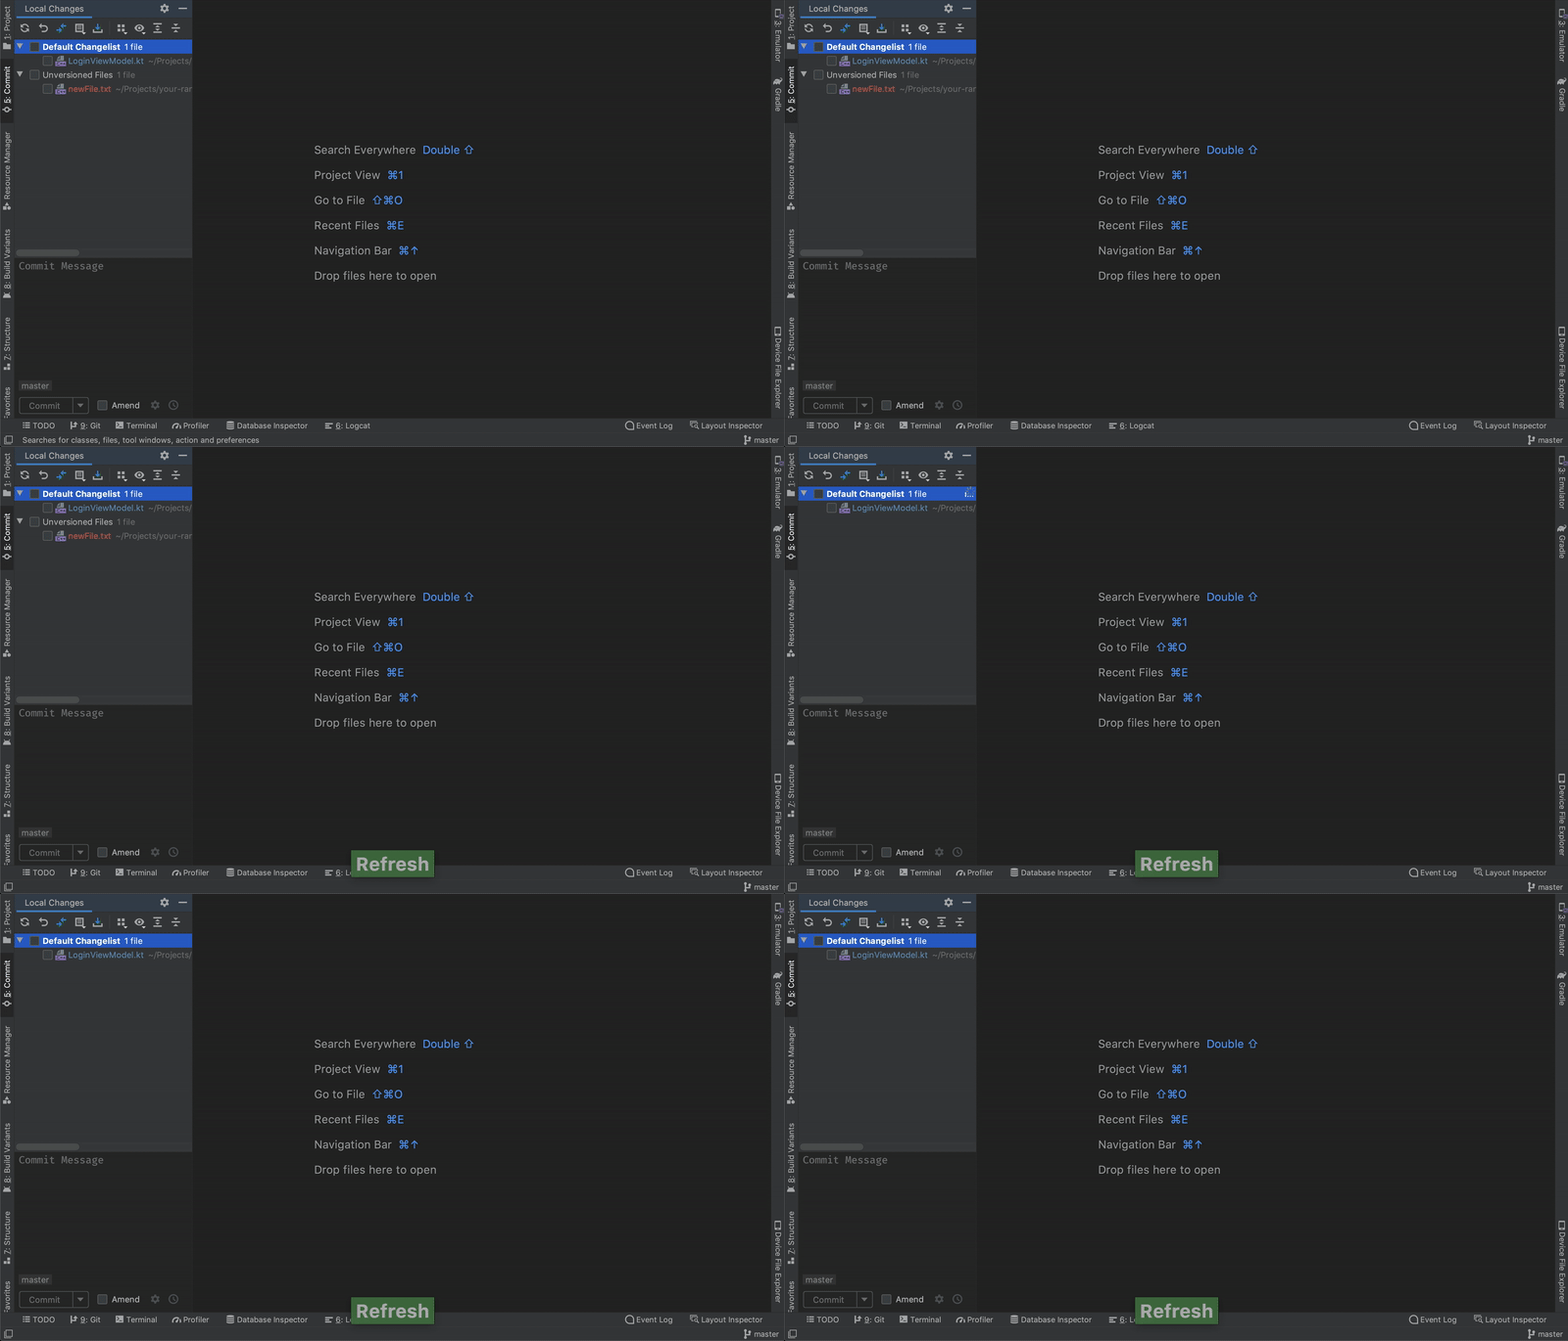
REFRESH
Assign (alt + shift + R). I’m using it to refresh git – sometimes it gets laggy if I’m making updates to commits via terminal via iTerm.
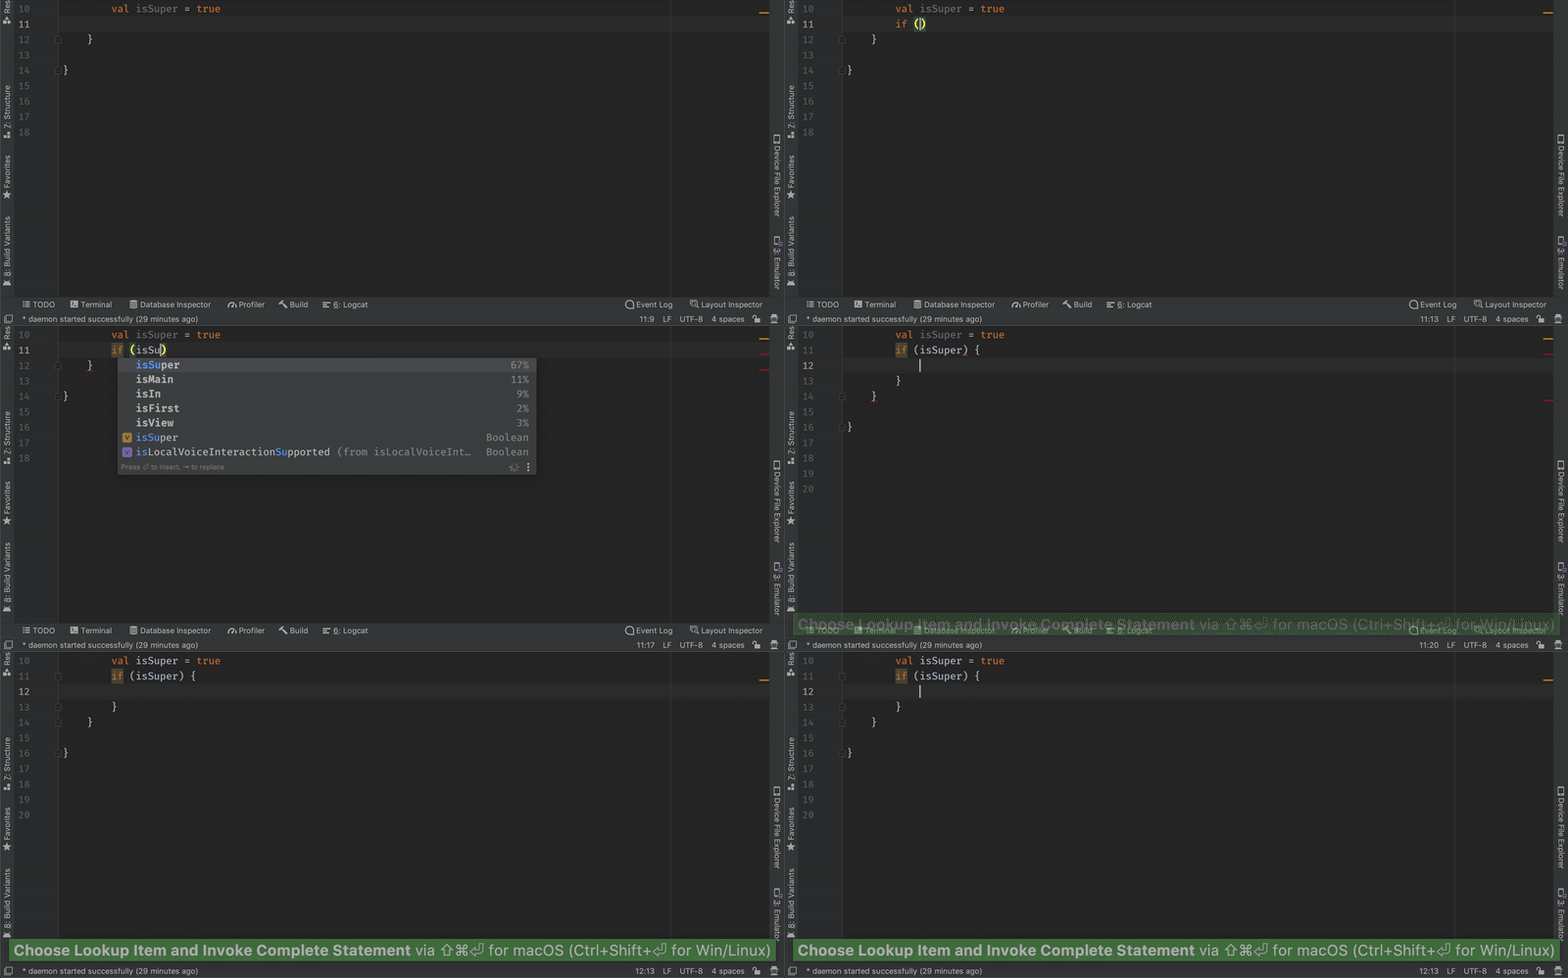
COMPLETE CURRENT STATEMENT
(macOS: cmd + shift + return Windows/Linux: ctrl + shift + enter) – for example, will add curly braces and go between them.
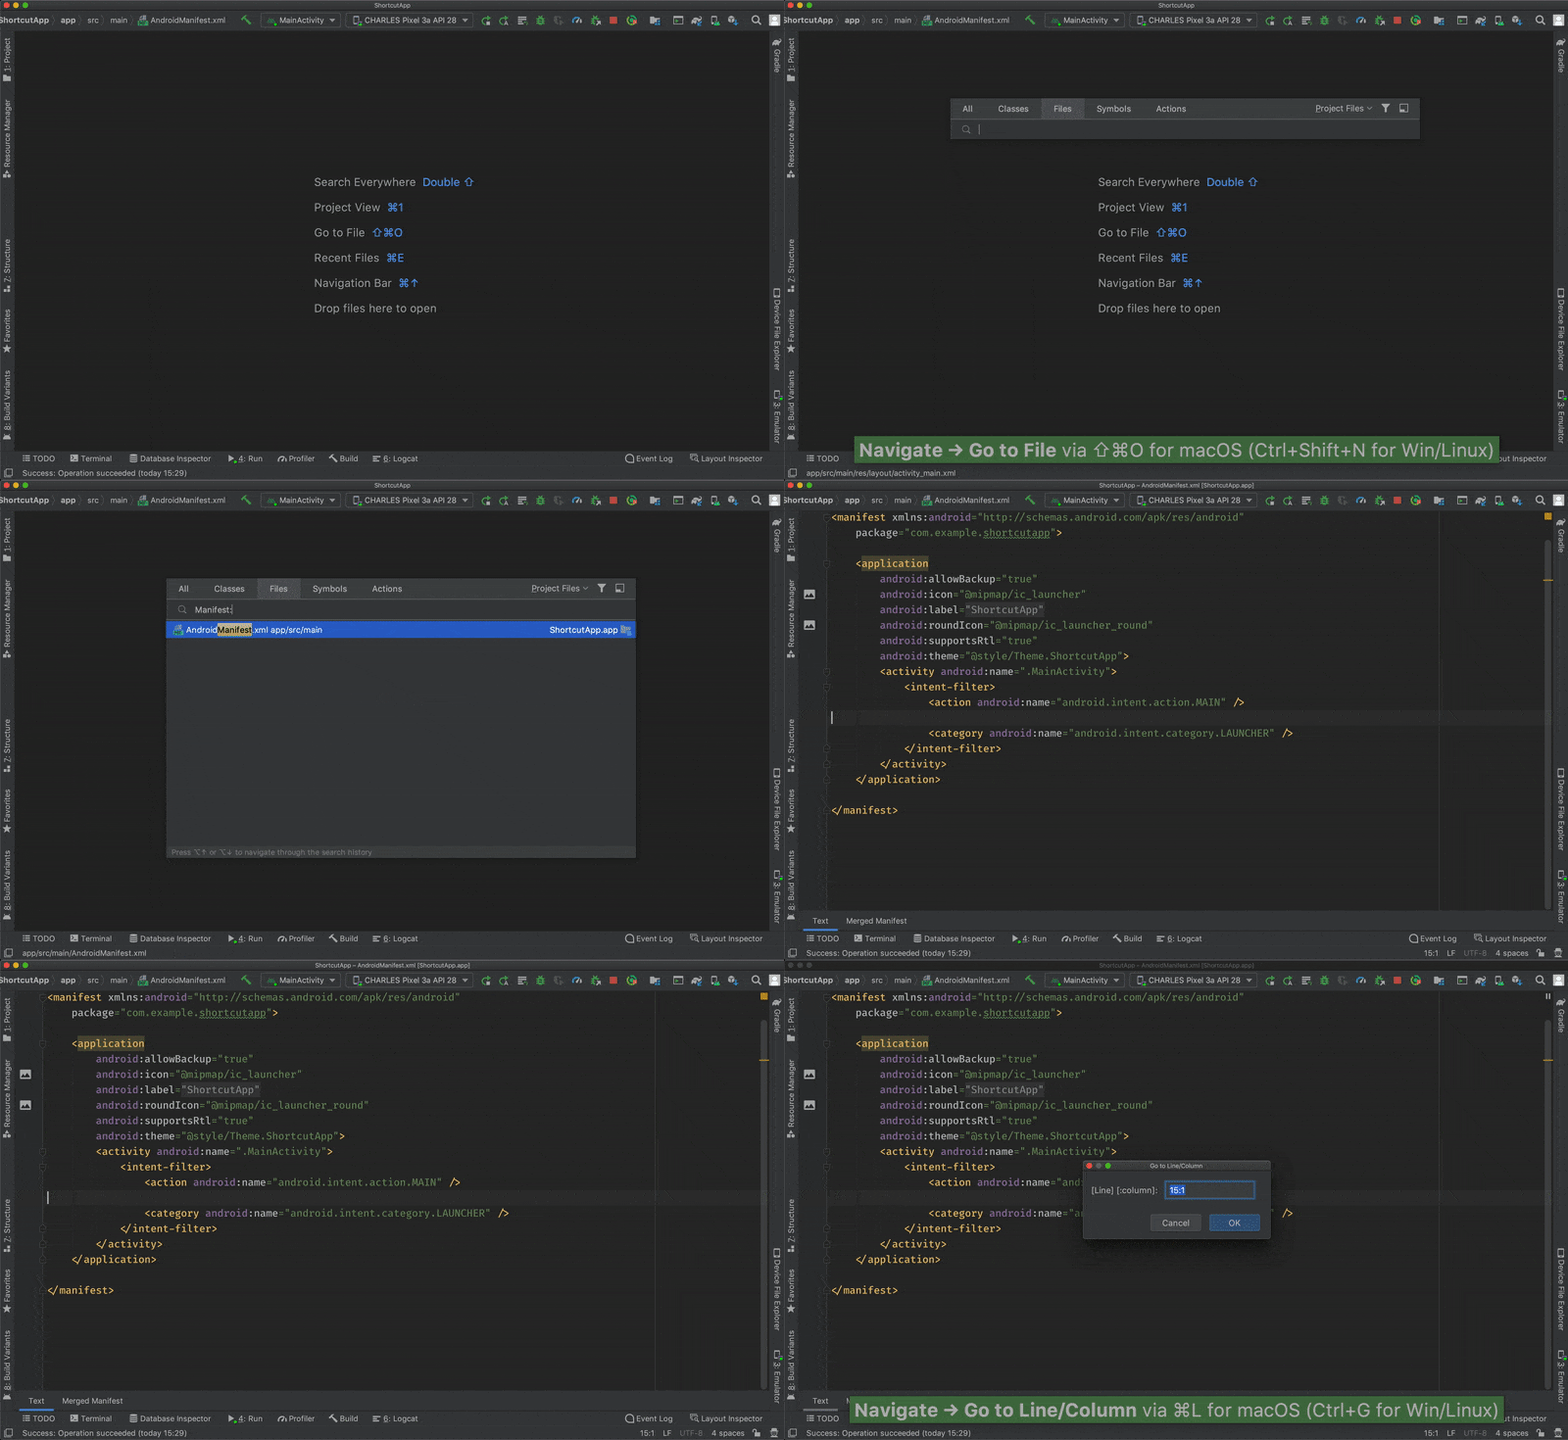
GO TO LINE
(macOS: cmd + L Windows/Linux: ctrl + G) – pop-up where you can go to a specific line (and column) within the opened file. If you’re not pair programming, you can easily switch off Show line numbers, as you may not need that while using GO TO LINE.
The second option to search for a specific line of some file is to use Class or File Search and type name of the class followed by colon and number of row e.g. Manifest:15 .
(macOS: ctrl + T Windows/Linux: ctrl + alt + shift + T)
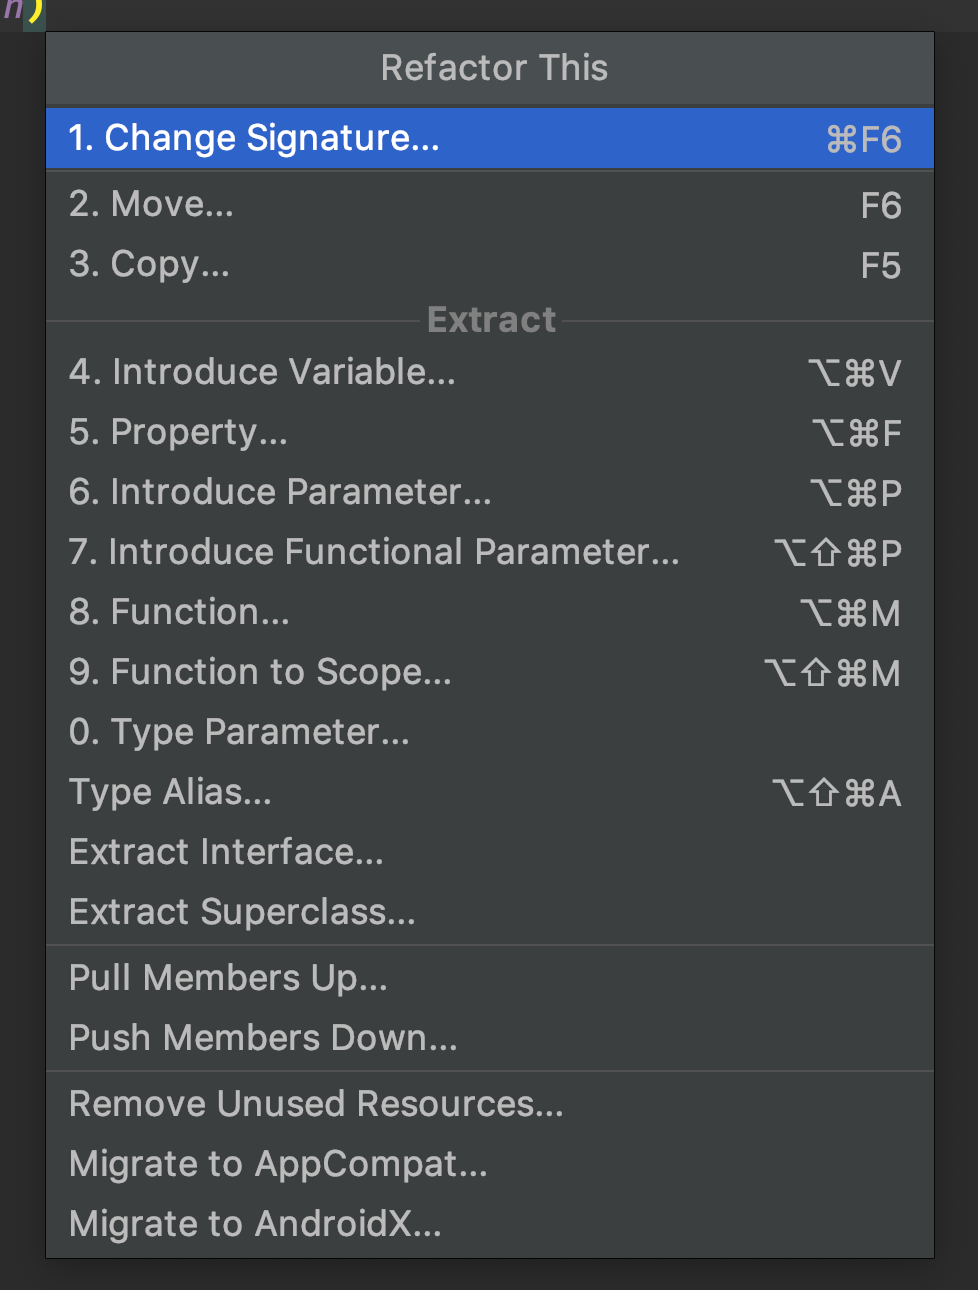
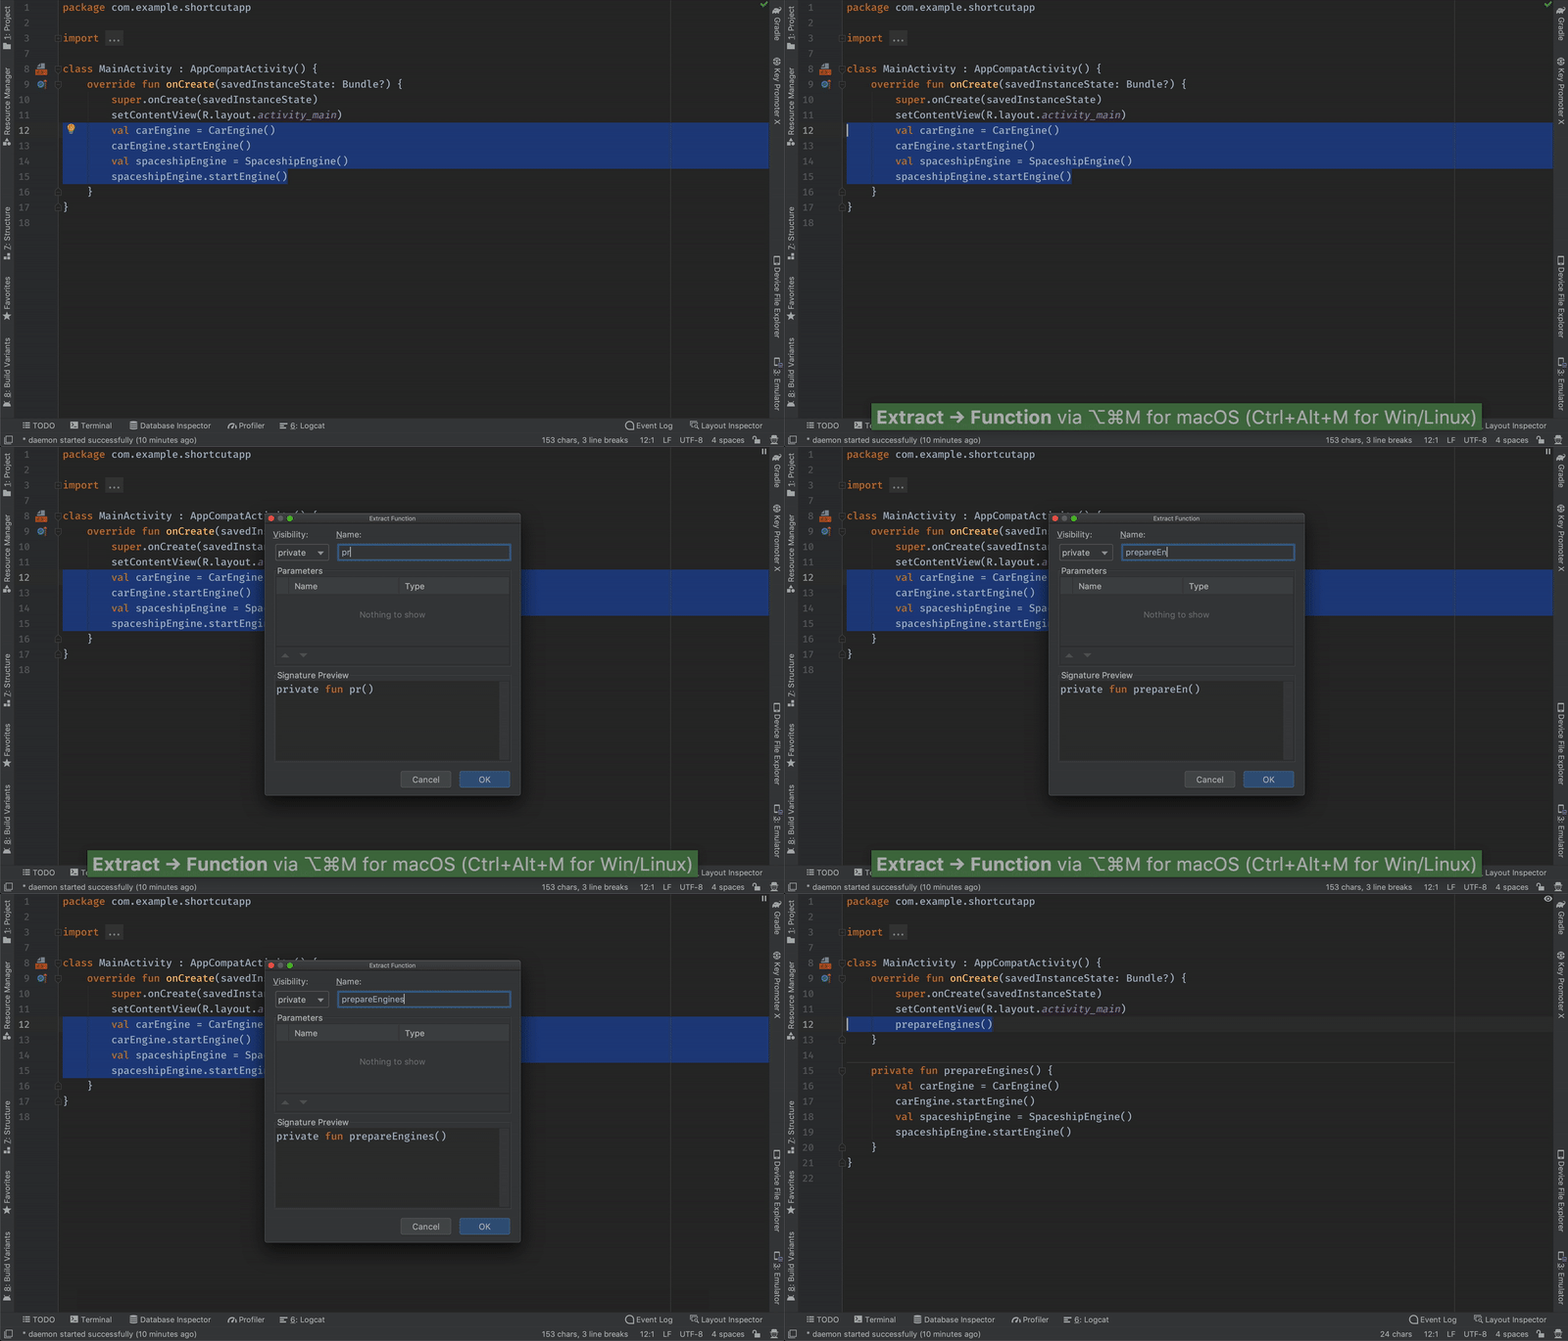
Probably one of the most frequently used Refactor option is Extract Function:
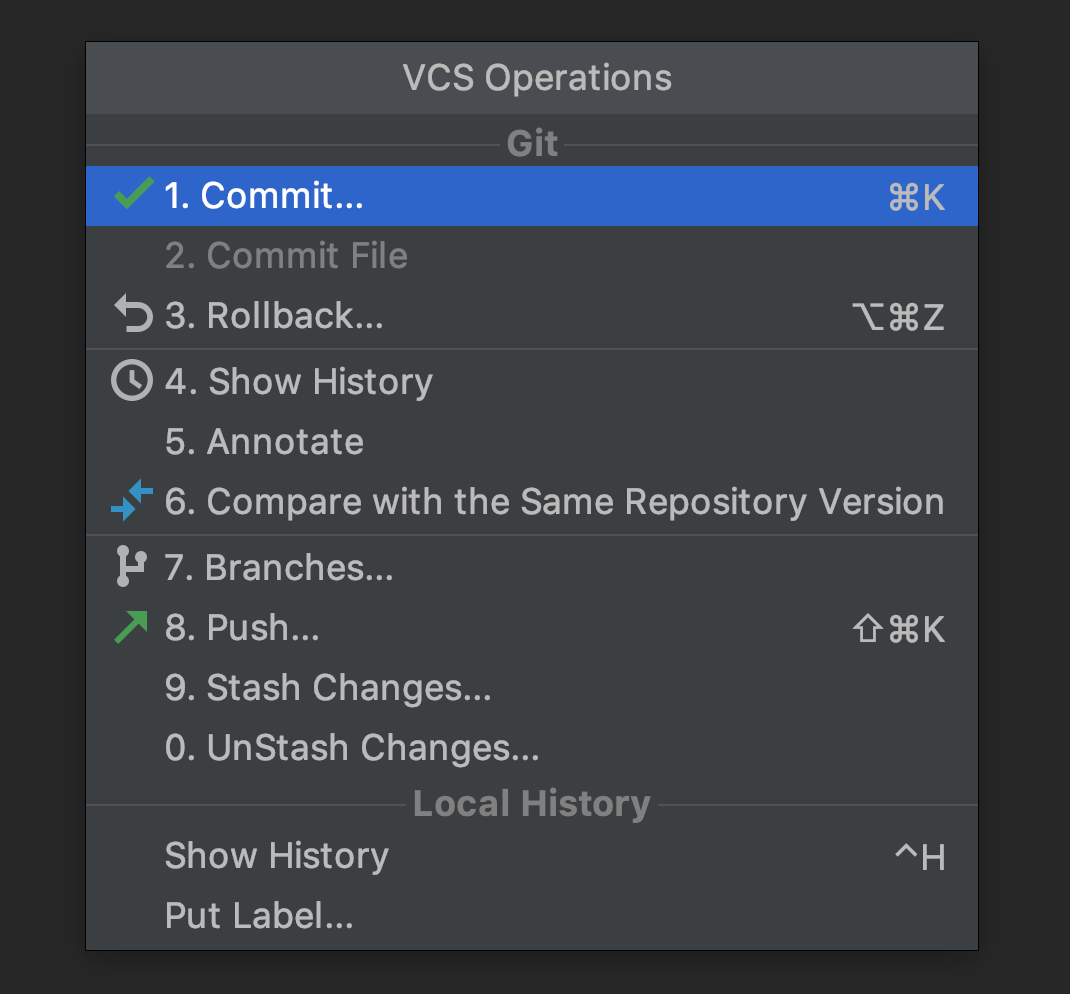
VERSION CONTROL POP-UP
(macOS: ctrl + V Windows/Linux: alt + `) – needs git configured first.
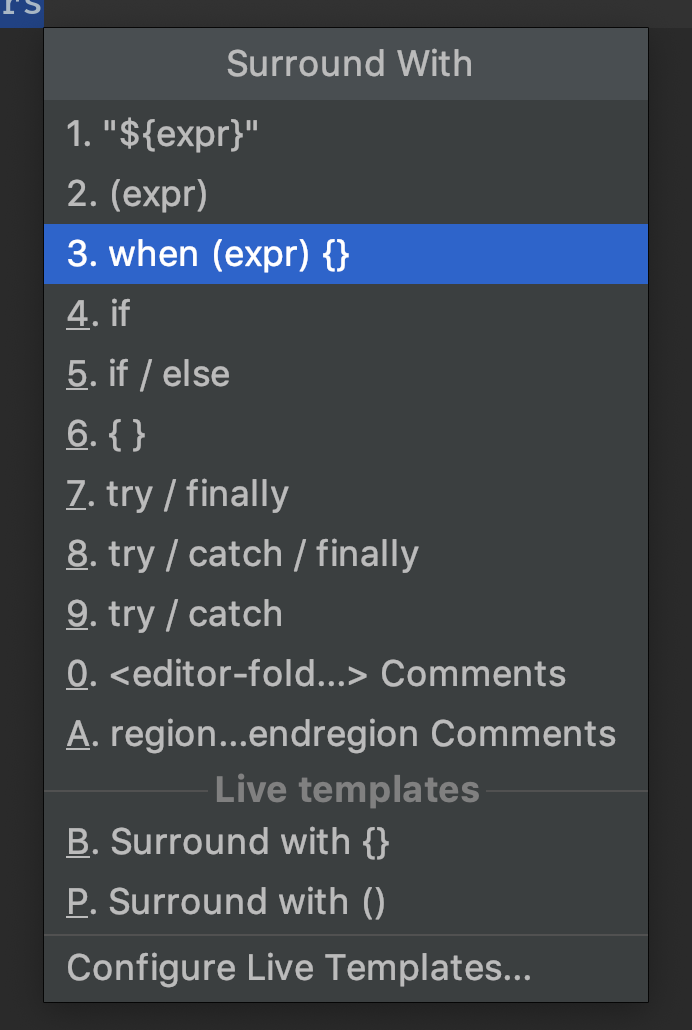
SURROUND WITH
(macOS: cmd + option + T Windows/Linux: ctrl + alt + T) – the contextual menu for selected text or text beneath the cursor.
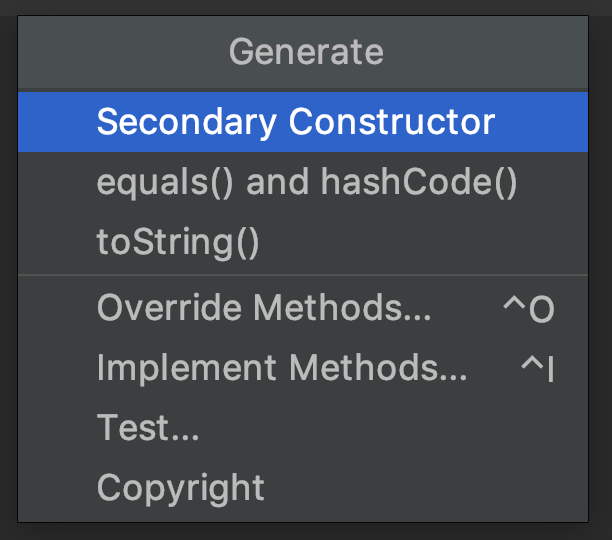
BOILERPLATE CODE GENERATION
(macOS: cmd + n Windows/Linux: alt + insert)
Handy plugins
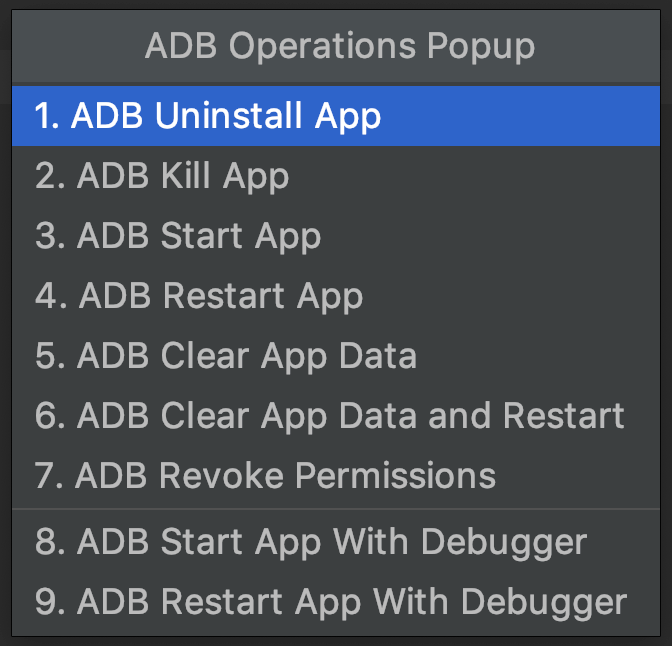
ADB IDEA
(macOS: ctrl + shift + A Windows/Linux: ctrl + alt + shift + A) – will prompt with ADB Operations Popup and let you clear data and uninstall the app with just a single click.
GRADLE STOP
Adds button for gradlew --stop, which then you can assign to shortcut.
NYAN PROGRESS BAR
Nyan cat wherever the loading bar appears.

POWER MORE II
Flames, explosions, etc: check yourself!
Custom Logcat Color
By going to “Android Logcat” preferences, you can manually change colors (check gist content for it), or just hit the gear icon there and import schema with that file. You should know that it will override your other customization, so I would use it on a relatively clean setup.

Conclusion
- Learn to move around with the keyboard and resize/show/hide panels — remove tabs immediately.
- Make it yours (assign shortcuts which best suits your needs) — this is actually a very small but important concept.
- Put your mouse far from you — use only when necessary. For training purposes, you may try to turn it off completely.
Thanks for your time! Please let me know if you find it useful or if you have any questions/suggestions about improving code reviews.
If you’re interested in more content like this follow me on twitter.
Sources:
- Keyboard shortcuts | Android Developers
- Android Studio Tips and Tricks — Part 2
- 50 Android Studio Tips, Tricks & Resources you should be familiar with, as an Android Developer
- The experts’ guide to Android development tools — Google I/O 2016
- IntelliJ map
- Mouseless driven development
- Android Studio for Experts (Android Dev Summit 2015)
- 20 Android Studio Shortcuts to Accelerate Your Workflow
- The Top 20 Android Studio Plugins

