In a multi-module Android project

Recently I was configuring detekt in our multi-module project. To make it easier to pass knowledge about using it I wrote this article. Feel free to use it as documentation inside your project, to speed up using linter by new developers.
I divided it into three parts. The first part will give you Gradle setup for detekt in a multi-module android project. The second part is about the initial setup that every developer needs to do locally in order to use detekt. In the third part, I will talk about practical use-cases and some hints to use them daily.
Part I. Multi-module detekt setup
What is detekt?
“A static code analysis tool for the Kotlin programming language.” — in other wordsif your code has errors, bugs, stylistic, formatting errors, you will see an error with description.
detektAll
Configuring basic setup for detekt is a pretty straightforward task, as documentation provides clear steps on how to do it. But in projects with multiple modules, I found it hard to implement it so easily.
Therefore I thought it would be beneficial to share a gist of the Groovy build.gradle setup with you:
Using detektPlugins "io.gitlab.arturbosch.detekt:detekt-formatting:1.16.0" is optional, but it will give you additional formatting checks and autoCorrect from ktlint, which is very useful in my opinion.
config
Detekt needs a configuration file (detekt.yml by default) in order to follow your guidelines. Once detekt in Gradle is set up, you can use built-in detektGenerateConfigtask to get a default configuration file for future improvements.
generating baseline
Putting detekt into a new project is easier, as you’re starting with clean code. On the other side, placing it into the older project will most probably create hidden issues. In order to start using detekt and prevent detektAll task from failing with current issues (based on the previously mentioned config), you may generate a baseline file — baseline.xml by default. This task is usually used once. In that way, we’re starting with a “clean” setup, and fix these issues during regular coding.
Again detekt comes with the task for creating a baseline. But for multi-module setup you will need a custom task that will do checks for each module. Here’s an additional snippet (you need variables from the first snippet too).
Part II. Basics and local configuration
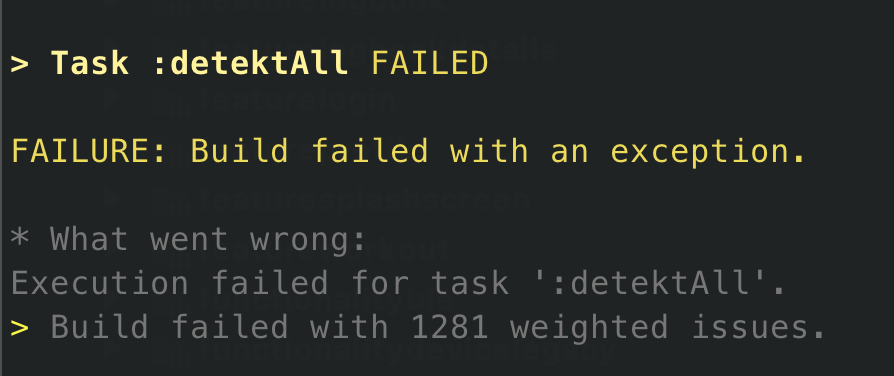
Possible failure may look like this:

In this example, detekt found 1281 issues. Of course, you will see each issue in a separate line. For example:

You can also see possible errors right in IDE, but we will talk about this later (as you need a separate plugin for it)
Task
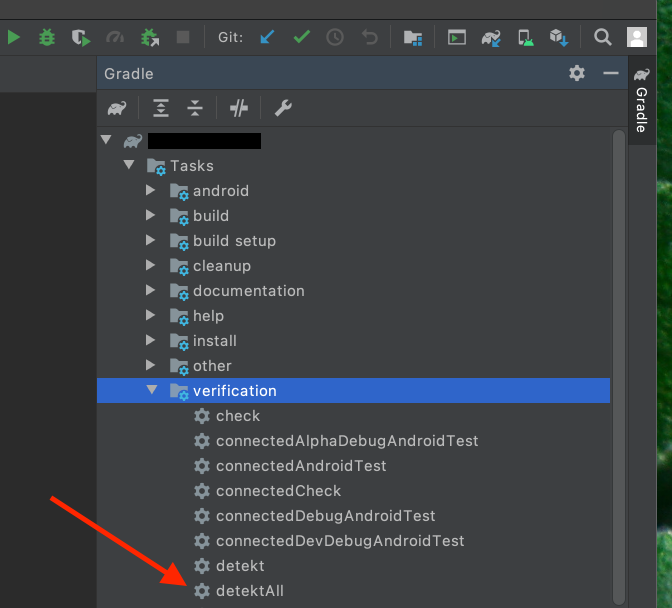
To check manually if your code is fine, you need to run detektAll task. You can do it in two ways:
- Gradle panel (Project name → Tasks → Verification →
detektAll). Hint: right-clickdetektAlland assign shortcut (for examplecmd + shift + D).

- command line (go to the project folder and run
./gradlew detektAll)
BTW: Default Gradle task for detekt is just detekt, but as I was creating a custom task that is running on each module I named it detektAll, so I will use it as a convention here. So in our case detekt task will not work properly.
Cool, now you know how to use it, but there’s more to it. With pre-push githook, you can tell git, to check if there are still some issues you’ve missed before pushing code.
Githook!
With that hook if you will try to push your changes, and if detekt will detect issues, it won’t let you push them until they will be resolved. Let’s see what you can expect:
- If you will push through the command line you will see what you should fix
- If you will push through Android Studio, it will show you generic info about detekt failure. To check what’s wrong in details, you will need to run
detektAllGradle task (reminder: use shortcut that was assigned earlier)

Setting up githook
- If you don’t have
.git/folder inside your project rungit initcommand inside of it. It will reinitialize the existing Git repository. - Go to
.git/hooks/folder. - Create
pre-pushfile. - Paste below snippet (source: documentation) and save file/
#!/usr/bin/env bash
echo "Running detekt check..."
OUTPUT="/tmp/detekt-$(date +%s)"
./gradlew detektAll > $OUTPUT
EXIT_CODE=$?
if [ $EXIT_CODE -ne 0 ]; then
  cat $OUTPUT
  rm $OUTPUT
  echo "***********************************************"
  echo "                 Detekt failed                 "
  echo " Please fix the above issues before committing "
  echo "***********************************************"
  exit $EXIT_CODE
fi
rm $OUTPUT- You need to make
.git/hooks/pre-pushexecutable otherwise it will be ignored. To do so, go to.git/hooks/and runchmod +x pre-push.
CI
If for some reason, you will bypass pre-push, our CI should catch it anyway. Though i’s good to catch it locally first as it’s faster, and you’re not polluting CI with unnecessary builds.
Suppose you don’t have it in your project yet, I encourage you to add a job to your CI with detekt. Configuring steps for running detekt in your builds is platform-specific, so it won’t be covered here.
Part II. How to live in peace with detekt:
Plugin
Now you know how to use detekt task, but it will be nice to see issues while coding without the need to run task each time.
This plugin will highlight issues in IDE, so you will see what you should fix right after a mistake occurs.
Setting up detekt plugin
- Install the plugin: https://plugins.jetbrains.com/plugin/10761-detekt .
- Once installed, configure it based on the screenshot below, and put configuration file + baseline file paths. They’re usually placed in
config/detekt/detekt.yml&&config/detekt/baseline.xml.

Basics
First thing first — resolve issues right after they appear.
Unfortunately, there may come a time when the issue is too large to fix it easily/quickly. In that case, you have 2 options:
Suppress warning
Let’s say we have a long function that needs to remain long for some reason.

To hide that warning, and bypass this one particular case, you could add @Suppress("CopyHereExactNameOfError") in this example @Suppress("LongMethod") .

Take in mind that suppressing is not a good solution. It should be only a TEMPORARY solution, so after putting suppress, you should probably create a technical debt task to resolve that issue properly.
You can find more details about suppressing in the official documentation
Change config
Sometimes a solution may be to talk to other team members and change the constraints.
Autocorrect hack
Some straightforward formatting issues can be fixed automatically during running detekt task. In order to take advantage of that feature, if you’re using my snippet you can pass flag to detektAllcommand.
./gradlew detektAll -PdetektAutoFix=true
It will auto-fix (if possible) formatting issues after running task.
Thanks Tom Koptel for hint with passing flag to the the Gradle task!
Exclude specific
If some packages are legacy or cause problems with detekt, and they won’t be fixed for some reason, you can add that package to excluded exceptions in detektAlltask. Nevertheless, it’s necessary to make this decision together with other team members.
IDE setup
Android Studio setup should match detekt config. In our case we’ve built upon a basic configuration file with few tweaks:
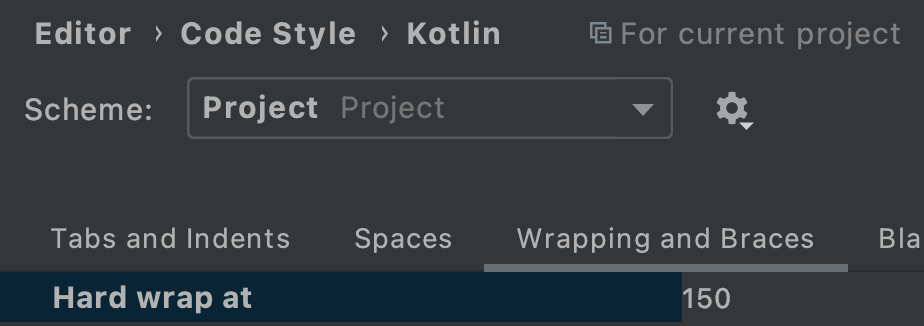
maxLineLength
Our detekt is configured to error when the line length is longer than 150 characters. Set up Android Studio, to match those constraints.

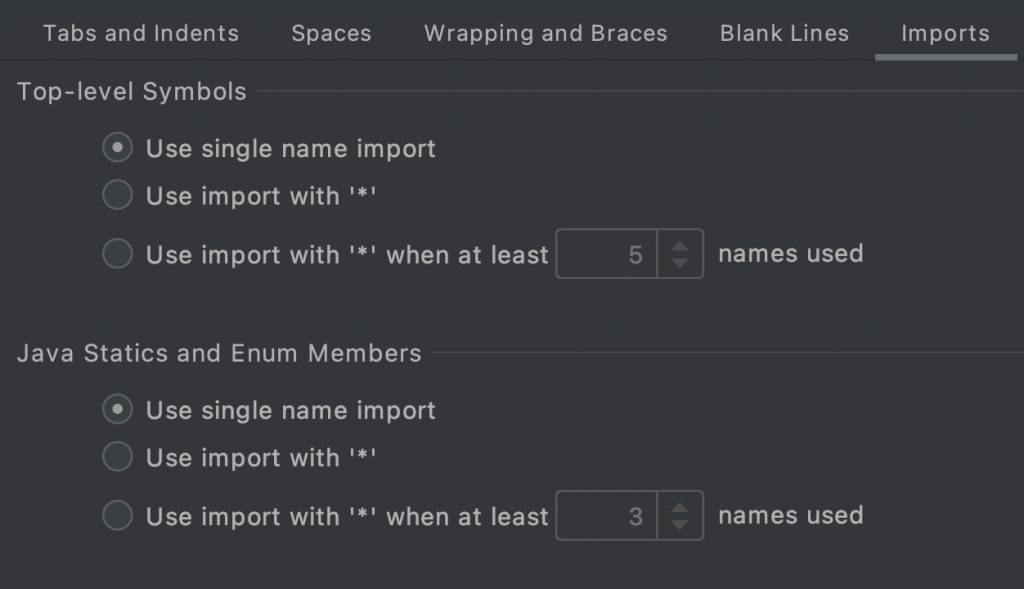
Wildcard imports
We’re not allowing for wildcard imports except java.utils and kotlinx.android.synthetic

There is more
Nothing from these configurations is set in stone and can be changed reactively. The above documentation is just a basic setup for further modifications.
As you’re probably an Android Developer, you may be interested in reading my recent post — Android Studio Productivity Course — with a huge amount of useful shortcuts, tips, and tricks.
As I said in the introduction: feel free to use the above documentation inside your project and speed up using linter by new devs.
Tell me if you found it useful.

